
 Pin
Pin
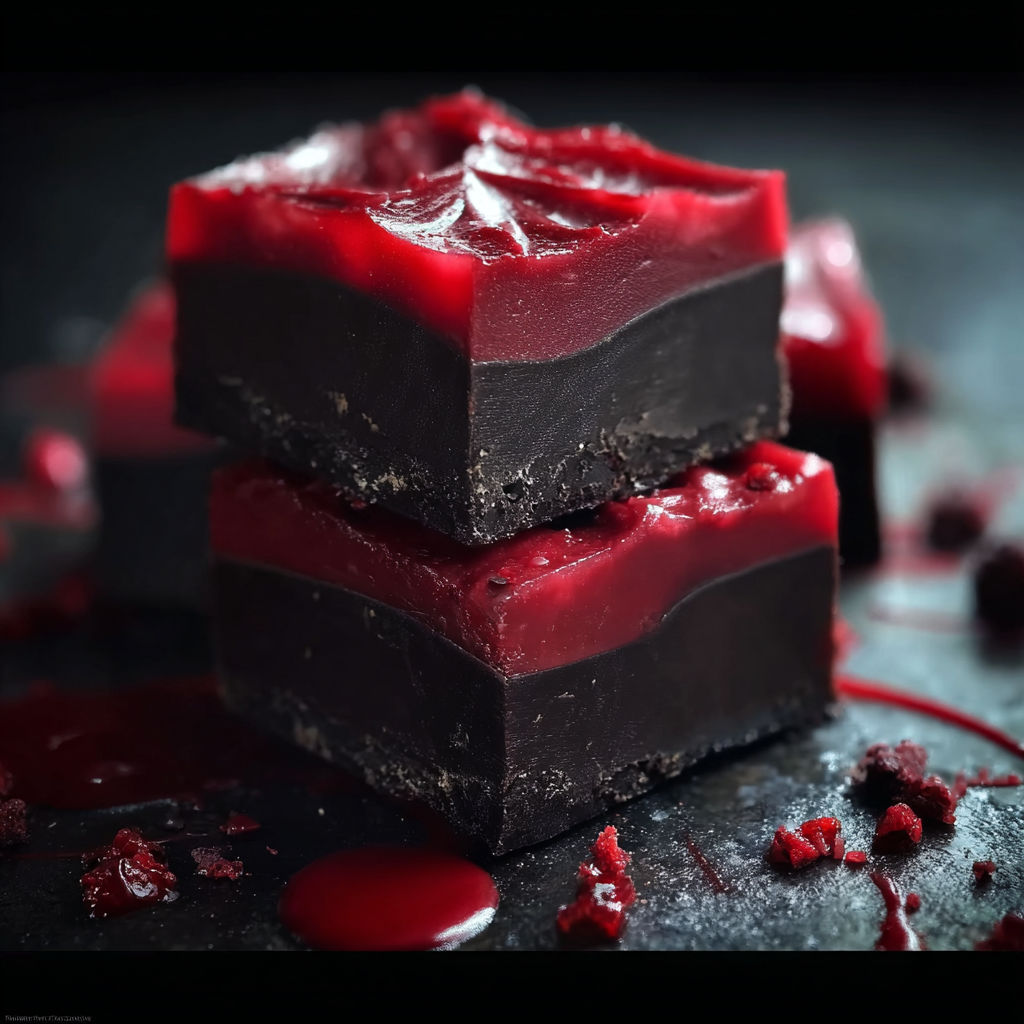
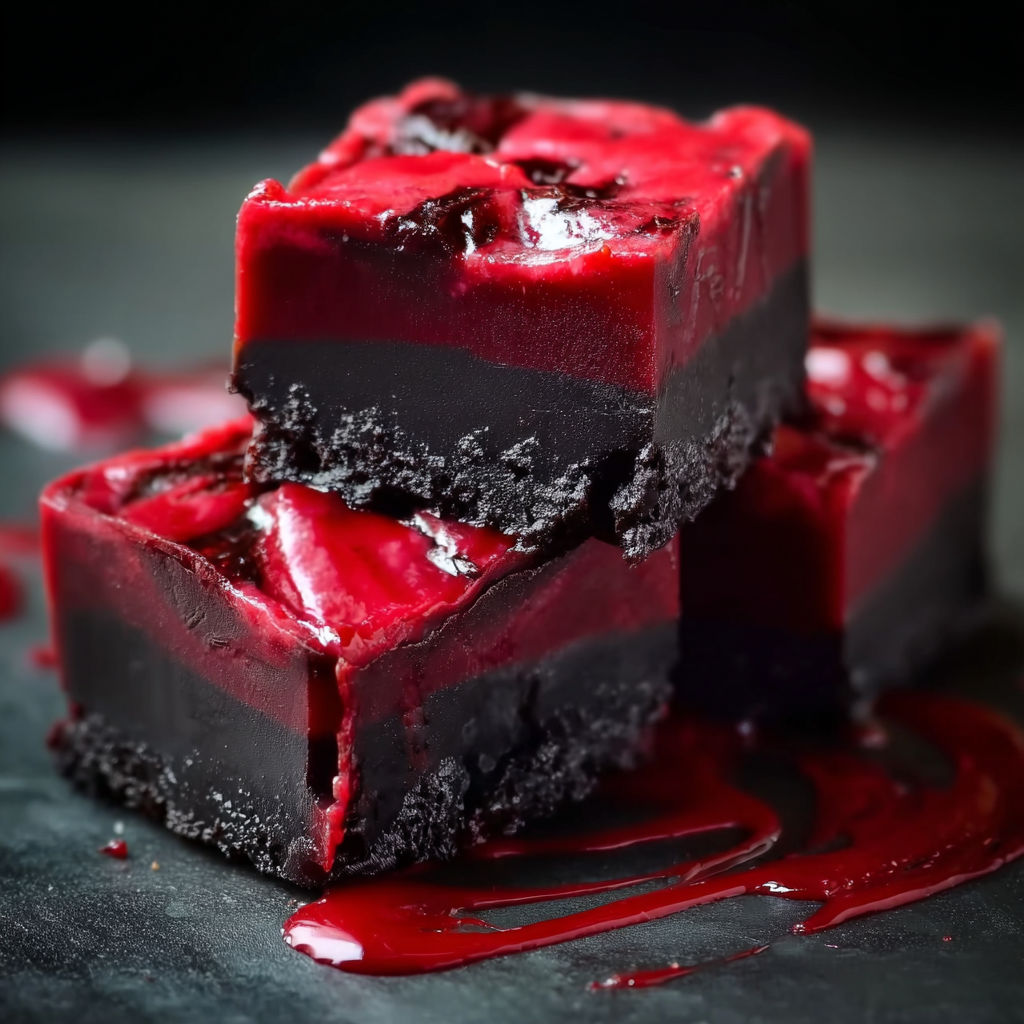
Blood-Swirled Fudge brings drama to Halloween gatherings with its stunning contrast of midnight black and crimson red swirls. Every piece reveals a unique marble pattern inside while the rich candy base satisfies even the sweetest tooth at your spooky bash. It's so quick to whip up that you'll have plenty of time for other party prep while still wowing your guests with an eye-catching dessert.
My kid still grins when talking about our first attempt mixing those colors together. That moment turned into our yearly Halloween kitchen ritual, and now we laugh about our messy counters and the fun we had creating it.
Round Up Your Ingredients
- Black candy melts: Create that spooky dark base and offer a smoother feel than regular chocolate. Pick ones with shiny surfaces without white patches showing they're fresh
- Red candy melts: Deliver that blood-like swirl effect and bright color pop. Choose deep, rich shades since pale reds won't stand out after mixing. You'll find these in grocery baking sections during holiday seasons
- Cream cheese frosting: Brings creaminess and a slight tang. Grab a container that looks smooth inside and check it's not past its date
- Optional warm milk: Helps thin your mix if it gets too stiff while working. Full-fat milk adds the best richness
- Parchment paper: Lets you easily pull out your finished treat for clean cutting
How to Make It
- Get the Pan Ready:
- Lightly coat an eight-by-eight baking dish with butter or cooking spray, then place two strips of parchment paper crossing each other for easy removal later
- Melt Your Colors:
- Place black candy melts in one microwave-safe bowl and red ones in another. Heat each bowl for up to two minutes, stopping to stir every half minute until completely smooth
- Heat the Frosting:
- Put the whole container of cream cheese frosting in the microwave for about forty-five seconds until it's just runny. Give it a good stir until it looks glossy
- Mix Colors with Frosting:
- Split the warm frosting equally between both bowls of melted candy. Mix each bowl quickly and thoroughly to blend colors without leaving streaks
- Create Your Pattern:
- Drop spoonfuls of black and red mixtures in an alternating pattern into your lined pan until you've used everything up. This creates that scary marbled look naturally
- Set Your Fudge:
- Bang the pan against your counter a few times to level the mixture and remove air bubbles. Put it in the fridge for at least four hours until completely firm
- Cut into Pieces:
- Grab the parchment edges to lift the whole fudge block onto a cutting board. Cut into small squares. Let it warm slightly for cleaner cuts
- Keep and Share:
- Pack the fudge squares in a sealed container in your fridge until party time. They'll stay fresh for about five days
Each fall I can't wait to see my kids mix those striking colors. We always keep black candy melts on hand for our scary baking projects, and nothing beats the thrill when we cut into those bold layers of fudge for the first time.
Flavor Boosters
If black or red candy melts aren't at your store, grab white ones and mix in oil-based food coloring gels. Don't use water-based colors as they'll ruin the melts. Try homemade frosting or store-bought vanilla frosting for different tastes. Look for dairy-free cream cheese frosting and allergy-safe candy melts if cooking for friends with food limits.
Serving Suggestions
Show off your Blood-Swirled Fudge at Halloween parties on a big plate with fake spiders or edible blood gel for extra scare factor. They look amazing next to other spooky treats. Try sprinkling sea salt on top before cooling for a more grown-up taste.
Creative Twists
Switch up candy melt colors for different holidays—try soft pastels at Easter, orange and black for traditional Halloween vibes, or pure white with rainbow swirls for birthday parties. This marbling method works great for any celebration theme.
This magical fudge will entrance everyone at your Halloween party and quickly become a yearly must-have. Get ready for unforgettable color patterns and deliciously spooky fun in every bite.
Common Questions About This Recipe
- → What gives the fudge its layered look?
Mixing dark and crimson candy melt blends in turns builds a striking marbled pattern throughout the sweet treat.
- → Can I use other color melts for different themes?
For sure! Mix and match any two different candy melt shades to fit your celebration or holiday theme.
- → What pan size works best?
An eight by eight inch dish delivers perfect thickness and makes cutting into squares really easy.
- → How do I ensure clean slices?
Take the dessert out of the fridge and wait five minutes before cutting to get smooth, clean edges.
- → How should leftovers be stored?
Keep them in a sealed container in the refrigerator up to five days to maintain their yummy taste and texture.
- → Is this treat gluten free?
Yes, when you pick verified gluten-free candy melts and frosting, it's naturally free from gluten.