
 Pin
Pin
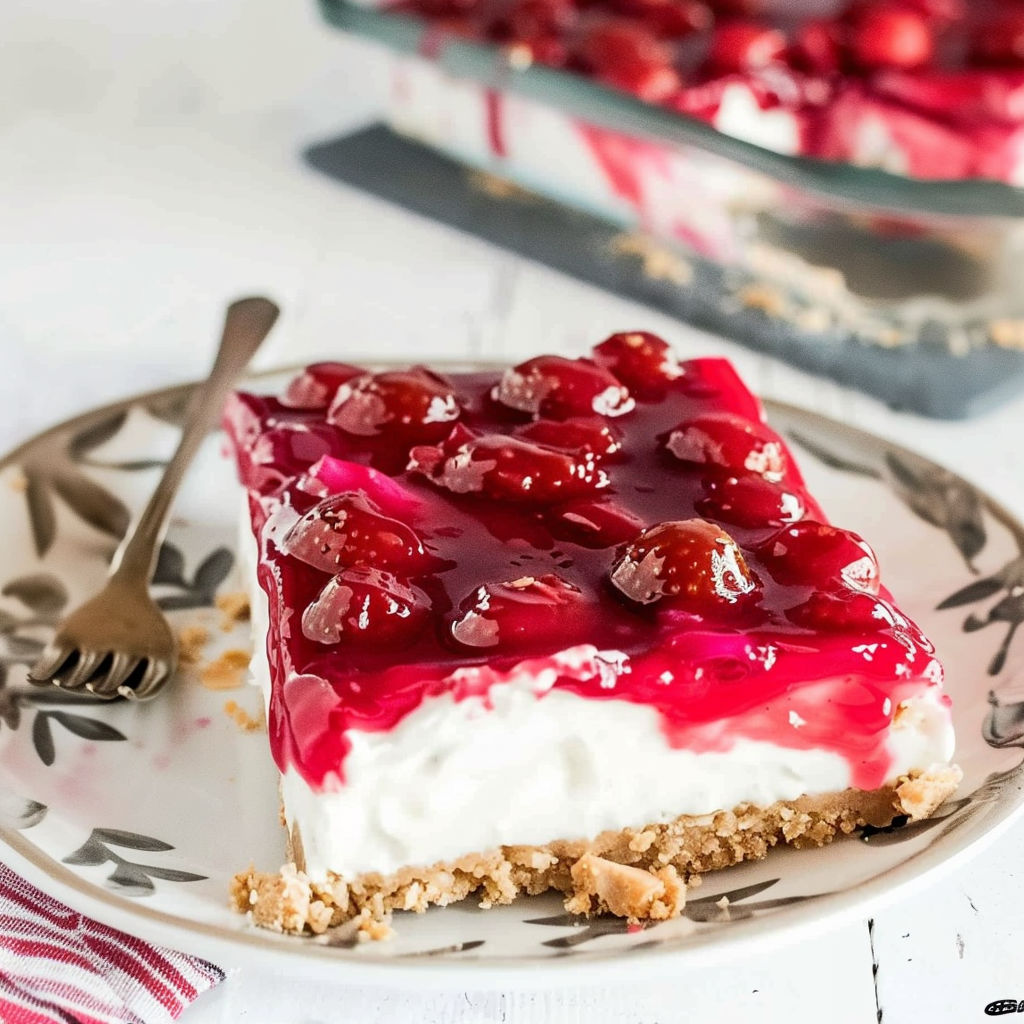
These irresistible no bake cherry cheesecake bars deliver a velvety smooth cream cheese filling with a sweet cherry topping and a buttery graham cracker crust, all without turning on your oven. Ready in just 25 minutes of hands-on prep time plus four hours of chilling, these easy cheesecake bars are the perfect make ahead dessert for warm weather parties or any celebration. Whether you're entertaining a crowd or want a cool treat to enjoy on a hot day, these bars check every box for flavor, texture and convenience.
I first made these no bake cherry cheesecake bars for a summer potluck during a heatwave, and they truly disappeared within minutes. The luscious, creamy filling contrasted with sweet tart cherries became my signature dessert for picnics and birthday parties. Each bite always reminds me why creamy cheesecake and fruit are such an irresistible combination—and why I rarely bother with baked versions anymore.
Gather Your Ingredients
- Graham cracker crumbs (2 cups, for cheesecake bars crust): Pre crushed graham cracker crumbs save time, but crushing whole graham crackers yourself brings a fresher, more robust flavor; you can substitute chocolate graham or vanilla wafer crumbs for variety
- Butter, melted (6 tablespoons): Use unsalted butter to balance the saltiness in the crust and ensure smooth incorporation; salted butter can be used if that’s what you have, but reduce any added salt elsewhere
- Cream cheese, softened (16 ounces): Full fat cream cheese provides richest, creamiest texture but reduced fat can be substituted for a lighter result; always let it fully soften at room temperature for ultimate smoothness
- Granulated sugar (1/2 cup): Supplies balanced sweetness to the filling without overpowering; superfine sugar can be used for slightly quicker blending
- Heavy cream (1/2 cup): Beating the cream until medium peaks form gives a light, mousse like filling; for a richer flavor, you can substitute an equal amount of mascarpone or even use nondairy whipped topping if preferred
- Cherry pie filling (21 ounces, canned): Look for premium brands for lots of whole cherries and best flavor; you can swap in blueberry, peach, or homemade fruit filling based on what’s in season
How to Make No Bake Cherry Cheesecake Bars
- Prepare the pan with parchment paper:
- Line an 8 inch by 8 inch square baking dish with parchment, leaving overhang on all sides for effortless, clean removal. This extra step makes it far easier to lift and slice the chilled bars, ensuring neat presentation. Use a sturdy metal pan for the sharpest edges and chill it ahead of time if your kitchen is warm.
- Mix and press the graham cracker crust:
- In a medium bowl, stir together graham crumbs and melted butter until the texture is like wet sand and every crumb is moist. Pour into the prepared pan and use a flat bottomed glass or measuring cup to press down firmly and evenly, especially at the corners, for a tight, non crumbly base. Freeze or refrigerate the crust while you make the filling to lock everything in place.
- Beat together the cream cheese and sugar:
- In a large mixing bowl, beat softened cream cheese and sugar with a hand mixer on medium speed for two to three minutes, scraping the bowl halfway. The mixture should look airy, pale, and have no lumps. Fully creamed and softened cheese is essential for a velvety smooth finished filling.
- Whip the heavy cream to medium peaks:
- Using a cold bowl and chilled beaters, whip heavy cream on low to start, then increase to high for about three to four minutes or until medium, softly folding peaks form. You'll know the peaks are right when they hold shape yet curl gently at the tips—this texture creates the signature mousse like cheesecake filling.
- Combine filling and spread evenly:
- Gently fold the whipped cream into the cream cheese mixture, then beat just until fully combined and silky with no visible streaks. The finished filling should look thick but still spreadable. Dollop onto the crust and spread evenly with an offset spatula, smoothing the top as much as possible for a gorgeous finish.
- Layer on the cherry topping:
- Spoon the cherry pie filling evenly over the cream cheese layer, using a light hand to avoid mixing into the filling. Spread cherries to the very edges, getting plenty of fruit in each bite. If you're using homemade or chunky filling, arrange larger cherries artfully on top for best presentation.
- Chill to set the cheesecake bars:
- Cover the pan tightly with plastic wrap, being careful it doesn't touch the cherry layer. Refrigerate for at least four hours (eight to twelve hours is ideal for flavor and neat slicing) to allow the layers to firm and flavors to combine. This waiting time is essential for perfect creamy squares that hold together beautifully.
- Slice and serve for best results:
- When you're ready to serve, use the parchment overhang to lift bars out onto a cutting board. Slice into nine squares with a hot, clean knife, wiping the blade between cuts. Serve immediately for the creamiest, tastiest results or garnished with fresh mint or whipped cream if desired.

These no bake cherry cheesecake bars have become my favorite summer dessert to bring to family gatherings and backyard barbecues. My kids love helping decorate the top with extra cherries, and every time I serve these at a party, guests always ask for the recipe. Discovering how easy and make ahead friendly this treat is has truly changed my dessert routine for good.
Smart Swaps and Variations
The beauty of this no bake cheesecake bars recipe is how versatile it is—you can easily change up both the crust and topping depending on what you have or what's in season. Try using chocolate graham crackers or vanilla wafers for a unique twist, or make a gingersnap crust for a spiced winter take. For the filling, swirl in lemon zest or melted white chocolate for added dimension, or swap in mascarpone for an Italian flair. Top with any pie filling or mix fresh berries with a little jam for a more homemade and seasonal finish—there's no limit to the flavor combinations you can invent.
How to Store and Reheat No Bake Cherry Cheesecake Bars
Store cut cheesecake bars in a single layer in an airtight container in the refrigerator for up to five days to maintain texture and freshness. For longer storage, freeze the bars in a freezer safe container with parchment between layers for up to one month—just thaw overnight in the fridge before serving. For easiest removal and neatest slices, use the parchment overhang and let bars stand at room temperature for 10 to 15 minutes before enjoying for the creamiest texture and best flavor.
What to Serve with No Bake Cherry Cheesecake Bars
No bake cherry cheesecake bars are delicious on their own, but pairing them thoughtfully can make dessert feel extra special. Try serving with a dollop of fresh whipped cream or a scoop of vanilla bean ice cream for added indulgence. Fresh berries or toasted almonds add color and crunch to every plate, while a cold iced coffee or glass of sparkling wine will balance the creamy, sweet filling—making these bars a standout for any party or special occasion.
Nutritional Benefits
Although these no bake cherry cheesecake bars taste decadent, they still offer some nutritional positives compared to traditional baked cheesecakes. Cherries provide antioxidants and vitamin C, and the dairy brings calcium and protein for extra satiety. With higher protein and good fats from the cream cheese and cream, these bars are more filling, which can help keep portions in check and energy stable after enjoying dessert. For an even lighter treat, reduced fat cheese and light toppings can be substituted without sacrificing too much flavor.
Recipe Success Tips
To guarantee perfect no bake cherry cheesecake bars every time, be sure to bring your cream cheese fully to room temperature for a lump free filling and don't rush the chilling process—four hours at minimum is essential. If your crust seems crumbly, mix in an extra tablespoon of melted butter; if it's too wet, sprinkle in more crumbs. For very smooth slices, dip your knife in hot water before each cut to keep the edges neat and professional looking.

With their effortless no bake method, creamy texture, and stunning cherry topping, these cheesecake bars are guaranteed to impress and satisfy any crowd. Try this recipe for your next warm weather event or easy family dessert, and enjoy the simple joy of sharing a beautiful homemade treat.
Common Questions About This Recipe
- → Can I use a different fruit topping for these bars?
Absolutely! While cherry is classic, you can substitute with blueberry, strawberry, or any preferred pie filling for a different flavor profile.
- → How long do these cheesecake bars need to chill?
It's best to refrigerate the bars for at least 4 hours, but chilling overnight helps them firm up and flavors meld even better.
- → Can I make these cheesecake bars ahead of time?
Yes, making them a day in advance not only saves time but also improves texture and taste. Store covered in the refrigerator until ready to serve.
- → What type of cream cheese works best?
Full-fat cream cheese provides the creamiest texture and richest taste, but reduced-fat can be used for a lighter option.
- → Do I need any special equipment for preparation?
No special tools are required—just mixing bowls, a hand mixer for whipping, and an 8x8-inch baking dish lined with parchment paper.