
 Pin
Pin
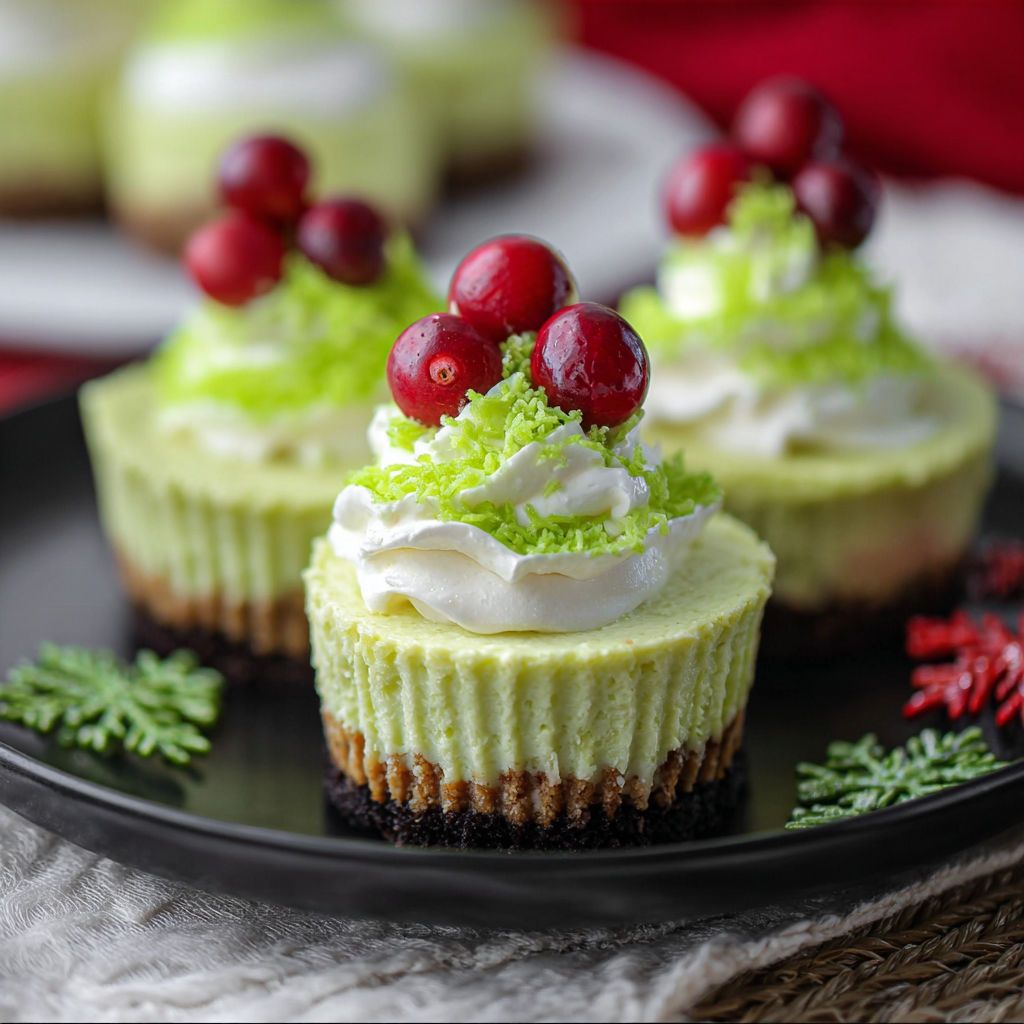
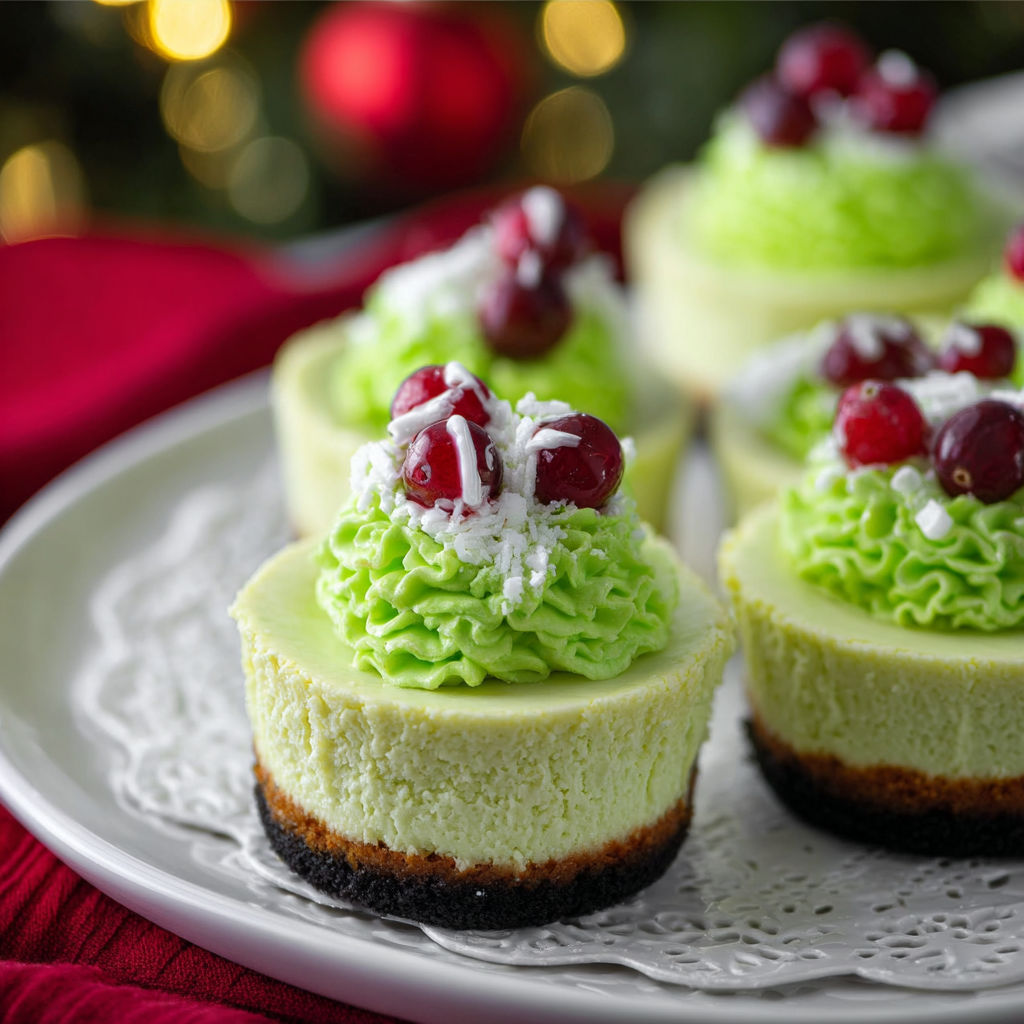
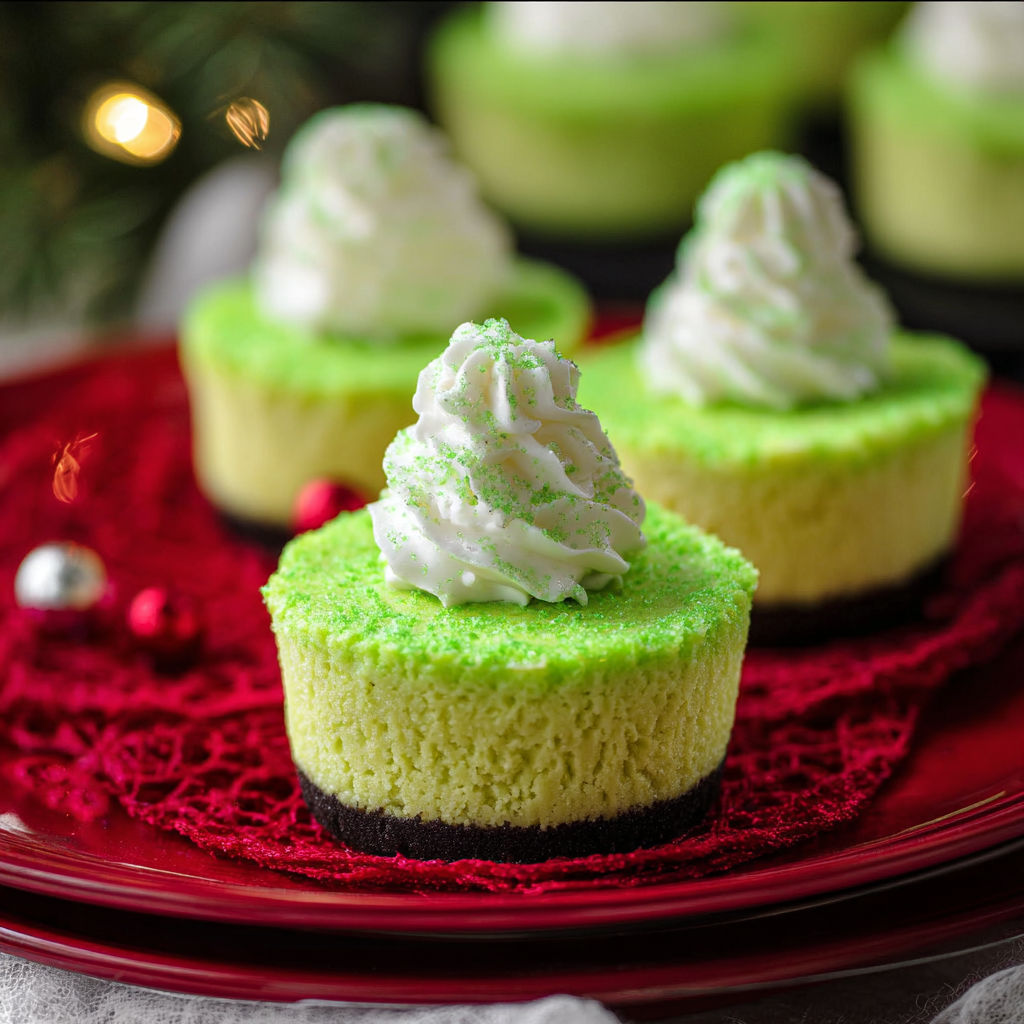
Making these colorful grinch mini cheesecakes always brightens up our holiday baking routine. Their smooth texture and eye-catching green color bring joy to my kitchen whether I'm hosting a get-together or just enjoying a quiet evening. The crunchy Oreo base perfectly complements the zesty cream cheese mixture with its playful green tint, making these treats popular with folks of all ages.
I started making these with my niece during a movie evening years ago, and now she begs to create them together every December. The excitement hasn't faded, and I've noticed even the grown-ups quietly coming back for more.
Round Up Your Ingredients
- Cream cheese: grab full-fat blocks and make sure they're completely soft for ultimate smoothness
- Sugar: adds classic sweetness - regular granulated works best for smooth blending
- Eggs: provide foundation and silky feel - stick with large ones at room temp
- Vanilla: adds depth to every component - real extract gives the best taste
- Oreo crumbs: form the dark foundation - crush them just before use for maximum freshness
- Butter: melted just right to stick the cookie bits together - pick unsalted to manage the flavor balance
- Neon green food coloring: crucial for the grinch look - gel types offer bold color without watering down your mix
- Whipped cream and sprinkles: not required but add holiday cheer - go for a firm whipped topping that won't collapse
How to Make It
- Preheat and Prep:
- Heat your oven to three hundred fifty degrees and put paper liners in a cupcake pan for eight to twelve spots depending on your tray size measure everything out first and let cream cheese sit until it's room temp for the smoothest possible mixture
- Make Oreo Crust:
- Grind about ten to eleven whole Oreos until they look like fine dirt mix in the melted butter then pulse again until all bits look lightly coated this helps make a crust that stays together and won't turn mushy
- Form Crusts:
- Split the crumb mix evenly between paper cups roughly two tablespoons per spot push down with a spoon back or small cup to create a solid flat base work carefully to cover from side to side for consistent thickness
- Mix Filling:
- In a bowl beat soft cream cheese with sugar until smooth and completely bump-free cleaning the sides as you go add eggs one by one mixing just enough to blend then stir in vanilla don't mix too much or you might get cracks later
- Add Color:
- Mix in the green coloring bit by bit until you reach the perfect grinch shade add slowly to control the brightness clean the bowl sides to mix color thoroughly
- Fill Cups:
- Scoop about quarter cup of green filling into each liner filling them almost to the top but not overflowing gently tap the pan on your counter to bring any air bubbles up
- Bake:
- Put the pan in the hot oven and cook for fifteen to seventeen minutes the middles should wobble slightly when you shake the pan gently showing they're done but still moist
- Cool and Chill:
- Let them cool completely in the pan for at least half an hour then cover and put in the fridge until totally firm another hour works well this helps them come out clean and taste extra creamy
- Decorate:
- Before serving top each little cake with whipped cream swirls and fun sprinkles if you want get creative with holiday decorations or extra Oreo bits for added crunch
My absolute favorite moment is mixing the green color and seeing how vibrant we can make it. My family always cracks up when we look at past holiday pictures with these treats clearly visible. There's never a speck of that Oreo base left behind on anyone's plate.
Flavor Boosters
Storage Tips These green mini cheesecakes keep wonderfully when wrapped well in the refrigerator. You can enjoy them for up to four days. If you need longer storage, put the cooled treats in a freezer container with parchment between layers. Let them thaw in the fridge overnight and add toppings just before you serve. They're great to make days before a holiday party to cut down on last-minute stress.
Serving Suggestions
Serve these cold right from the fridge for the best texture. Put a maraschino cherry on each to look like the Grinch's growing heart or try candy hearts and crushed Oreos for fun decorations. They taste amazing with hot chocolate or a Christmas-inspired non-alcoholic drink for movie night treats.
Creative Twists
Ingredient Substitutions If you want a different base, try chocolate graham crackers or ginger cookies. Gluten-free cookies will work fine too. For extra tang in the filling, fold in some Greek yogurt before the eggs. If you can't find green gel coloring, regular food drops work too - you'll just need more for that bright effect.
There's something magical about these playful green cheesecakes that draws everyone to gather round. I still get excited about making a fresh batch each December and watching family members compete for the brightest green color. Give them a try once, and you might end up starting your own holiday tradition.
Common Questions About This Recipe
- → Can I use a different cookie for the crust?
For sure, you can swap Oreos with graham crackers or any chocolate cookie sandwich to create a totally different taste for your base.
- → Is food coloring required for the green color?
The bright green food coloring gives that classic Grinch look, but you can skip it or go with a natural food dye if that's what you prefer.
- → How long do the cheesecakes need to chill?
Once baked, let them cool down in the pan first, then stick them in the fridge for at least 2 hours till they're nice and firm.
- → Can I make these cheesecakes ahead of time?
You bet. Make them the day before and keep them wrapped up in your fridge until you're ready to serve them.
- → What toppings go well with these cheesecakes?
Whipped cream and holiday sprinkles look amazing, but you can also try crushed Oreo bits, tiny chocolate chips, or even little candy stars on top.