
 Pin
Pin
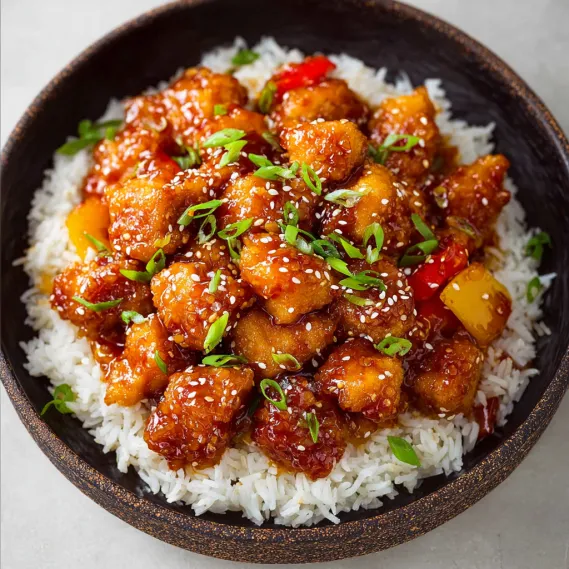
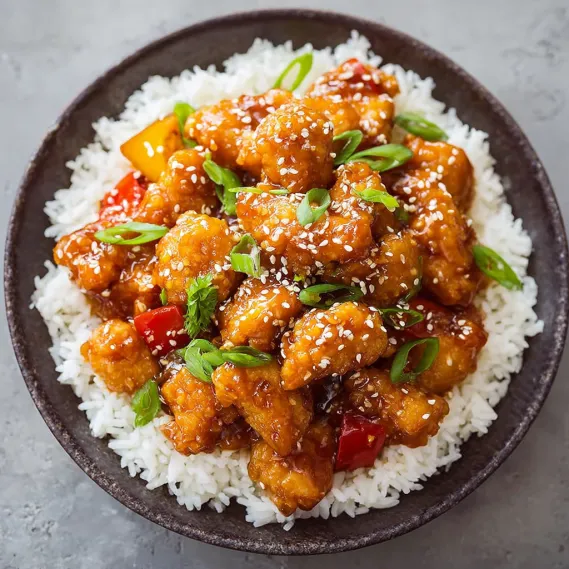
This homemade sweet and sour chicken recipe has completely transformed my weeknight dinner routine with its incredible flavor and simplicity. The tangy sauce perfectly coats tender chicken pieces for a restaurant-quality meal that comes together in just 15 minutes.
I discovered this recipe during a busy work week when I was craving Chinese food but didn't want to order delivery. My family was so impressed that it's now requested at least twice a month and has saved us countless dollars on takeout.
Ingredients
- Chicken breasts cut into 1-inch pieces: provides the perfect texture and cooks quickly. You can substitute with thighs for juicier results.
- Cornstarch: creates that signature light coating that helps the sauce cling to each piece.
- Apple cider vinegar: delivers the essential tanginess that defines sweet and sour sauce. Look for unfiltered varieties for the best flavor.
- Granulated sugar and brown sugar: work together to create depth in the sweetness.
- Ketchup: adds color and umami while thickening the sauce.
- Soy sauce: provides the savory backbone. Choose low sodium to control the salt level.
- Sesame oil: brings a nutty aroma that elevates the entire dish. A little goes a long way.
- Fresh garlic: infuses the sauce with essential aromatic flavor. Always use fresh rather than jarred for the brightest taste.
- Green onions and sesame seeds: offer a beautiful finishing touch with contrasting color and texture.
Step-by-Step Instructions
- Prepare the Sweet and Sour Sauce:
- Begin by combining sugar, vinegar, ketchup, soy sauce, sesame oil, brown sugar, and garlic in a medium saucepan. Whisk everything thoroughly until well integrated, then bring to a gentle boil over medium-high heat. The mixture will begin to bubble and the sugars will dissolve completely. In a separate small bowl, create a slurry by mixing cold water and cornstarch until smooth with no lumps. Pour this slurry into your simmering sauce and immediately reduce the heat to low. Allow the sauce to simmer for about 5 minutes while preparing the chicken, whisking occasionally to prevent sticking. The sauce will gradually thicken to a beautiful glossy consistency.
- Coat the Chicken:
- Place your chicken pieces into a large ziplock bag, then add cornstarch, salt, and pepper. Seal the bag tightly, removing excess air, and shake vigorously to ensure each piece of chicken is evenly coated with the cornstarch mixture. This coating creates a light crisp exterior that will help the sauce adhere perfectly to the chicken. Make sure every piece is separated and individually coated for the best results.
- Cook the Chicken:
- Heat olive oil in a large skillet over medium-high heat until shimmering but not smoking. Add the coated chicken pieces in a single layer, being careful not to overcrowd the pan. Cook for approximately 5 to 7 minutes, stirring and flipping frequently to ensure all sides develop a golden color and the chicken cooks through completely. The cornstarch coating will create a light crust as it cooks. If the pan becomes dry during cooking, add an additional tablespoon of oil as needed to prevent sticking.
- Combine and Finish:
- Once the chicken is fully cooked with no pink remaining, reduce the heat to low and pour the prepared sweet and sour sauce over the chicken. Gently stir to coat each piece evenly with the sauce. Allow the combined dish to simmer for 1 to 2 minutes, which helps the flavors meld together and the sauce to further thicken around the chicken. For the final touch, sprinkle with sliced green onions and sesame seeds before serving for a pop of color and texture.
The sesame oil is truly the secret ingredient in this recipe. I once tried making it without when I ran out, and while still good, it was missing that distinctive aroma that makes this dish so authentic. Just that one tablespoon transforms the entire sauce from good to restaurant quality.
Make Ahead Options
This sweet and sour chicken is perfect for meal prep. You can prepare the sauce up to three days in advance and store it in an airtight container in the refrigerator. When ready to use, simply reheat it gently on the stove before combining with freshly cooked chicken. The chicken itself is best cooked right before serving for optimal texture, but if needed, you can cook it a few hours ahead and reheat it in a skillet with a splash of water to prevent drying out.
Serving Suggestions
This sweet and sour chicken pairs beautifully with steamed jasmine rice which soaks up the delicious sauce. For a lower carb option, try serving it with cauliflower rice. To create a complete meal, consider adding steamed broccoli or a simple side of sautéed snap peas. For a more substantial feast, serve alongside vegetable spring rolls or a light cucumber salad dressed with rice vinegar for a refreshing contrast to the sweet sauce.
Variations To Try
While this recipe is perfect as written, you can easily customize it to suit your preferences. Add chunks of bell pepper, pineapple, and onion during the last few minutes of cooking for a more traditional sweet and sour chicken. For extra heat, incorporate a teaspoon of sriracha or red pepper flakes to the sauce. You can also try substituting the chicken with shrimp or tofu for delicious alternatives that work beautifully with the same sweet and sour sauce.
Storage Tips
Leftover sweet and sour chicken will keep well in an airtight container in the refrigerator for up to five days. The flavors actually develop and improve after a day, making it an excellent make ahead meal. To reheat, add a tablespoon of water to the container and microwave on medium power, stirring halfway through to ensure even heating. Alternatively, reheat in a skillet over medium low heat until warmed through. I do not recommend freezing this dish as the texture of the chicken and sauce can become compromised upon thawing.
Common Questions About This Recipe
- → What kind of chicken works best?
Boneless, skinless chicken breasts deliver a tender bite, though thighs can be used for extra juiciness.
- → How do I achieve a crispy coating?
Toss chicken pieces in cornstarch before pan-frying in hot oil for a golden, crisp exterior.
- → Can I make the sauce ahead of time?
Yes, the sauce can be made in advance and stored in the refrigerator for up to 3 days.
- → What can I serve alongside this dish?
Steamed rice, stir-fried vegetables, or noodles pair well for a complete meal.
- → How do I store leftovers?
Keep leftovers in an airtight container in the fridge for up to 5 days and reheat gently in a skillet.
- → Is the dish very sweet?
The sauce is balanced with both sweetness and tang. Adjust sugar or vinegar to taste if you prefer less sweetness.