
 Pin
Pin
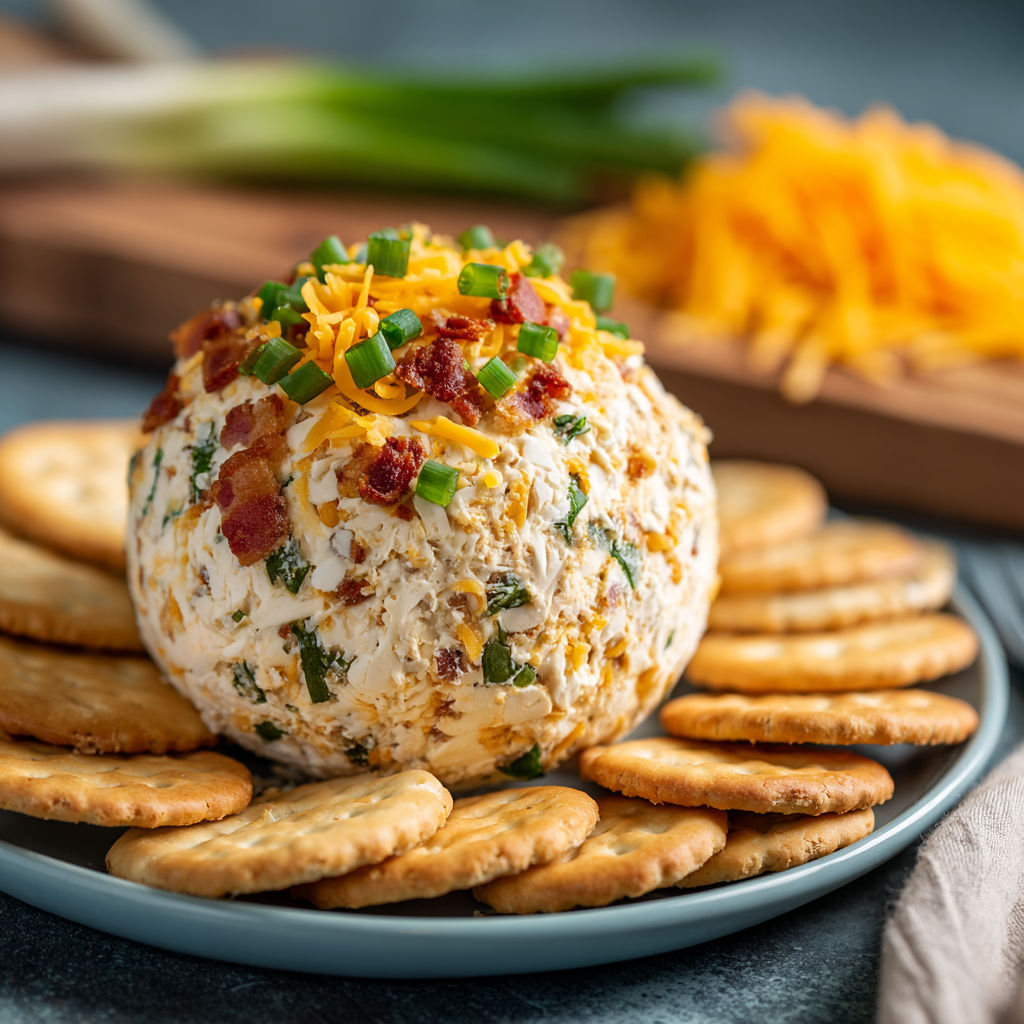
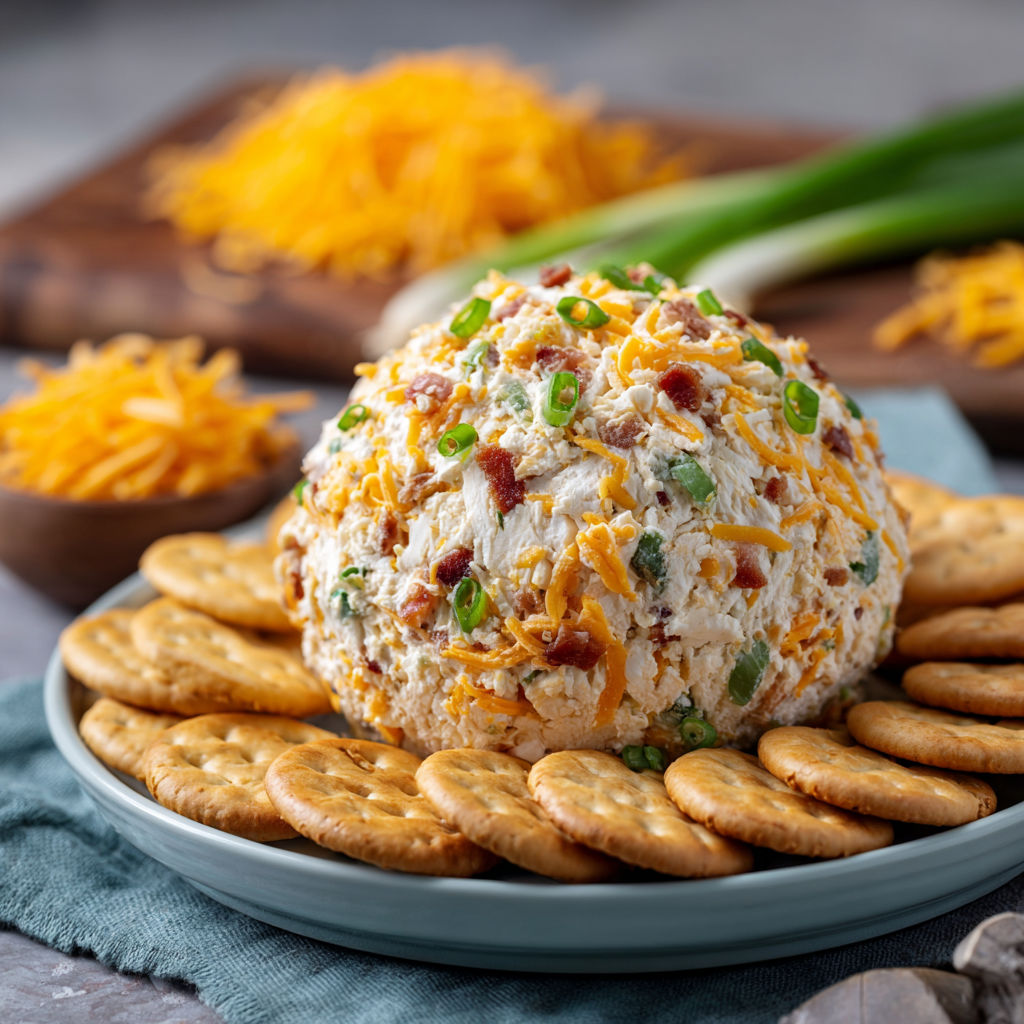
This irresistible cheddar ranch cheeseball recipe combines creamy cheese, zesty ranch seasoning, and savory bacon for a crowd-pleasing appetizer that vanishes within minutes at any gathering. Ready in just 40 minutes with only 15 minutes of hands on prep, this easy ranch cheese ball is perfect for busy hosts who need a delicious centerpiece without stress. The blend of tangy ranch and sharp cheddar makes it a familiar yet elevated appetizer ideal for any occasion, from holiday parties to game day celebrations.
I first made this cheddar ranch cheeseball when unexpected guests announced they would arrive in just an hour, prompting me to turn to my refrigerator basics and pantry staples for inspiration. The tangy ranch seasoning balances the rich cream cheese perfectly, while crispy bacon adds irresistibly smoky depth throughout. Guests loved the addictive flavor combination, and now it is my most requested appetizer for every family gathering and celebration, especially since even picky eaters devour it without hesitation.
Gather Your Ingredients
- Cream cheese (16 oz, softened): Essential for the creamy, spreadable base, so be sure to fully soften at room temperature for a smooth result; use full fat for best flavor and texture, though reduced fat works in a pinch
- Dry ranch seasoning (1 packet): Provides signature zesty herb flavor; opt for classic brands or homemade versions for more control over ingredients; substitute with Italian seasoning for a different twist
- Sharp cheddar cheese (1 cup, freshly shredded): For the best melt and rich flavor, use cheese you grate yourself; pre-shredded cheese may cause texture issues due to anti-caking agents
- Green onions (1/4 cup, finely diced): Adds freshness, color, and mild onion flavor; chives or shallots are good substitutes if needed
- Bacon (1 cup, cooked and crumbled): Crispy bacon pieces add smoky, savory flavor; turkey bacon or vegetarian bacon bits can be swapped for dietary needs
- Crackers, bread rounds, or vegetable sticks: Serve as dippers; choose a variety such as whole grain crackers, water crackers, and sliced peppers for gluten free guests
How to Make Cheddar Ranch Cheeseball
- Prepare the Base:
- Start by ensuring the cream cheese is completely softened at room temperature for at least one hour, as this prevents lumps and yields a silky texture. In a large mixing bowl, combine the cream cheese with the dry ranch seasoning packet. Blend with an electric mixer on medium speed for about 2 minutes, mixing until no white streaks remain and the mixture is uniformly smooth.
- Add the Mix-ins:
- Gently fold in the freshly shredded sharp cheddar cheese, finely diced green onions, and crispy crumbled bacon using a sturdy spatula. Mix until all ingredients are evenly dispersed throughout the mixture, taking care not to overwork so you retain a thick, workable consistency packed with colorful specks of onion and bacon.
- Shape the Cheeseball:
- Lay a large sheet of plastic wrap on your work surface and mound the cheese mixture onto it. Using the plastic wrap as a guide, form the mixture into a ball, pressing and smoothing it into a cohesive sphere. Wrap tightly in the plastic, ensuring the cheeseball is completely sealed with no air pockets.
- Chill for Firming:
- Transfer the wrapped ball to the refrigerator and chill for at least 1 to 2 hours, or overnight for maximum flavor; chilling allows the flavors to meld while the ball firms enough to hold its shape. The longer resting time deepens the seasoning and makes the cheeseball easier to cut and serve.
- Finishing and Serving:
- For a decorative touch, roll the chilled cheeseball in additional toppings like more bacon bits, chopped fresh herbs, or toasted nuts right before serving. Let the cheeseball sit at room temperature for 15 to 20 minutes so it becomes spreadable. Arrange on a platter with crackers, bread rounds, or sliced vegetables around the base for guests to enjoy.
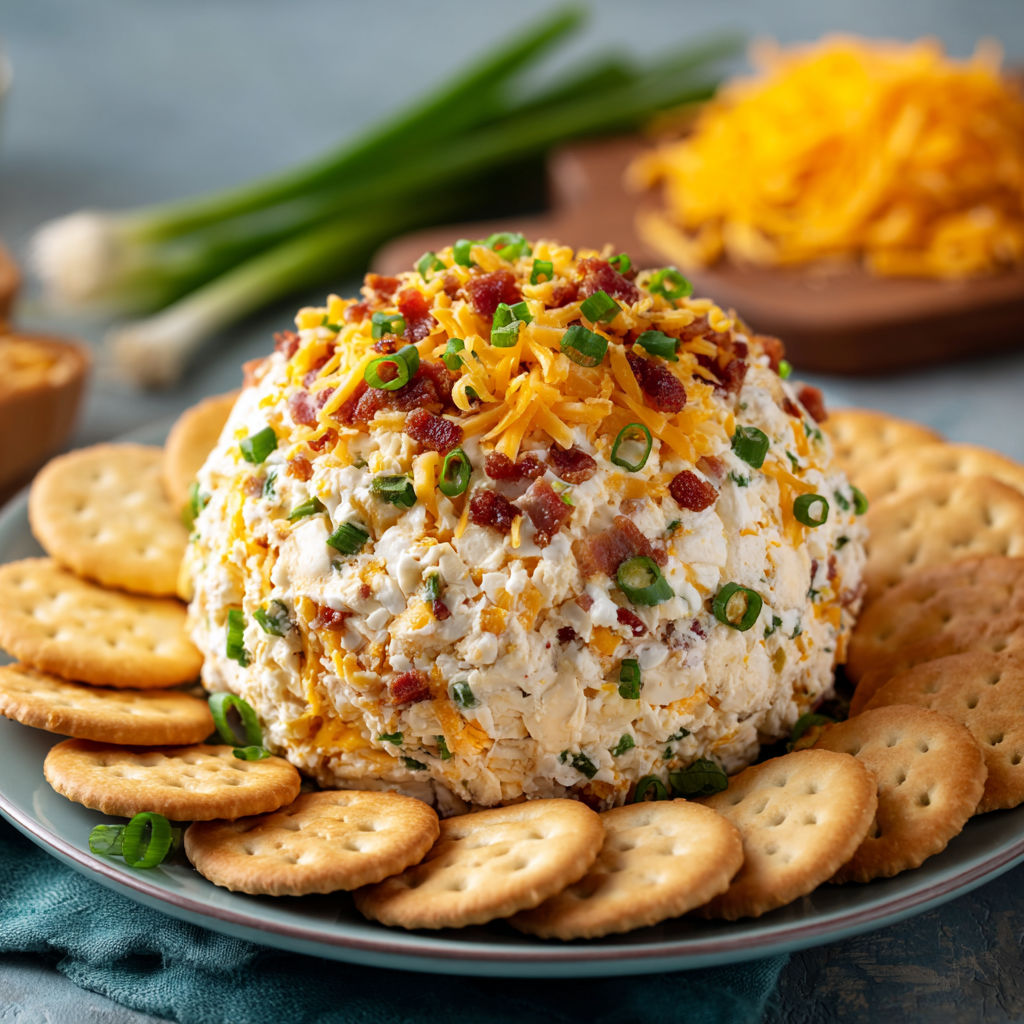
The game changing element in my version is extra crispy bacon, crumbled very finely so smoky flavor is found in every single bite. My family loves customizing their cheeseball plates with different types of crackers, from peppery water crackers to buttery rounds and fresh vegetables. Over the years, this simple appetizer has become our go to for gatherings, holiday feasts, and even late night snacks with friends.
Smart Swaps and Variations
This cheddar ranch cheeseball is incredibly versatile, making it perfect for various palates and dietary needs. To add a southwestern kick, swap sharp cheddar for pepper jack and mix in a diced jalapeño, or craft a Mediterranean version by adding sun dried tomatoes, olives, and a sprinkle of feta instead of ranch. For a vegetarian or lighter option, use Greek yogurt cream cheese and omit bacon or try turkey bacon; or sweeten for brunch with cranberries and pecans finished with a drizzle of honey.
How to Store and Reheat Cheddar Ranch Cheeseball
To keep your cheddar ranch cheeseball as fresh and delicious as possible, wrap it thoroughly in plastic wrap or place in an airtight container before refrigerating. Store in the refrigerator for up to one week, giving the flavors time to intensify for an even tastier appetizer with each passing day. Always wait to add any exterior coatings like herbs or nuts until just before serving to preserve freshness, and if excess moisture appears on the surface, gently blot with a paper towel and reroll toppings as desired.
What to Serve with Cheddar Ranch Cheeseball
Pair your cheddar ranch cheeseball with an assortment of crunchy crackers, bread rounds, and fresh vegetables for a stunning appetizer platter. Crisp bell peppers, cucumber slices, and carrot sticks add freshness and color why hearty crackers provide perfect contrast to the creamy cheese. For an elegant spread, include apple or pear slices, and round out your table with other finger foods like stuffed mushrooms and mini quiches to suit any gathering.
Nutritional Benefits
While indulgent, this cheddar ranch cheeseball delivers notable nutritional benefits when served with wholesome dippers and enjoyed in moderation. Cream cheese and cheddar provide valuable calcium for strong bones, and the inclusion of green onions adds antioxidants and vitamin A. When paired with fresh vegetable options, the appetizer also brings more fiber and micronutrients, helping balance the meal for party guests looking for more than empty calories.
Recipe Success Tips
Troubleshooting a cheeseball is simple with a few key strategies: if the mixture is too soft to shape, chill it for 30 minutes and try again for better handling; for mixtures too stiff, allow more time at room temperature to soften. To ensure balanced flavors, taste before chilling and adjust with extra seasoning or a squeeze of lemon juice if needed. Overmixing can make the mixture gummy instead of creamy, so combine gently for the best texture, shaping with dampened hands or cooling briefly if sticking occurs.
This cheddar ranch cheeseball delivers irresistible creamy, tangy flavor and always earns rave reviews at parties and family gatherings. Enjoy making it for your next event and watch how quickly your guests come back for seconds.
Common Questions About This Recipe
- → Can I make the cheddar ranch cheeseball ahead of time?
Yes, you can prepare it up to 1-2 days in advance. Chill well, then let soften slightly before serving for best texture.
- → What crackers pair best with this cheeseball?
Classic butter crackers, pretzel crisps, or sturdy pita chips make excellent choices for scooping and spreading.
- → Can I substitute other cheeses for cheddar?
Absolutely. Try colby jack, pepper jack, or a sharp white cheddar for subtle flavor variation.
- → Is it possible to make this without bacon?
Yes, you can omit bacon, or substitute with diced smoked turkey, ham, or even sun-dried tomatoes for a vegetarian option.
- → How do I keep the cheeseball from sticking when shaping?
Chilling the mixture briefly or using plastic wrap to shape the ball can help keep it from sticking to your hands.