
 Pin
Pin
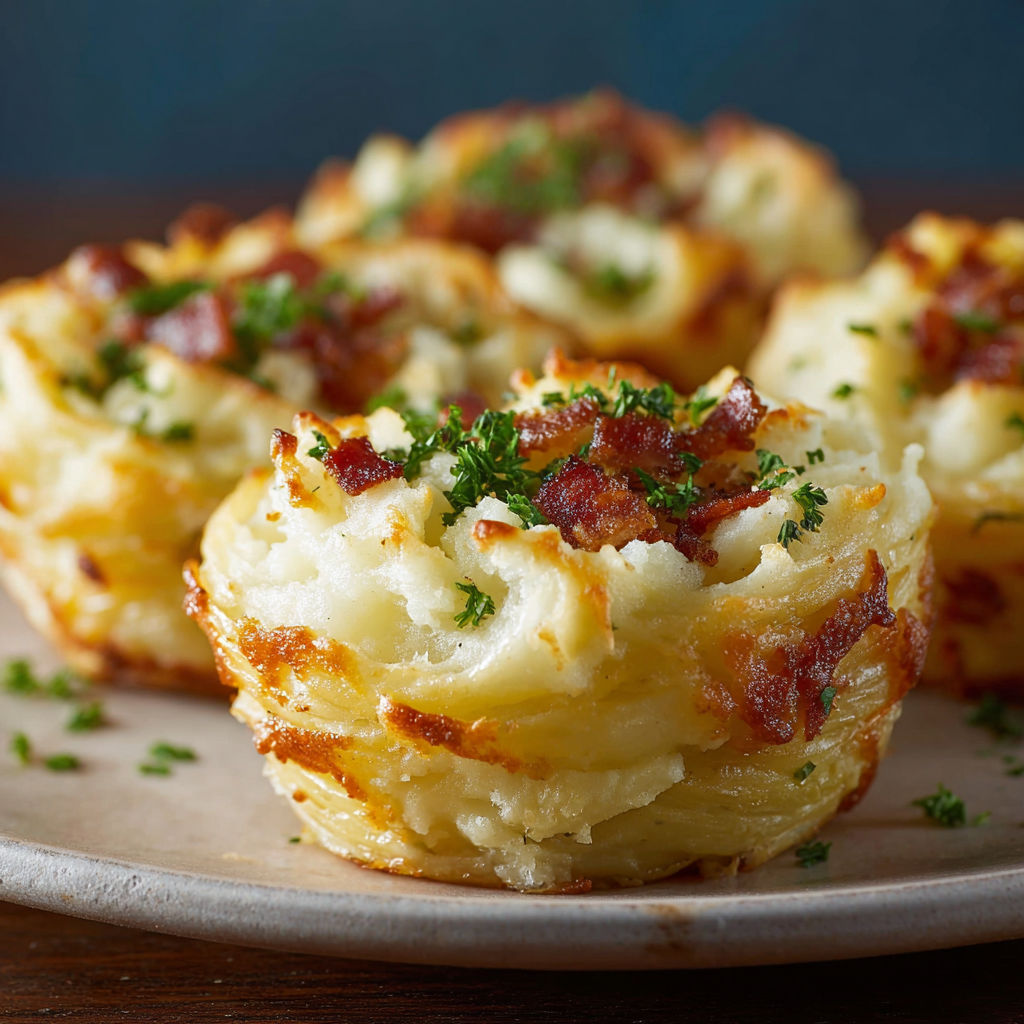
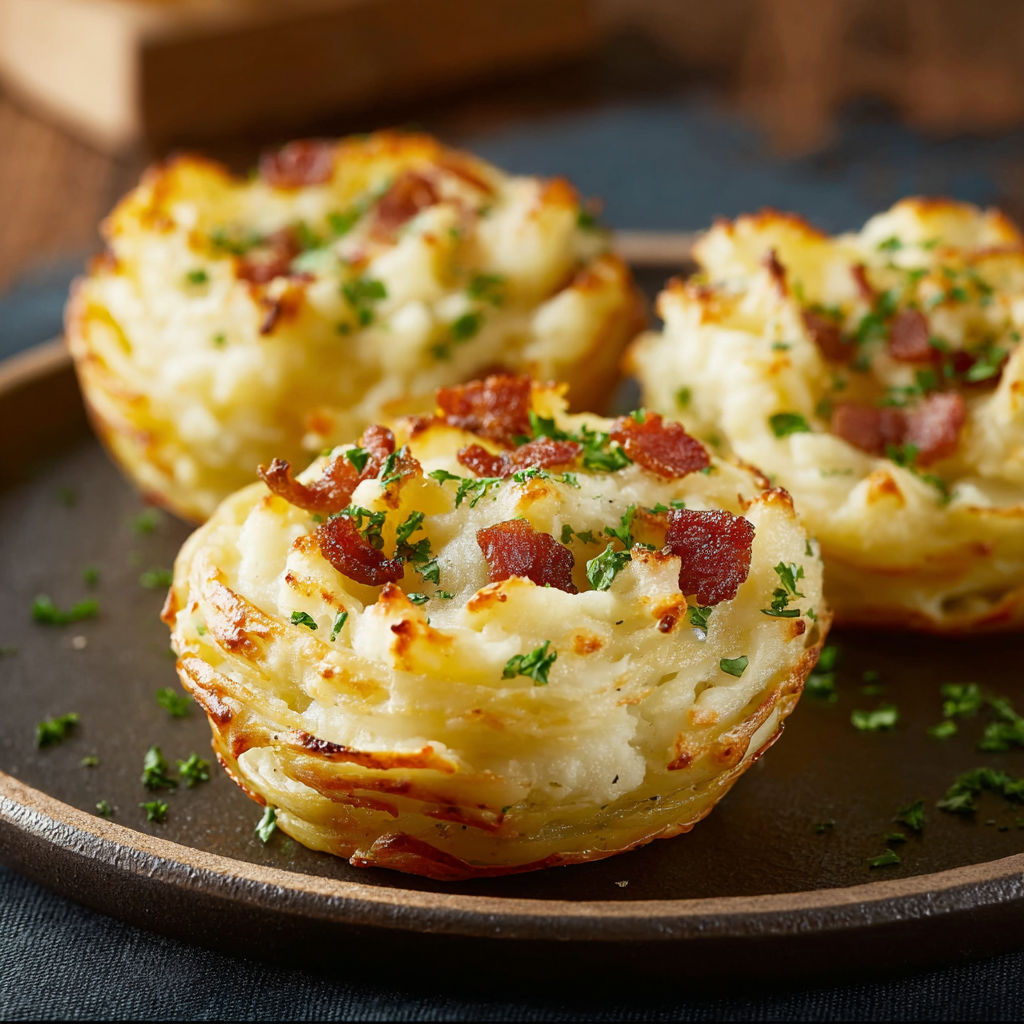
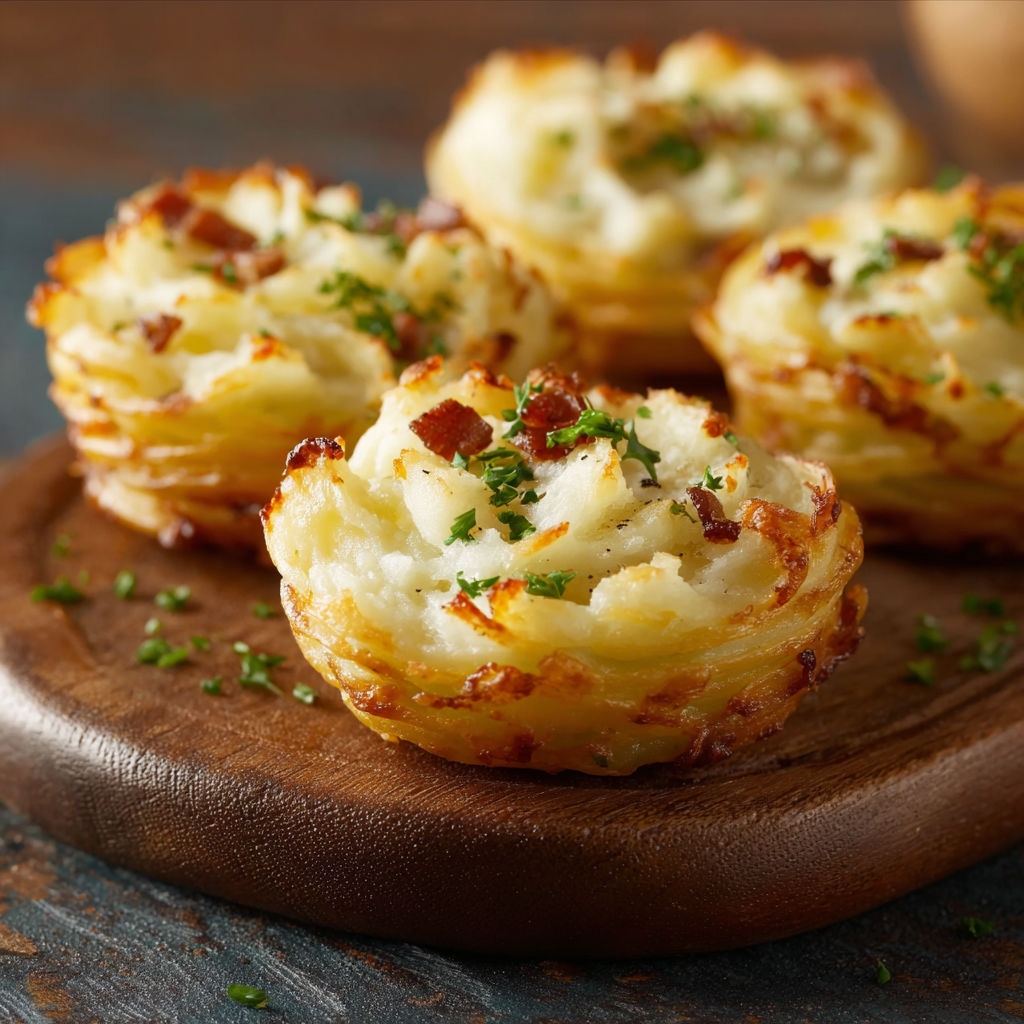
There is something about these stuffed mashed potato nests that always draws a crowd at my table, making it a standout recipe for both entertaining and everyday meals. Stuffed mashed potato nests transform simple mashed potatoes into crispy, golden shells filled with gooey cheese and savory ingredients in just 30 to 45 minutes from start to finish. Whether you’re planning for a holiday brunch or a quick dinner, these nests deliver on comfort, flavor, and visual appeal with minimal effort.
I first whipped up these easy stuffed mashed potato nests for a family brunch, not realizing they would steal the show from every other dish on the table. Now, whenever I make these crispy yet creamy potato cups loaded with cheese, bacon or veggies, my family asks for seconds—and always requests the recipe to share with friends. Their craveable texture and endless adaptability have made them a regular in our kitchen whether for cozy dinners, brunches, or as an impressive holiday side.
Gather Your Ingredients
- Mashed potatoes (made from russet potatoes): Serve as the creamy, sturdy base for forming nests; russets work best because they hold shape well, but Yukon golds add a buttery flavor if substituted
- Fresh grated Parmesan cheese: Adds nutty, salty flavor and helps potato mixture set up during baking; grate fresh for best melt and swap in dairy free cheese if needed
- One large egg: Acts as a binder to keep nests firm and structured; essential for texture but can be omitted for egg free versions with the addition of a tablespoon of potato starch or gluten free flour
- Kosher salt and freshly ground black pepper: Essential for seasoning the base so every bite is balanced; taste and adjust since fillings add salt too
- Shredded cheddar cheese: Melts into gooey pools inside each nest; use sharp cheddar for a punch or mozzarella for creamier bites, or swap for vegan cheese
- Cooked and crumbled bacon: Delivers smokey crunch, though sautéed mushrooms, ground beef, or plant-based sausage all make satisfying alternative fillings
- Steamed broccoli florets: Adds color and nutrition; other mixed veggies like peas, peppers, or spinach can be used for variety or convenience
- Chopped fresh chives: Provides bright garnish and subtle onion notes; try parsley or dill for a different fresh flavor
- Nonstick spray or extra virgin olive oil: Prevents sticking and ensures a golden edge; oil can add richness if preferred over spray
How to Make Stuffed Mashed Potato Nests
- Prepare and Preheat the Oven for Even Baking:
- Begin by setting your oven to 400 degrees Fahrenheit so it reaches full temperature before baking. Generously coat a standard 12-cup muffin tin with nonstick spray or brush with extra virgin olive oil for easy release. Preheating both oven and pan promises crisp, golden potato crusts that won’t stick when unmolding.
- Mix and Season the Mashed Potato Base for Creaminess:
- In a large mixing bowl, combine mashed potatoes with Parmesan, egg, salt, and pepper. Stir thoroughly until the mixture is creamy, thick, and smooth, free from lumps. This well-blended base ensures every nest is flavor packed and sturdy enough to hold its shape without crumbling during baking.
- Shape the Potato Nests for Structure:
- Spoon the potato mixture evenly into the muffin tin, filling each cup about three fourths full. Use the back of a spoon or your fingers to press down and create a deep well in each mound, building the mixture up the sides to mimic a nest shape. Take your time in this step so the sides are thick and stable for stuffing later.
- Bake the Potato Shells Until Golden:
- Place the muffin tin into the preheated oven and bake for 15 to 20 minutes. Watch for the edges to turn rich golden brown and crisp while the centers stay pale and soft. This first bake sets the structure so the nests hold their fillings and come out easily from the tin later.
- Add the Cheesy Stuffed Center and Bake Again:
- Carefully remove the muffin tin from the oven. Fill the wells with shredded cheddar and add a layer of bacon bits or veggies as desired. Return to the oven and bake for another 5 to 7 minutes, until the cheese melts and the fillings are piping hot, creating a gooey, irresistible center.
- Cool Slightly and Serve Warm:
- Once done, allow the nests to cool in the tin for a few minutes, which firms them up for easier removal. Run a small spatula or butter knife gently around each edge to loosen, then lift out. Top with chopped chives for a fresh finish and serve the nests warm for the best creamy, cheesy experience.
Discovering that mixing in just a tablespoon of extra Parmesan cheese gave the edges a lacy crisp bite was a game changer for my family’s potato nests. We love digging through the fridge together and customizing the filling—one time, my son added sautéed mushrooms and declared it the best bite he’d ever had. Mashed potato nests always make family dinners more interactive and fun, especially because each batch is a little different.
Smart Swaps and Variations
Stuffed mashed potato nests are wonderfully versatile and welcome endless variations depending on dietary needs or ingredients on hand. Swap bacon for sautéed mushrooms or roasted red peppers for a vegetarian version, or use shredded rotisserie chicken or turkey for a lean protein punch. If you want to make them dairy free, choose your favorite vegan cheeses and replace the egg with a spoonful of potato starch or gluten free flour for binding. For extra hidden nutrition, mix in chopped spinach, grated zucchini, or roasted seasonal vegetables. Even mashed sweet potato or cauliflower can replace part of the potatoes for a different flavor or lower carb touch.
How to Store and Reheat Stuffed Mashed Potato Nests
To keep your stuffed mashed potato nests fresh, allow them to cool completely before transferring to an airtight container lined with paper towel to absorb excess moisture. Refrigerate for up to three days, or freeze in a single layer between pieces of parchment paper in a freezer safe bag or container for up to two months. To reheat, arrange nests on a baking sheet, cover loosely with foil, and warm in a 350 degree oven for 10 to 12 minutes until hot and crispy. If microwaving for convenience, use medium power in thirty second bursts and avoid overheating so they remain moist and creamy inside.
What to Serve with Stuffed Mashed Potato Nests
Stuffed mashed potato nests shine as both main course and side dish, making them equally at home at weeknight dinners or festive gatherings. Serve with a crisp green salad tossed in lemon vinaigrette for a light, refreshing contrast, or alongside vegetable soup or glazed ham for a hearty holiday spread. For brunch, try topping each nest with a poached or fried egg and serve with a platter of fresh fruit or roasted veggies. Plan two nests per person if serving as a meal or one as an appetizer, and enjoy how easily they fit into any menu.
Nutritional Benefits
These stuffed mashed potato nests pack a punch of good for you nutrients from every layer. The combination of potatoes, cheese, and veggies ensures they are high in potassium, calcium, and vitamin C, while bacon or vegetarian proteins can add satisfying iron and extra protein. Easily made gluten free and naturally nut free, they fit into many special diets, especially with careful ingredient selection. With about 500 calories and 25 grams of protein per generous serving, these nests make a filling lunch, dinner, or snack that truly nourishes as it comforts.
Recipe Success Tips
If your potato nests turn out messy or too delicate, it often means the mashed potatoes were too soft or not pressed firmly enough. For the best results, always use chilled or cool potatoes before shaping, which helps the mixture stay sturdy as it bakes. Uneven browning can happen if the oven is not fully preheated or the muffin tin is crowded, so make sure every cup has room for air circulation. If unmolding is a challenge, gently run a small offset spatula or butter knife around each nest and loosen the edges before lifting out for picture perfect results.
The craveable creaminess and golden crunch of these stuffed mashed potato nests keeps them in regular rotation at my dinner table. Try a batch and discover just how versatile and crowd pleasing your favorite fillings can be in this fun, family friendly recipe.
Common Questions About This Recipe
- → Can I use instant mashed potatoes?
Yes, you can use instant mashed potatoes for convenience. Just ensure they're thick enough to hold shape in the muffin tin.
- → What alternatives can I use for bacon?
Feel free to substitute bacon with sautéed ground beef, turkey, or keep it vegetarian with extra veggies like broccoli or bell peppers.
- → How do I get crispy edges on the nests?
Pre-bake the mashed potato mixture in the muffin tin until the edges are golden before adding the filling.
- → Can these be made ahead?
Yes, assemble the nests and refrigerate before baking. Add fillings and bake just before serving for best results.
- → What is the best cheese to use?
Cheddar and Parmesan work well for flavor and melting, but you can also try mozzarella, gouda, or your favorite meltable cheese.