
 Pin
Pin
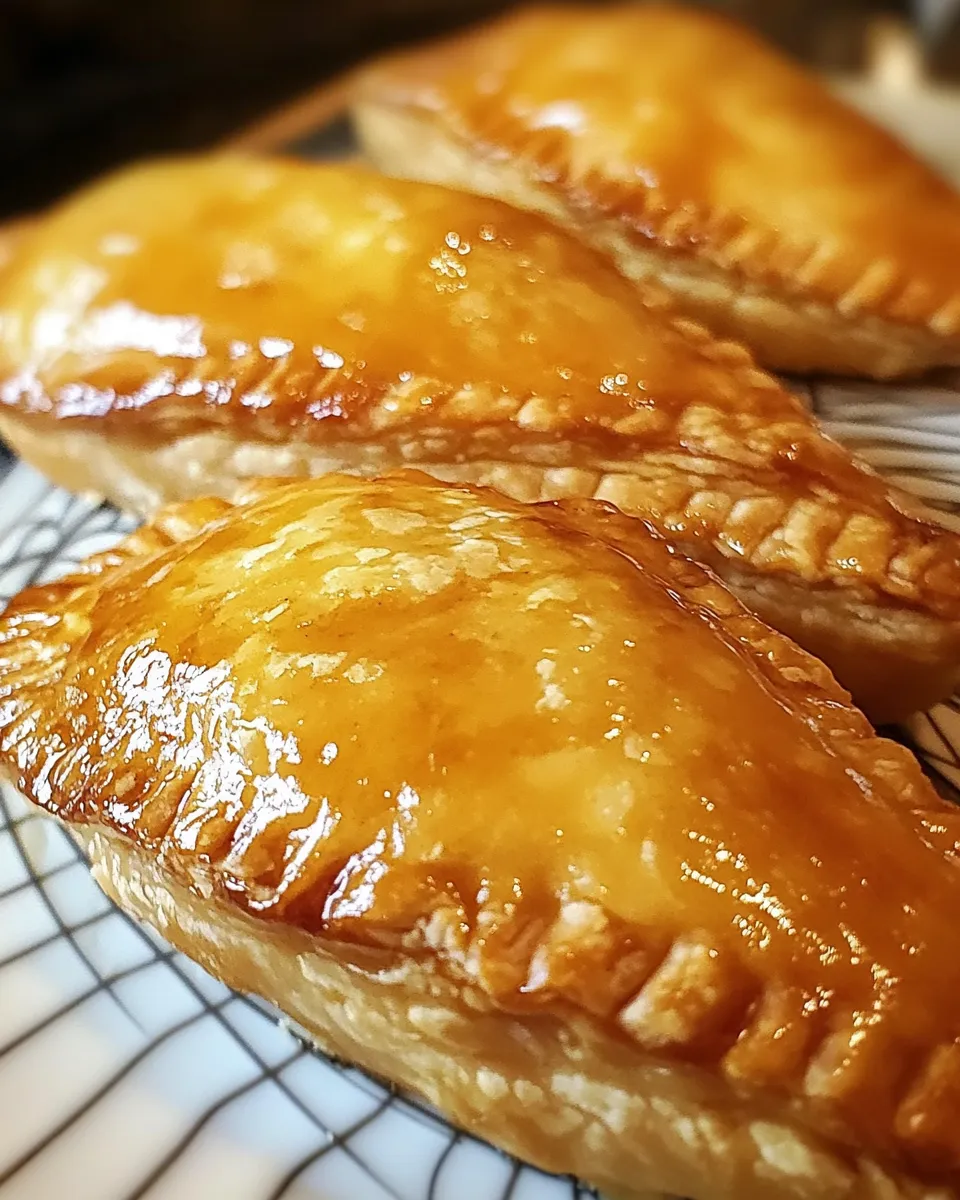
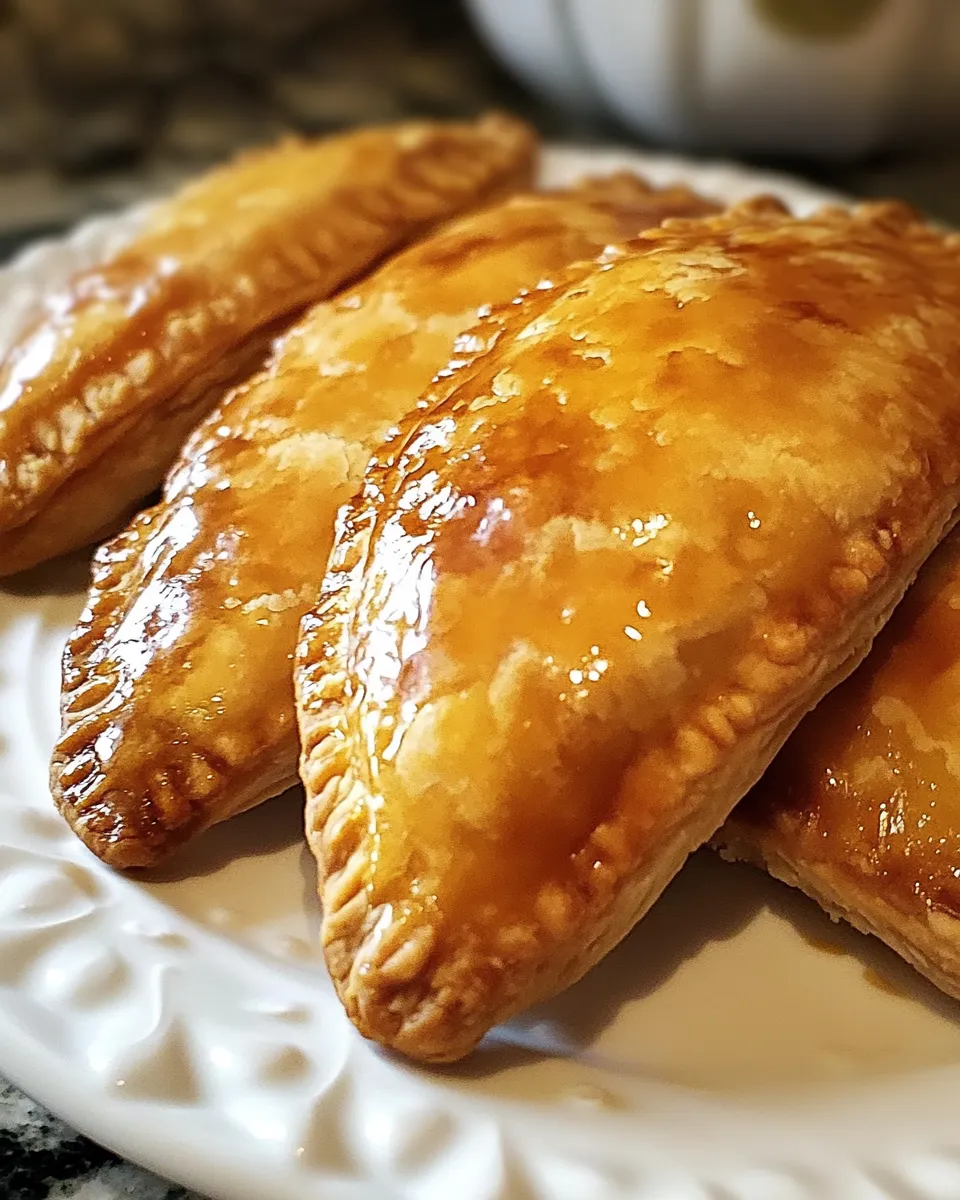
This filling homemade apple cheesecake fried pie transforms basic items into a rich treat that perfectly combines crunchy outsides with hot, melty middles. The mix of apple chunks spiced with cinnamon and smooth cheesecake filling makes an addictive spin on classic fried pies that'll quickly become your family's most wanted dessert.
I first made these pies after we went apple picking and had tons of fresh fruit to use up. What began as me trying to mix my two favorite sweets has now turned into our family's most asked-for holiday dessert, with my kids always arguing over who gets the last one.
Ingredients
- Medium apples: go for Gala or Fuji which give you just the right mix of tang and firmness so your filling won't turn mushy
- Unsalted butter: adds luxury to the apple mix while letting you decide how much salt goes in
- Ground cinnamon and nutmeg: these cozy spices bring that must-have apple pie taste try to grate your own nutmeg for stronger aroma
- Cornstarch: helps the apple filling get just thick enough without making it sticky or gummy
- Cream cheese: pick full fat for the richest cheesecake filling and make sure it's fully softened for no lumps
- Vanilla extract: gives extra flavor to both the cheesecake part and glaze go for real instead of fake for the best taste
- Premade pie crusts: cuts down your work time but still tastes great though making your own dough makes them extra special if you've got time
Step-by-Step Instructions
- Create Apple Filling:
- Heat butter in a pan over medium until it bubbles but stays light colored. Toss in your cut and peeled apples with sugar, cinnamon, and nutmeg. Cook for 5-7 minutes, gently turning every minute so they soften evenly without falling apart. The apples should be tender when poked but still hold their shape. Add the cornstarch mix and keep cooking for 1-2 more minutes, stirring the whole time until the sauce gets thick enough to stick to your spoon. Take it off the heat right away so it doesn't overcook and let it cool down to room temperature.
- Mix Cheesecake Filling:
- In a bowl, blend soft cream cheese, sugar, and vanilla. Beat with your mixer at medium for 2-3 minutes until it's totally smooth with no chunks left. The mix should end up light and easy to spread. Wipe down the sides of your bowl halfway through to get everything mixed in well. Keep it in the fridge if your kitchen's warm until you need it.
- Assemble The Pies:
- Spread your pie dough circles on a lightly floured counter so they won't stick. Put 1 tablespoon of cheesecake filling a bit off-center on each circle, then add 1 tablespoon of the cooled apple mix, keeping at least half an inch free around the edges. Fold the dough over to make a half-moon, pushing out air bubbles as you go. Press the edges firmly together with your fingers, then seal by pushing down with a fork, making sure there aren't any gaps where filling might leak during frying. Move the finished pies to a parchment-covered baking sheet and chill them for 15-20 minutes to firm up.
- Fry To Perfection:
- Warm vegetable oil in a deep, heavy pot to 350°F, checking with a thermometer to be sure. Carefully drop 2-3 pies into the hot oil using a slotted spoon, making sure not to crowd them which would cool down the oil too much. Fry for 2-3 minutes on each side, watching closely since they can turn from golden to burnt fast. The best pie will have an even brown, crunchy outside with no light or dark patches. Move them to a paper towel-covered plate to soak up extra oil, letting them drain about 30 seconds per side.
- Add The Finishing Touch:
- Mix powdered sugar, milk, and vanilla in a small bowl until completely smooth. The glaze should be thick enough to coat your spoon but still easy to drizzle. You can either drizzle it over the warm pies with a spoon or fork, or dip the tops into the glaze for fuller coverage. Let the glaze set up for 3-5 minutes before serving so it looks nice and neat.
My grandma showed me the trick to perfectly sealed pies is cooling them before frying, which stops the filling from escaping and makes that picture-perfect crispy edge. The first time I brought these to Thanksgiving dinner, my brother-in-law ate four in one sitting and has asked for them at every family get-together since.
Make-Ahead Options
These pies work great as a do-ahead dessert when you're busy hosting. You can fix and put together the pies completely, then keep them in the fridge uncooked for up to 24 hours before frying. Or you can fry them ahead, let them cool all the way, and store them in the fridge for up to 3 days. To get back their crunch, warm them in a 350°F oven for 10 minutes or in an air fryer for 3-4 minutes at 325°F. This gentle heating warms the filling without burning the crust, giving you pies that taste like you just made them.
Ingredient Substitutions
This recipe bends easily for different diets or whatever you have on hand. For a lighter take, swap in Neufchâtel cheese instead of regular cream cheese to cut fat while keeping it creamy. If you can't have dairy, try plant-based butter and cream cheese options that are easy to find nowadays. The apple type can change based on what's in season or what you like. Pears work really well too with their similar feel and matching flavor. For folks avoiding gluten, use ready-made gluten-free pie crusts which have gotten much better lately, though you might need to handle them more carefully when putting the pies together.
Serving Suggestions
These hand pies taste best when served warm with thoughtful sides. A scoop of vanilla bean ice cream makes a great hot-cold contrast with the warm pie. For extra richness, add some caramel sauce or a bit of lightly sweetened whipped cream. These pies look stunning as the main attraction on a dessert board with fresh berries and mint for color. During fall gatherings, pair them with spiced apple cider for a themed dessert experience. For brunch, skip the glaze and serve with a spoonful of Greek yogurt for a less sweet but just as tasty option.
Common Questions About This Recipe
- → Can I use a different type of apple for the filling?
You bet! Granny Smith and Honeycrisp work great for their sweet-tart balance, but other firm varieties like Fuji or Braeburn will do the job nicely too.
- → Can these pies be baked instead of fried?
For sure! Pop them in the oven at 375°F (190°C) for about 20-25 minutes. Coat them with beaten egg before baking to get that lovely golden finish.
- → How can I store leftover pies?
Put any extras in a sealed container in your fridge for up to 3 days. When you want them again, warm them in your oven or air fryer to keep them nice and crispy.
- → What can I substitute for pre-made pie dough?
Want to make your own dough? Go for it! Just whip up a basic pie crust and roll it out into circles about 4-5 inches across, then follow the same steps.
- → Can I skip the glaze for a less sweet dessert?
Definitely! These pies taste great without any extras. The glaze just adds more sweetness, so feel free to leave it off if you don't want something too sweet.