
 Pin
Pin
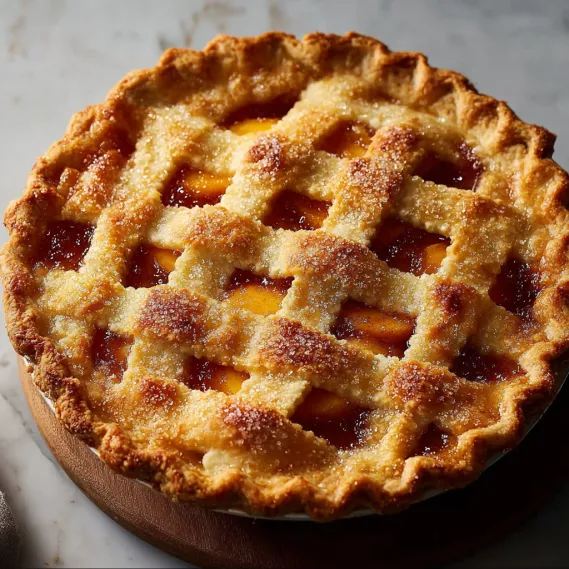
This homemade peach pie filling transforms fresh summer peaches into a sweet, jammy treasure that's perfect for classic pies but versatile enough for countless desserts. The natural sweetness of ripe peaches gets enhanced with a blend of sugars while a touch of cinnamon adds subtle warmth.
I first created this recipe during a particularly abundant peach season when my kitchen counters were overflowing with fragrant fruit. What began as a practical solution to preserve the harvest has become my signature dessert contribution at family gatherings.
Ingredients
- Fresh peaches: choose ripe yet firm fruit with a sweet fragrance for the best flavor base
- Granulated sugar: provides the primary sweetness while helping create the syrupy texture
- Brown sugar: adds depth and caramel notes that complement the peaches perfectly
- Cornstarch: essential thickening agent that transforms the juicy peaches into a sliceable filling
- Lemon juice: brightens the flavor and balances sweetness while helping prevent browning
- Ground cinnamon: optional warming spice that enhances the natural peach flavor
- Butter: creates silky richness and adds a glossy finish to the filling
Step-by-Step Instructions
- Prep the Peaches:
- Blanch the peaches in boiling water for exactly 30 seconds before transferring to an ice bath. This quick temperature shock loosens the skins, allowing them to slip off effortlessly with just your fingers. Slice the peeled peaches into even pieces about 1/4-inch thick for consistent cooking and a pleasing texture in your final dessert.
- Combine Ingredients:
- Add your sliced peaches to a medium saucepan followed by both sugars, which will begin drawing out the fruit's natural juices. Introduce the lemon juice next, which not only adds brightness but helps preserve the peaches' color. If using cinnamon, sprinkle it evenly across the mixture now to ensure it distributes well during cooking.
- Cook the Filling:
- Heat the mixture over medium heat, stirring occasionally until you notice juice pooling at the bottom of the pan. This indicates the peaches are releasing their natural moisture. Add the cornstarch and stir continuously for the next 5-7 minutes as the mixture thickens. You'll know it's ready when it coats the back of a spoon and leaves a clear path when you run your finger through it.
- Add Butter:
- Remove the pan from heat before incorporating the butter, allowing it to melt into the hot filling. Stir gently but thoroughly until the butter is completely melted and integrated, creating a smooth, glossy appearance. This step adds richness and a silky mouthfeel to your finished filling.
- Cool and Store:
- Allow the filling to cool completely in the pan, which gives the thickeners time to fully set. The filling will continue to thicken as it cools, reaching its final consistency at room temperature. Transfer to storage containers only after it has cooled completely to prevent condensation.
The lemon juice is my secret weapon in this recipe. While many people add it merely for flavor, I've discovered it serves multiple crucial purposes: preventing the peaches from browning, balancing sweetness, and providing enough acidity for safe canning if you choose to preserve your filling for longer storage.
Selecting the Perfect Peaches
The success of your pie filling begins at the market or orchard. Look for peaches that yield slightly to gentle pressure but aren't mushy. The skin should have a deep yellow or cream background with vibrant blush areas. The most telling sign of a perfect peach is its aroma a truly ripe peach will perfume the air around it with sweet fragrance. Freestone varieties make preparation easier as the flesh separates cleanly from the pit, while clingstone types, though sometimes more flavorful, require more effort to prepare.
Storage Solutions
Refrigerator Storage: Transfer cooled filling to airtight containers and refrigerate for up to 5 days. The filling may thicken substantially when cold but will loosen when gently reheated.
Freezer Method: Pour completely cooled filling into freezer-safe containers, leaving at least 1/2 inch headspace for expansion. Seal tightly, label with the date, and freeze for up to 3 months. Thaw overnight in the refrigerator before using.
Water Bath Canning: For long-term storage, process filled and sealed canning jars in a boiling water bath for 25 minutes (adjust for altitude). Properly canned peach pie filling will remain shelf-stable for up to 18 months.
Creative Serving Ideas
While traditional peach pie is always delightful, this versatile filling deserves exploration beyond the pie plate. Warm it slightly and spoon over vanilla ice cream for an effortless dessert. Layer it with granola and Greek yogurt for breakfast parfaits. Use it as a filling for crepes or as a topping for cheesecake. One of my favorite unexpected uses is warming the filling and serving it alongside roasted pork as a sweet fruit compote the combination of savory meat with sweet peaches creates a memorable main course.
Common Questions About This Recipe
- → How can I easily peel peaches for this filling?
Blanch the peaches in boiling water for 30 seconds, then immediately transfer them to an ice bath. The skins will slide off easily.
- → Can I use frozen peaches instead of fresh?
Yes, frozen peach slices work well. Thaw and drain any excess liquid before cooking to avoid a watery filling.
- → What’s the role of cornstarch in the filling?
Cornstarch thickens the mixture, creating a glossy, cohesive texture that holds together when sliced or served.
- → How long can I store the finished peach filling?
Store cooled filling in the refrigerator for up to 5 days, or freeze in an airtight container for up to 3 months.
- → Can I use this filling for desserts other than pie?
Absolutely! Spoon it over pancakes, waffles, ice cream, or use as a layer in trifles and cobblers for fruity flavor.