
 Pin
Pin
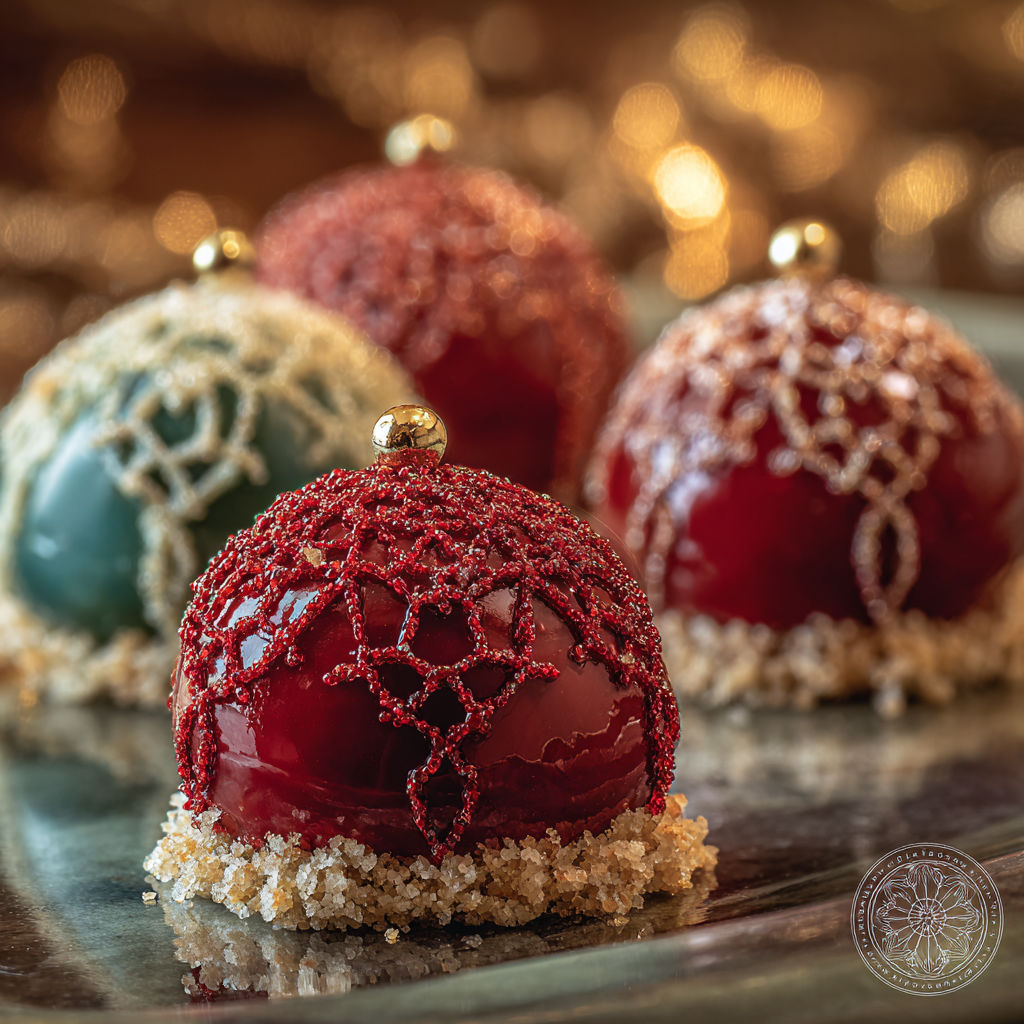
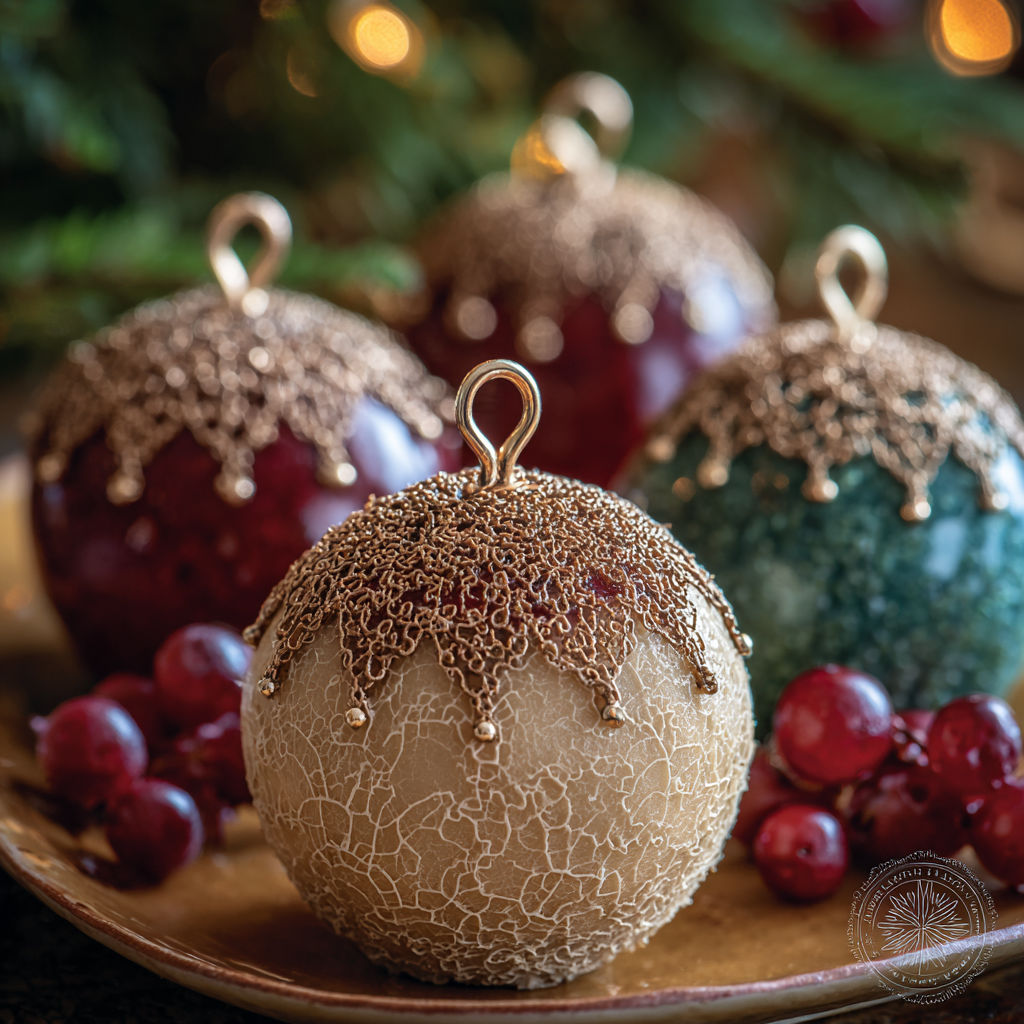
These Christmas Ornament Mousse Balls will totally steal the show at your holiday gathering—a fun, shiny dessert that came from my family's beloved traditions. Each bright, mirror-glazed treat has fluffy chocolate inside, a hidden surprise center, and gleams just like the decorations from my grandma's Christmas tree. When you bring these out, they light up your table with vibrant colors and happiness, making them the perfect sweet ending to any festive meal.
I first whipped these up because I wanted something as enchanting as my Mamaw's Christmas tree. Every year since, I've tried different colors and fillings, and my friends always gasp when I show up with these fancy edible decorations.
Tasty Ingredients
- Heavy cream: gives your mousse that velvety smoothness; grab one with at least 36% fat to make sure it turns out just right
- Chopped chocolate: forms your mousse foundation; pick something really good for the richest taste
- Vanilla extract: brings a cozy flavor; try vanilla bean paste if you want pretty little specks
- Pinch of salt: cuts through sweetness and makes chocolate taste even better; fine sea salt works great
- Sugar: helps your glaze look amazing and set up properly; regular granulated works perfectly
- Sweetened condensed milk: makes your mirror glaze thick and creamy; adds that sweet richness
- Unflavored gelatin: the secret to that mirror-like finish; double-check it hasn't expired
- White chocolate: creates the base for your colorful glaze; make sure it's real white chocolate with cocoa butter
- Gel or powdered food coloring: gives you bright colors without watering down your glaze; skip the liquid stuff
- Optional fillings: try raspberry sauce, melted chocolate or bits of cake hidden inside; go for something with big flavor
- Fondant, licorice or pretzels for edible “hooks”: makes them look like real ornaments; add gold sprinkles if you want extra sparkle
How to Make It
- Creating the Silky Mousse Base:
- Cut chocolate into small pieces and put it in a medium bowl that can take heat. Warm half your cream in a small pot just until tiny bubbles show up at the edges. Pour this warm cream over your chocolate and wait one minute. Stir slowly until everything's smooth, then let it cool down completely so it won't ruin your whipped cream.
- Whipping the Cream:
- Using a cold bowl, whip your remaining cream with vanilla and a tiny bit of salt until you get stiff peaks. Take about a third of this whipped cream and mix it into your chocolate mixture to lighten it up. Fold in the rest of the cream very carefully so you don't knock out all the air. You want it fluffy but smooth.
- Assembling the Ornaments:
- Get your silicone ball molds and fill each one about a third full with mousse. Drop some filling right in the middle. Cover with more mousse until it reaches the top and flatten with a spatula. Put in the freezer until completely hard, at least four hours but better overnight.
- The Magic of the Mirror Glaze:
- First, soften your gelatin by sprinkling it over cold water and letting it turn spongy. Mix water, sugar and condensed milk in a pot and heat it up without boiling, while stirring all the time. Take it off the heat, add your spongy gelatin and stir until it melts. Then add finely chopped white chocolate and stir until everything's completely smooth.
- Color and Cool the Glaze:
- Pour your glaze through a strainer to catch any lumps. Add your favorite gel food colors and blend until smooth. Let it cool down until it feels just warm when you touch it, around 90°F. Getting this temperature right makes all the difference for a perfect glaze.
- The Grand Finale Glazing and Decorating:
- Put a piece of parchment paper under a wire rack. Take out your frozen mousse balls and place them flat side down on the rack. Pour glaze over them in one quick motion, letting extra drip off. Quickly add your decorative hooks or sprinkles before the glaze hardens. Serve on plain plates to make the colors pop.
- Make It Your Own:
- Try different flavors like minty dark chocolate mousse with mint glaze and chocolate filling, tropical white chocolate with fruit filling inside, cookies and cream with cookie pieces mixed in, or grown-up eggnog flavor with nutmeg, rum flavor and cake bits in the center.
I love using white chocolate in the glaze because it works so well with bright colors and gives that glass-like shine. My family members always pick their favorite colored ball at dessert time, and every year we come up with new filling ideas.
Flavor Boosters
If you can't have dairy, swap in coconut cream instead of heavy cream and use condensed coconut milk rather than regular. Look for dairy-free white chocolate too, and double-check all your fillings for allergens. No silicone molds? No problem! Use any flexible mold you have or shape them by hand wearing gloves for a rustic look.
Serving Suggestions
Put each ornament on a white dish with a sprinkle of powdered sugar or some edible gold dust for extra holiday magic. Serve with a tart fruit sauce or vanilla custard on the side. They look stunning arranged on a cake stand surrounded by pine branches as a centerpiece.
Creative Twists
When spring rolls around, go with soft pastel glazes and lemon mousse. Summer calls for berry-flavored mousse with bright blue or red coating. Fall is perfect for pumpkin spice or caramel mousse with bronze or copper shimmer. You can adapt these for any holiday just by changing up the colors and what's inside.
What makes this recipe so fun is making it fit your style, so don't be afraid to play around with different flavors and colors to make your holiday table truly special.
Common Questions About This Recipe
- → How can I achieve a smooth and shiny mirror glaze?
Make sure your glaze is around 90°F and your mousse balls are completely frozen. Always pour the mixture through a fine strainer to get rid of any bits for that perfect shine.
- → Can I prepare these mousse balls in advance?
Absolutely, you can make and freeze the mousse balls up to a week early. Just add the glaze on the day you'll serve them. Once glazed, they'll stay good in the fridge for a day or two.
- → What creative filling options work well inside the mousse balls?
Try stuffing your balls with mashed raspberries, minty chocolate filling, passion fruit cream, tiny cake pieces, or smashed cookies for tasty holiday surprises.
- → What if I don't have silicone sphere molds?
No worries, you can use any silicone mold shape, muffin tins, or even roll the mousse into balls with your hands for a charming homemade look before adding the glaze.
- → How do I prevent glaze streaks or melting mousse?
Your mousse must be rock-solid frozen and your glaze needs to be just the right warmth. If you notice the mousse starting to soften before glazing, pop it back in the freezer until it's firm again.