
 Pin
Pin
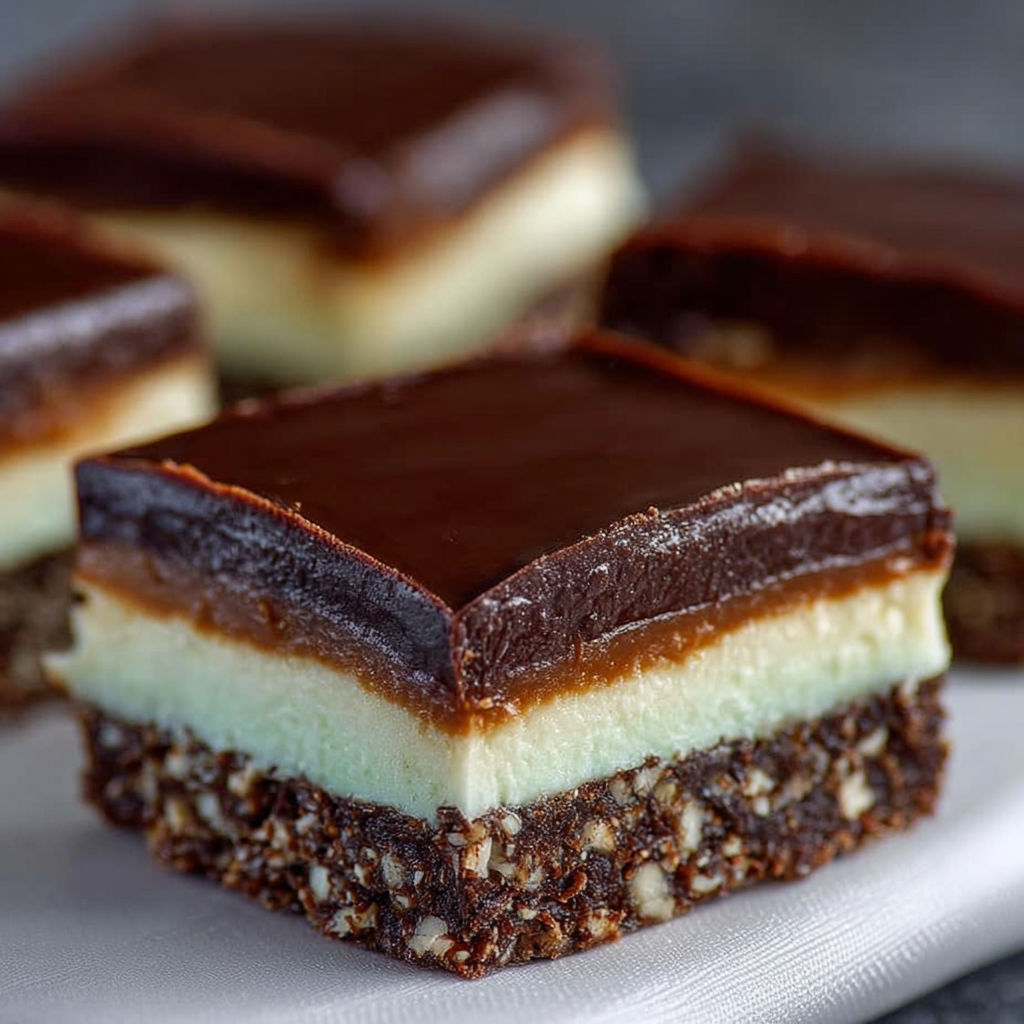
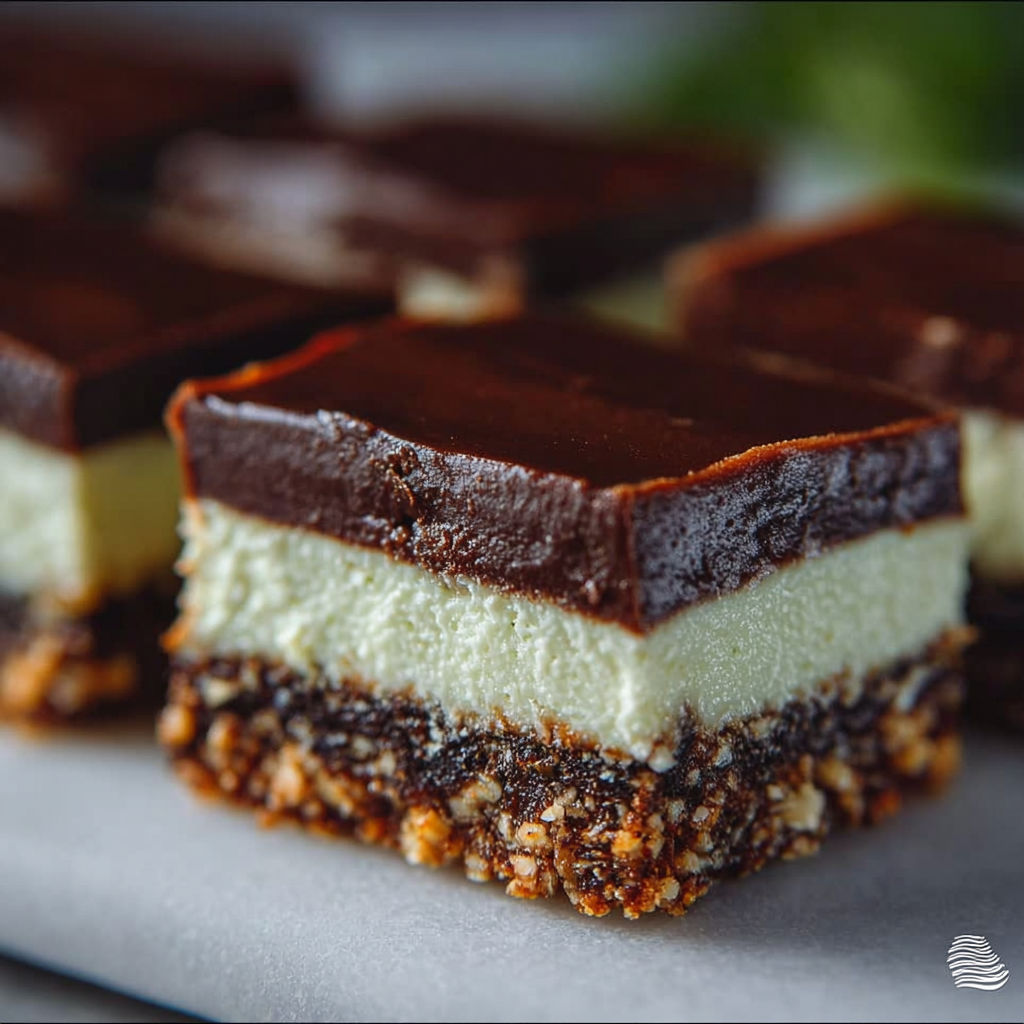
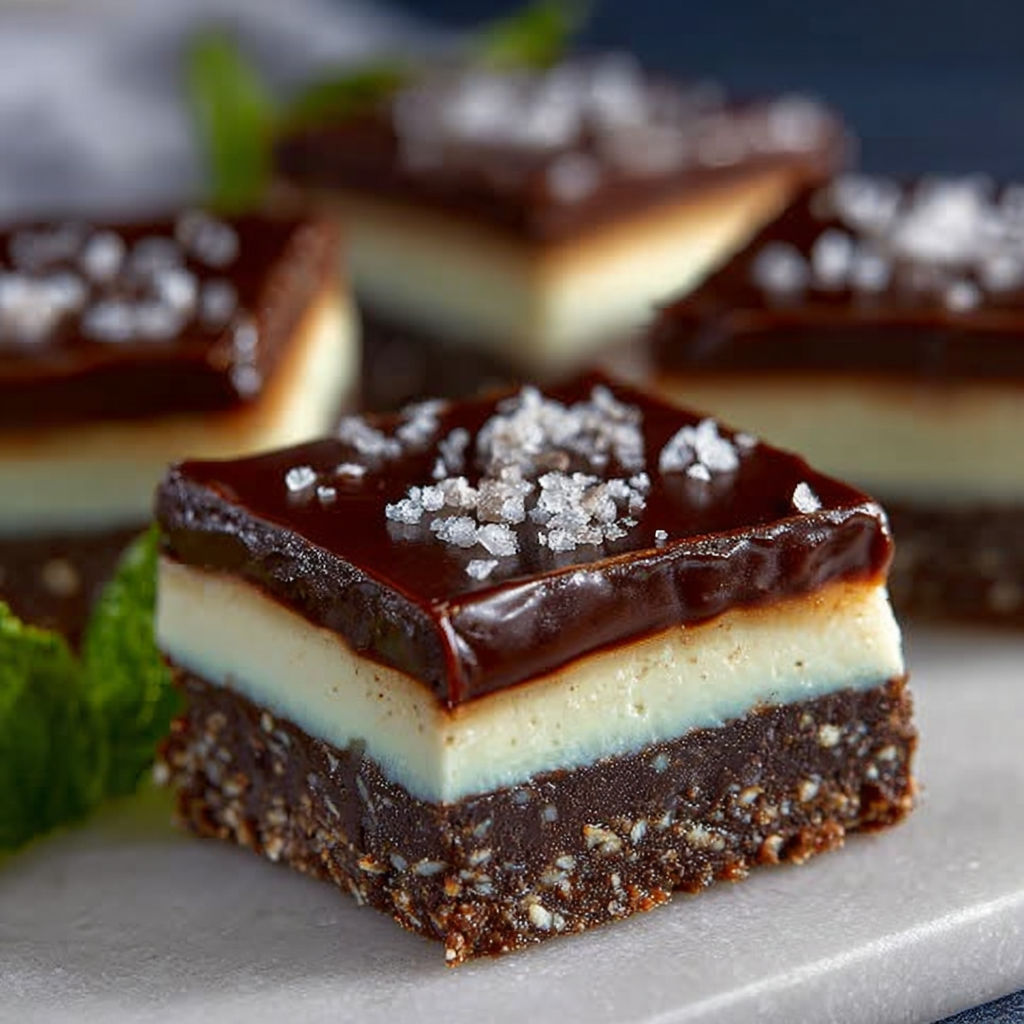
These irresistible chocolate mint Nanaimo bars deliver layers of rich chocolate, creamy peppermint, and a buttery coconut base for a classic no bake Canadian dessert that comes together in just 35 minutes plus chilling time. Whether you are searching for the ultimate chocolate mint bar recipe for holidays or crave an easy summertime treat, this decadent dessert offers crowd pleasing flavor and stunning presentation with minimal effort.
I first tasted mint Nanaimo bars while traveling with family along Vancouver Island and instantly fell for their fresh mint layer and deep chocolate flavor. Since then, I have experimented with various extracts, chocolate qualities, and bases, always returning to the version that includes pure peppermint extract and finely crushed coconut for a genuine Canadian twist. Friends look forward to these bars every holiday and they quickly disappear at every gathering, proving just how beloved this easy dessert really is.
Gather Your Ingredients for Chocolate Mint Nanaimo Bars
- Dark chocolate chips: Essential for both the base and top layers; choose high quality, 60 to 70 percent cacao chips for the smoothest melt and richest flavor. You can substitute semi sweet chips but dark chocolate provides a more intense taste.
- Butter (unsalted): Used in all three layers to add structure and flavor; unsalted butter lets you control saltiness, but you may use salted in a pinch and reduce any added salt. Soften butter for the filling to ensure a creamy, lump free mint layer.
- Graham cracker crumbs: Provide body and a slight crunch to the base; ensure they are finely ground for an even foundation. Substitute gluten free graham crackers or chocolate cookie crumbs for dietary adaptations or deeper chocolate flavor.
- Sweetened coconut flakes: Add signature chew and subtle sweetness to the bar base; use desiccated or shredded coconut for texture variation. For a nutty spin, toast the coconut lightly before using.
- Powdered sugar (sifted): Forms the smooth, stable mint layer; sift twice to erase any lumps that could mar the filling. You can use finer icing sugar for an ultra silky texture.
- Cornstarch: Stabilizes the middle layer for clean slices and firm yet creamy consistency; do not omit, as it keeps the filling from weeping.
- Pure peppermint extract: Delivers crisp, refreshing mint without bitterness; avoid artificial extracts as they can overwhelm and taste medicinal.
- Milk: A small amount in the filling gives spreadability without making it runny. Dairy or non dairy milk both work for customization.
- Vanilla extract: Rounds out the flavor and balances the mint; opt for pure vanilla for best results.
How to Make Chocolate Mint Nanaimo Bars
- Prepare the base pan with nonstick coating:
- Lightly grease an eight by eight inch baking dish with butter or cooking spray to ensure easy release of the bars after chilling and prevent sticking. Set aside so it is ready when your base mixture is complete.
- Melt chocolate and butter for base:
- Place dark chocolate chips and butter in a heat safe bowl over a barely simmering pot of water. Stir constantly until glossy and smooth with all chips melted, about four to five minutes, taking care not to let the water touch the bottom of the bowl. Remove from heat immediately to avoid burning.
- Add crumbs and coconut for structure:
- Stir in the finely ground graham cracker crumbs and sweetened coconut flakes to the melted chocolate mixture until fully coated and evenly mixed. The mixture should be moist and cohesive, forming small clumps.
- Press and level the base:
- Spread base mixture into prepared pan and press firmly with the back of a flat bottomed glass or measuring cup, ensuring an even and compact layer that reaches all corners. A firmly packed base prevents crumbling during slicing and serving.
- Chill the base for a stable foundation:
- Refrigerate pressed base for thirty minutes or until fully set to touch. Chilling solidifies this layer, allowing you to spread the mint filling without mixing layers.
- Create the mint filling:
- Beat sifted powdered sugar, softened unsalted butter, cornstarch, peppermint extract, and milk in a mixing bowl using an electric mixer on medium speed for two to three minutes until completely smooth and creamy. The filling should resemble thick buttercream and be free of lumps.
- Spread and smooth the mint layer:
- Once the base is firm, spread the whipped mint filling evenly over it using an offset spatula. Hold the spatula at a slight angle for an ultra smooth, level surface, taking care not to disturb the base.
- Chill again for layer separation:
- Return the pan to the refrigerator for at least thirty minutes so the mint layer sets and will not blend with the warm chocolate glaze next.
- Prepare chocolate topping with vanilla:
- Melt additional chocolate chips, butter, and vanilla extract over a gently simmering water bath, stirring until silky and homogeneous. Allow to cool for three to five minutes so the chocolate is still pourable but not hot, preserving the clean layers.
- Apply the final chocolate layer:
- Pour the slightly cooled chocolate mixture over the mint layer and swiftly tilt the pan or spread using an offset spatula until the top is evenly coated. Work quickly, as the cold layer below will set the chocolate fast.
- Score and final chill for neat cuts:
- Let bars cool at room temperature for fifteen minutes until chocolate just loses its gloss, then score shallow lines for cutting guides with a sharp knife. Return to refrigerator for one or more hours to set before slicing into squares and serving.
The pure peppermint extract gives these bars their signature cooling flavor, which I always amplify with an extra drop just as my grandmother did for family gatherings. Discovering the difference between artificial and pure extract was a game changer, lending a refreshing finish that balances the rich chocolate layers. We now keep good peppermint extract stocked just for this dessert each holiday season.
Smart Swaps and Variations for Chocolate Mint Nanaimo Bars
To suit various dietary needs, try coconut oil in place of butter throughout the recipe for a dairy free option, using coconut cream for added richness. For a gluten free twist, substitute crushed gluten free graham crackers or crisp chocolate gluten free cookies in the base. The middle layer is endlessly customizable: replace mint extract with almond plus a touch of orange oil for a sophisticated flavor, or instant espresso powder dissolved in the milk for mocha Nanaimo bars. Extra peanut butter gives a playful chocolate peanut butter mint version that kids love.
How to Store and Reheat Chocolate Mint Nanaimo Bars
Store cut bars in a tight sealing container in the refrigerator with a layer of parchment paper between each row to prevent sticking. These Nanaimo bars remain best for up to one week, though their texture is ideal within five days. For longer storage, freeze individual squares wrapped in plastic inside a freezer safe box for up to three months; when ready to serve, thaw overnight in the refrigerator to avoid moisture on the chocolate topping and always avoid microwaving which can separate the layers or melt the chocolate unevenly.
What to Serve with Chocolate Mint Nanaimo Bars
Pair these indulgent chocolate mint bars with strong coffee, such as espresso or French press, for a delightful contrast to the sweetness. For a lighter dessert plate, fresh raspberries or strawberries add bright, tart flavor and beautiful color. Serving alongside vanilla ice cream creates a classic, crowd pleasing treat, while pairing with a glass of cold milk or a minty tea highlights the cooling notes for a balanced taste experience during holidays or after dinner gatherings.
Nutritional Benefits
While decadent, chocolate mint Nanaimo bars offer some nutritional value when enjoyed as an occasional treat. Dark chocolate is rich in antioxidants, which may help support heart health and fight oxidative stress, while coconut provides medium chain fatty acids metabolized efficiently for energy. These bars are naturally egg free and, with select substitutions, can be adapted for gluten free or dairy free needs, making them accessible for a range of dietary restrictions. Each two inch square contains roughly 350 calories and enough fat to keep you satisfied with a modest portion.
Recipe Success Tips for Chocolate Mint Nanaimo Bars
To avoid a gritty mint layer, always use softened butter and thoroughly sifted powdered sugar. Melt chocolate gently with steam, not boiling water, and never rush the cooling process between layers to prevent them blending together. For precision, score the chocolate before it's fully set and use a hot chef’s knife cleaned between slices for perfect squares. If you encounter trouble with crumbling bases or uneven layers, carefully press and chill as directed—patience is the key to the iconic three layer look every time.
These chocolate mint Nanaimo bars have become our family tradition for celebrations from winter holidays to summertime parties, always drawing requests for the recipe. Enjoy the mix of nostalgic Canadian flavors and cool minty freshness and share these stunning treats with everyone you love!
Common Questions About This Recipe
- → How do I achieve clean layers and cuts for nanaimo bars?
To get clean layers, ensure each layer is fully chilled and set before adding the next. For tidy cuts, use a sharp knife dipped in hot water and wiped dry before slicing.
- → Can I substitute ingredients if I don’t have graham cracker crumbs?
Yes, you can use crushed vanilla wafers or digestive biscuits instead of graham cracker crumbs, though it may slightly change the texture and flavor.
- → Is it necessary to use peppermint extract for the mint layer?
Peppermint extract is recommended for a classic mint flavor, but you can substitute with spearmint extract for a milder taste or omit it for a traditional version.
- → How long will these bars keep in the refrigerator?
Stored in an airtight container, the bars will keep well for up to 5 days in the refrigerator. They can also be frozen for up to a month.
- → Can I make this treat ahead for parties?
Absolutely. Nanaimo bars are ideal for making ahead since they improve in texture and flavor after chilling. Prepare the night before for best results.
- → What’s the best way to prevent the chocolate top from cracking?
Let the chocolate topping cool and set slightly before cutting. Scoring the chocolate lightly before it's fully firm can also help prevent cracks.