
 Pin
Pin
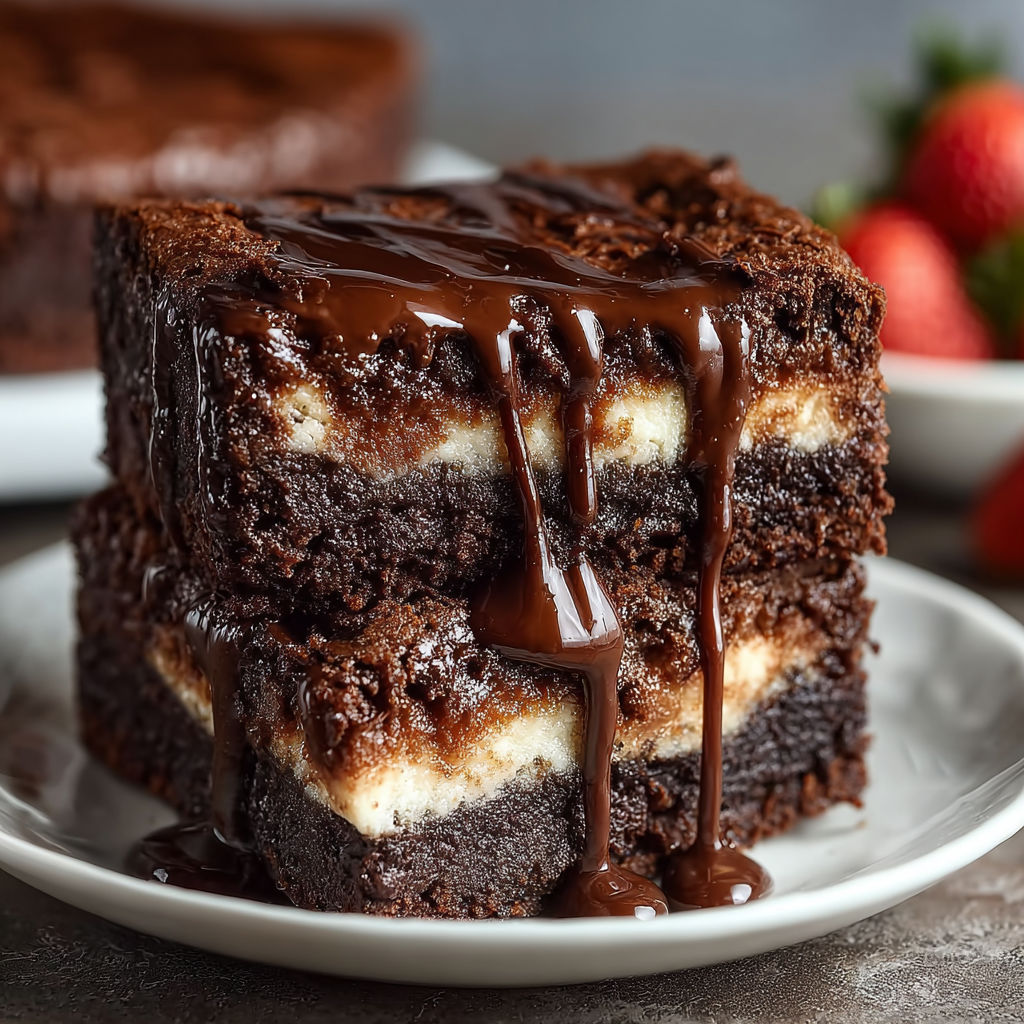
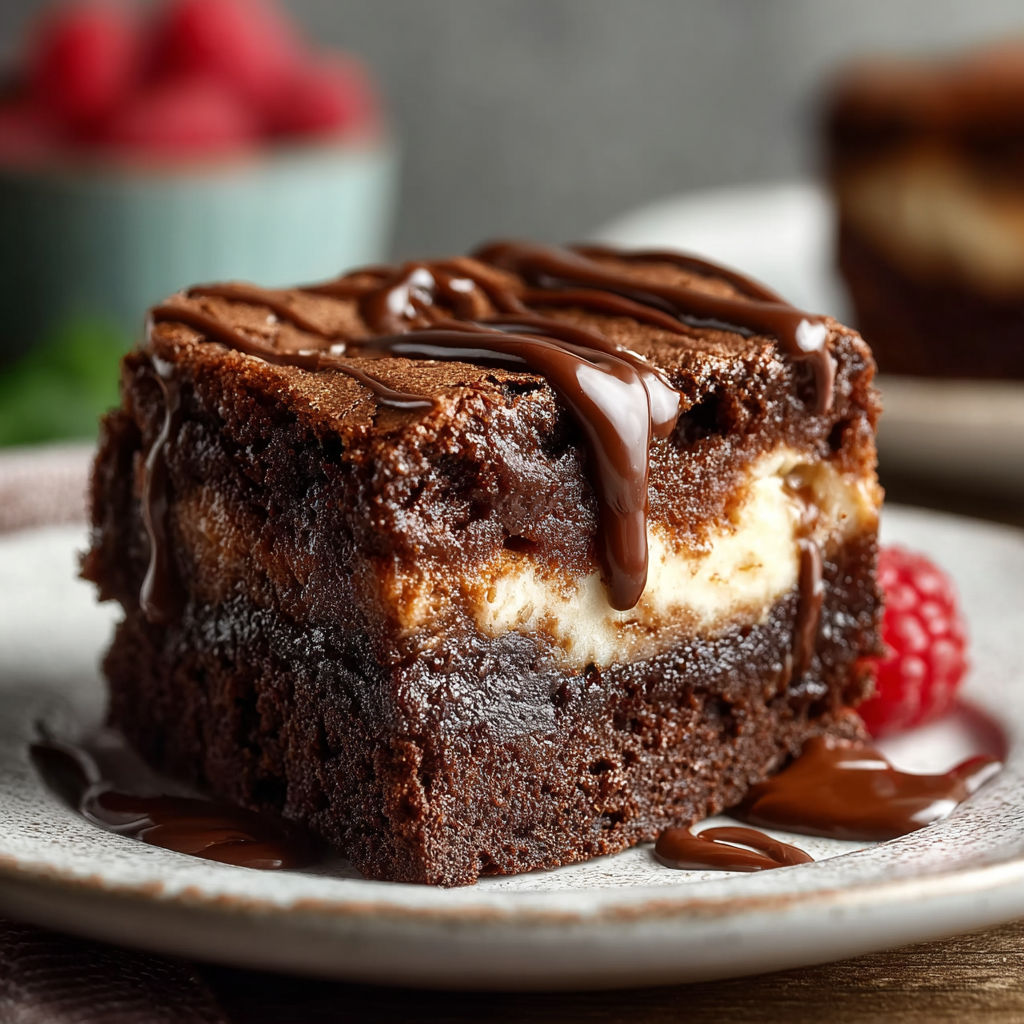
Fudgy brownie mixed with creamy cheesecake creates my ultimate dessert combo when I can't decide between the two. Each bite delivers a perfect balance - dense chocolate goodness swirled with tangy cream cheese that pleases everyone at the table. The beautiful marble pattern looks so impressive, and whenever I take this to gatherings, the plate gets wiped clean within minutes.
I first whipped this up for a birthday celebration and everyone couldn't stop talking about those gorgeous swirls and how indulgent each piece tasted. Now my relatives always ask for it whenever we celebrate something important.
Round Up Your Ingredients
- Unsalted butter: Adds moisture and silky smoothness so pick something good quality for better flavor
- Dark chocolate chips or chunks: Creates that intense chocolate kick aim for at least sixty percent cocoa content
- Granulated sugar: Sweetens the brownie part and helps the cheesecake stay smooth
- Brown sugar: Gives a slight molasses flavor and keeps the texture super fudgy
- Eggs: Work as glue between layers while adding richness grab large ones for best outcome
- All purpose flour: Provides the framework but keeps things dense shake through a sieve for smoother mixing
- Cocoa powder: Boosts the chocolate flavor Dutch processed works great for darker color
- Vanilla extract: Adds wonderful background flavor go for real extract instead of fake stuff
- Cream cheese: Must be soft for lump-free cheesecake layer stick with block type not the spread
- Heavy cream: Makes the cheesecake part extra velvety and rich
Preparation Steps
- Preheat and Prep:
- Turn your oven to three hundred fifty degrees Fahrenheit and put parchment in an eight inch square pan letting the paper hang over the sides for easy removal later
- Melt Chocolate and Butter:
- Put butter and chocolate in a bowl that can go in the microwave heat in thirty second bursts stirring after each until everything looks shiny and smooth then cool it down a bit
- Combine Sugars and Eggs:
- Dump both sugars into your slightly cooled chocolate mix and stir until it looks glossy then add eggs one by one mixing well after each addition
- Mix Dry Ingredients:
- Shake the flour and cocoa straight into your bowl through a sieve then fold everything together with a rubber spatula until you can't see any dry spots then mix in the vanilla
- Prepare Brownie Base:
- Dump the brownie mix into your paper lined pan and spread it out evenly to all edges using a flat spatula
- Make Cheesecake Batter:
- In another bowl beat the room temperature cream cheese with sugar until it's really smooth add your egg heavy cream and vanilla then mix until it's thick and creamy
- Layer and Swirl:
- Pour the cream cheese mixture over the brownie layer then grab a knife or wooden stick to make swirly patterns by dragging through both layers
- Bake:
- Stick the pan in your hot oven and bake around thirty five to forty minutes until the sides look set but the middle still jiggles a tiny bit for super fudgy results take it out when a toothpick comes out with some thick sticky crumbs
- Cool and Chill:
- Let everything cool down at room temp then stick it in your fridge for at least two hours or overnight which helps everything firm up so you can cut nice clean pieces
- Slice and Serve:
- Pull the whole thing out by grabbing the paper edges cut into squares with a knife dipped in hot water serve cold and if you want drizzle some melted chocolate on top or add fresh fruit and whipped cream
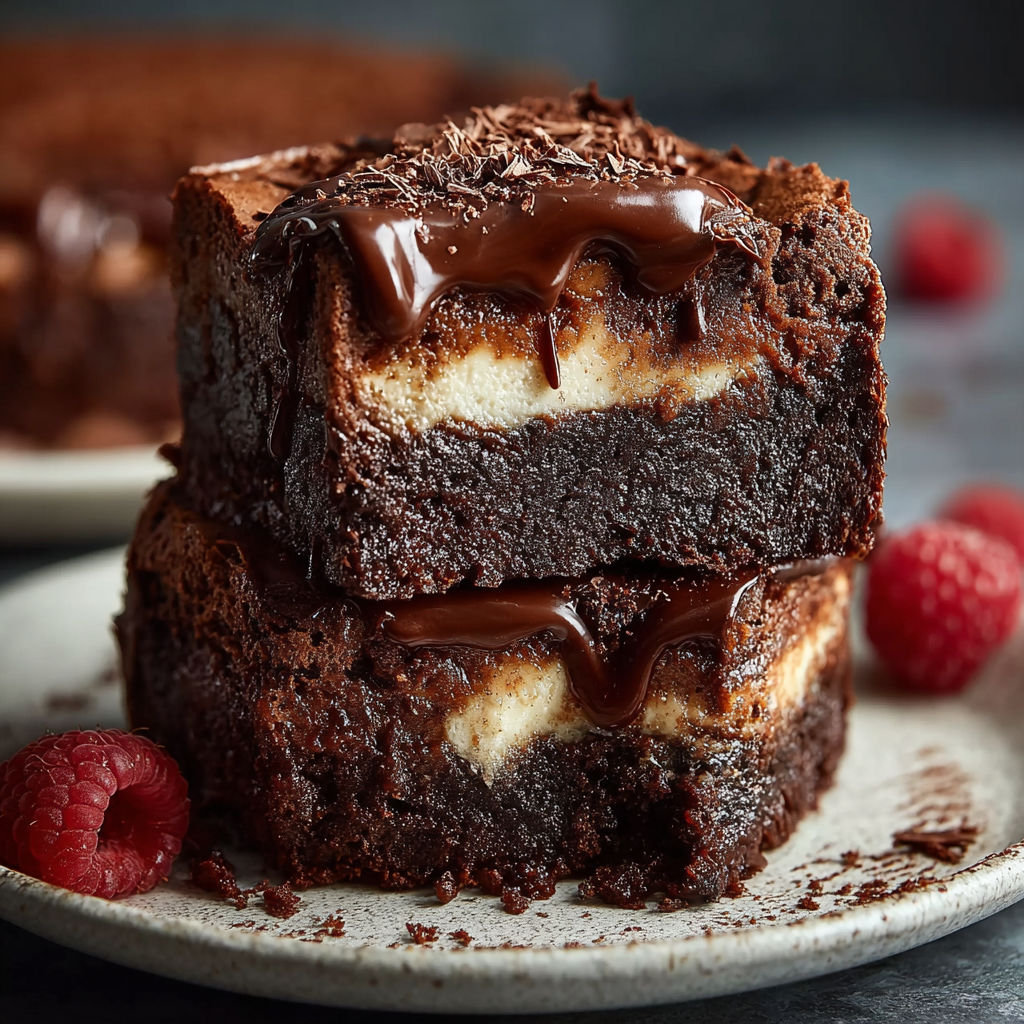
I absolutely love that middle section where the brownie meets cheesecake in one amazing bite and my kid still talks about trying those corner pieces with extra crunchy chocolate edges. Sometimes I actually make extra batter just to get more of those crispy end bits.
Tasty Add-ins
During cold months try adding a dash of cinnamon or coffee powder to the chocolate mix for extra warmth. When spring comes mix some crushed raspberries into the cream cheese part. For Christmas parties toss some crushed candy canes or festive sprinkles on top before baking.
Ways to Serve
Enjoy these cold right from the fridge for the cleanest cuts. They taste amazing with some fresh berries or a spoonful of whipped cream. For fancy events cut circles using a cookie cutter and add chocolate drizzle. You can even use leftover squares as the bottom layer of an ice cream treat.
Smart Substitutions
Don't have dark chocolate? Regular semisweet chips work just fine. Need a gluten free option? Just swap in your favorite cup-for-cup gluten free flour mix. For dairy issues, try vegan cream cheese and plant butter alternatives. Want less sweetness? Cut back sugar by about a fourth cup without messing up the texture too badly.
Whenever I bring this treat to any gathering it vanishes almost instantly. You'll be amazed how simple it is to create those stunning swirls that look totally professional, with classic flavors packed into every bite.
Common Questions About This Recipe
- → How do I achieve a fudgy brownie layer?
To get that gooey texture, take the brownie base out of the oven when it's still a bit soft, then add your cheesecake mixture on top and don't stir your batter too much.
- → Can I customize the flavor of this cake?
Absolutely, try adding some coffee powder or orange zest to your brownie mix, or swirl in some peanut butter, caramel, or mashed raspberries before you bake it.
- → What's the best way to slice it cleanly?
Make sure your cake sits in the fridge for at least 2 hours. Grab a sharp knife and wipe it off between each cut you make.
- → Is it possible to make this gluten-free or dairy-free?
Sure thing, just swap regular flour with a gluten-free mix and use dairy-free chocolate, plant-based butter, and non-dairy cream cheese for your alternative version.
- → How should I store leftovers?
Put any extras in a covered container in your fridge and they'll stay good for about 5 days. Want to keep them longer? Wrap them up tight and stick them in the freezer for up to a month.
- → What toppings go well with this cake?
Pour some melted chocolate over it, add a dollop of whipped cream, or scatter some fresh berries on top to make it look and taste even better.