
 Pin
Pin
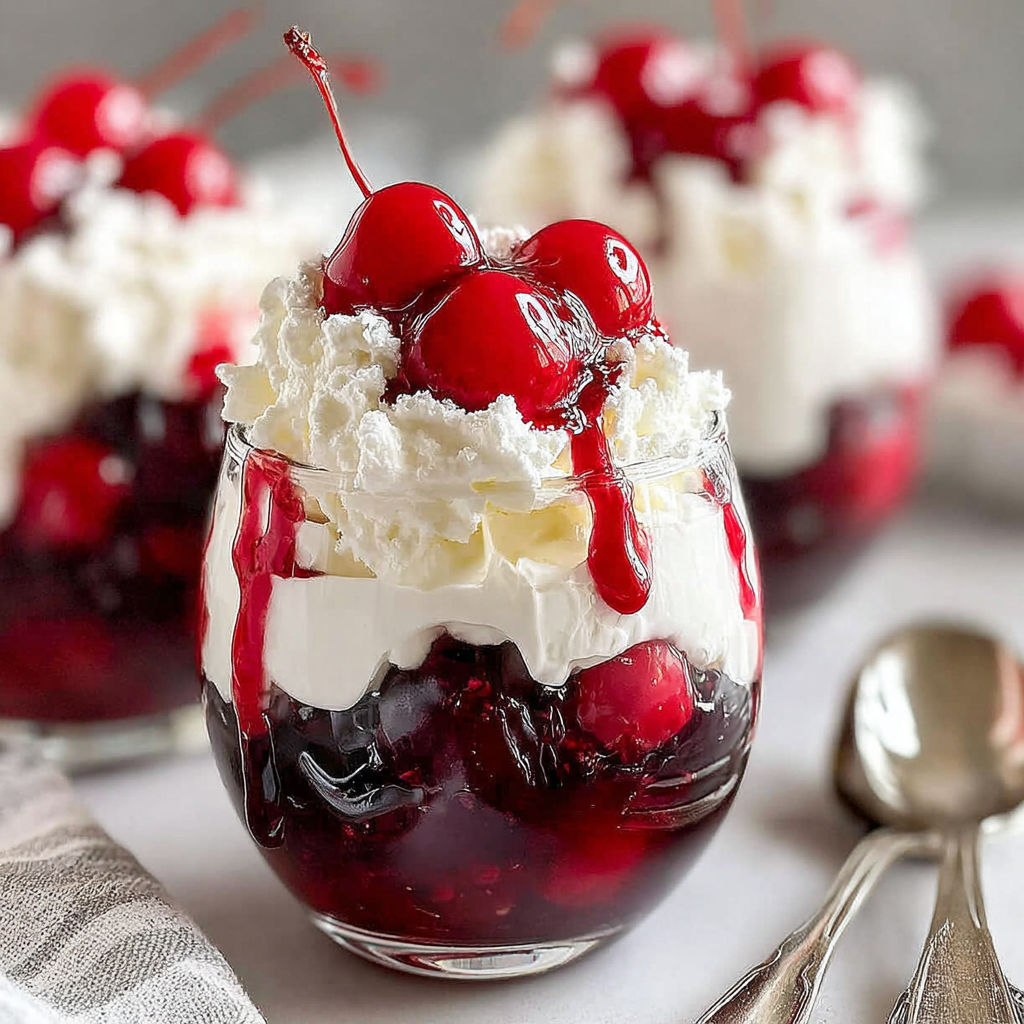
This cherries in the snow dessert turns even an ordinary evening into something special with its creamy layers, bursts of cherry flavor, and fluffy cake. If you need an easy make ahead treat that feels both nostalgic and showstopping, this recipe delivers all that and more in under 40 minutes from start to finish. The minimal prep time and budget friendly ingredients make it perfect for potlucks, family gatherings, holidays, or whenever you want a refreshing decadent dessert to finish your meal with a flourish.
I still remember the first time I made cherries in the snow dessert for my book club; it looked so festive piled high with juicy cherries and the creamy swirl underneath. Everyone raved about its bright cherry flavor and not a single serving remained by the time coffee was poured. Since then, friends and family ask for it by name at summer parties and winter holidays alike, enjoying its creamy richness and light texture every single time.
Gather Your Ingredients
- Full fat cream cheese: Brings rich creaminess and a tangy bite that balances sweetness. Always let cream cheese soften fully at room temperature before mixing for a silky smooth result, or substitute dairy free cream cheese for allergies.
- Powdered sugar: Sweetens the dessert and dissolves quickly for a velvety filling. If needed, blend regular sugar in a blender as a quick substitute.
- Prepared whipped topping (such as Cool Whip): Provides the signature light, airy texture. You can use homemade sweetened whipped cream as a classic alternative to keep it old fashioned.
- Pound cake or angel food cake: Supplies the dessert's fluffy, chewy base. Choose store bought for convenience, or bake your own for richer flavor. Use gluten free loaf if needed for dietary needs.
- Cherry pie filling: Lends vibrant color and sweet, fruity flavor. Pick a high quality brand with lots of whole cherries for the best look. Substitute blueberry, raspberry, or homemade fruit topping for seasonal twists.
- Pure vanilla extract: Adds warmth and rounds out the creamy layer. Real vanilla yields a deeper, more complex flavor; try lemon or almond extract for unique variations.
How to Make Cherries in the Snow Dessert
- Soften and Beat the Cream Cheese for Fluffy Layers:
- Leave cream cheese out at room temperature for at least 30 minutes to fully soften. Place in a large mixing bowl and beat using an electric mixer on medium for 2 to 3 minutes until creamy and smooth, with no lumps. This step is crucial to avoid gritty texture and ensures the creamy base is light and even.
- Mix in Sugar and Vanilla for Sweetness:
- Add powdered sugar and pure vanilla extract to the cream cheese while still in the bowl. Beat again until the mixture becomes light, creamy, and smooth, scraping down the bowl to incorporate every bit. Taste for sweetness and adjust as needed for your preference.
- Fold in Whipped Topping for Lightness:
- Gently fold thawed whipped topping into the cream cheese mixture using a spatula with slow, deliberate strokes. Blend until combined and no streaks remain, but avoid overmixing to keep the filling airy and luscious.
- Layer Cake Cubes for Structure:
- Slice pound cake or angel food cake into evenly sized, bite sized cubes. Arrange half in the bottom of a 9 by 13 inch baking dish or a clear trifle bowl. The cake forms an even, stable base for the creamy layers and absorbs just enough moisture for the perfect bite.
- Spread Half of the Creamy Mixture:
- Spoon half of the cream cheese and whipped topping mixture over the cake cubes. Use a spatula or spoon to evenly cover the cake, taking it all the way to the edges for clean layers.
- Add Cherry Pie Filling for Juicy Contrast:
- Spoon half of the cherry pie filling over the creamy layer. Distribute cherries evenly so every scoop will be full of fruit. If cherries are clumped, gently separate with a fork for better coverage and attractive presentation.
- Repeat Layers for Height and Drama:
- Layer the remaining cake cubes, then spread on the rest of the cream cheese blend. Top with the final cherry pie filling, swirling gently with a knife for a marbled, glossy finish.
- Chill then Serve for Best Texture:
- Refrigerate the dessert for at least 2 hours before serving, allowing flavors to meld and layers to set for tidy scooping. For parties, prepare a day ahead and cover tightly. Slice into generous squares or scoop into bowls, and garnish with extra whipped topping or fresh cherries if desired.

You can always find me sneaking a spoonful as soon as the creamy cherry layers set in the fridge. A splash of almond extract in the filling makes it taste exactly like cherry cheesecake, and for family holidays we use a glass trifle bowl so the kids can layer and swirl the dessert themselves. Those moments turning a simple recipe into a memory are the sweetest of all.
Smart Swaps and Variations
Cherries in the snow dessert is one of the most adaptable recipes for all kinds of tastes, allergies, and seasonal changes. Try homemade whipped cream for a richer old school base, or go lighter with low fat cream cheese and whipped topping. Swap in your favorite gluten free cake or use lemon pound cake for a fun spring twist. Blueberry or raspberry pie filling are fantastic substitutes, and you can even make this vegan by choosing dairy free cream cheese and coconut whipped topping for a dreamy, entirely plant based version.
How to Store and Reheat Cherries in the Snow Dessert
Properly storing your cherries in the snow dessert guarantees it remains moist, delicious, and ready whenever you crave something sweet. Immediately transfer leftovers to an airtight container to prevent the cake from drying out. Store in the coldest section of your fridge and enjoy within four days for peak texture and flavor. For make ahead ease, layer the dessert and cover tightly, but wait to add the top layer of cherries until serving day for best color. To freeze, portion into freezer safe containers and enjoy within one month. Always thaw overnight in the fridge and serve chilled, or let rest at room temperature for fifteen minutes for a slightly softer texture.
What to Serve with Cherries in the Snow Dessert
This dessert is perfectly matched with coffee drinks, sparkling wine, or a cold glass of milk. I like to serve it after a light main course, such as grilled chicken or a fresh green salad, allowing the cherry and cream flavors to shine. For special occasions, layer in parfait glasses with a spring of mint or extra fruit for a showstopping finish to any celebration.
Nutritional Benefits
Cherries in the snow dessert manages to be both decadent and flexible enough for many balanced eating plans. Every serving delivers a moderate boost of protein from the cream cheese, healthy fats, and quick energy carbohydrates. Real cherries also offer a dose of vitamin C and antioxidants, while the recipe remains nut free and can be easily adjusted for gluten or dairy free diets by swapping just a few ingredients.
Recipe Success Tips
Great results with cherries in the snow dessert come from just a few simple tweaks and solutions. If your cream cheese layer is too soft, let it chill briefly before assembling to help it set firm. For clean, defined servings, slice with a hot wet knife after thoroughly chilling. If the cherry layer looks thin or watery, drain some syrup or add extra berries for the ideal consistency. In a rush, assemble in smaller dishes for parfaits, which set faster and make a stunning presentation.
With its pillowy creaminess and vibrant cherry flavor, cherries in the snow dessert turns any gathering into a celebration. Whether it is your first time or a family tradition, this simple recipe is a guaranteed crowd pleaser you will want to return to again and again.
Common Questions About This Recipe
- → What type of cake works best for this dessert?
Pound cake and angel food cake both work well, providing a soft yet sturdy base for the creamy layers.
- → Can I use homemade whipped cream instead of whipped topping?
Yes, homemade whipped cream can be substituted for a fresher flavor and lighter texture.
- → Is it possible to prepare this dessert in advance?
This dessert is ideal for preparing ahead and chilling, making it perfect for entertaining.
- → What other fruit toppings complement this dessert?
Strawberry or blueberry pie filling can add a twist to the flavor, pairing well with the creamy base.
- → How do I serve and store leftovers?
Serve chilled, cutting into squares or spooning into bowls, and store leftovers covered in the refrigerator.