
 Pin
Pin
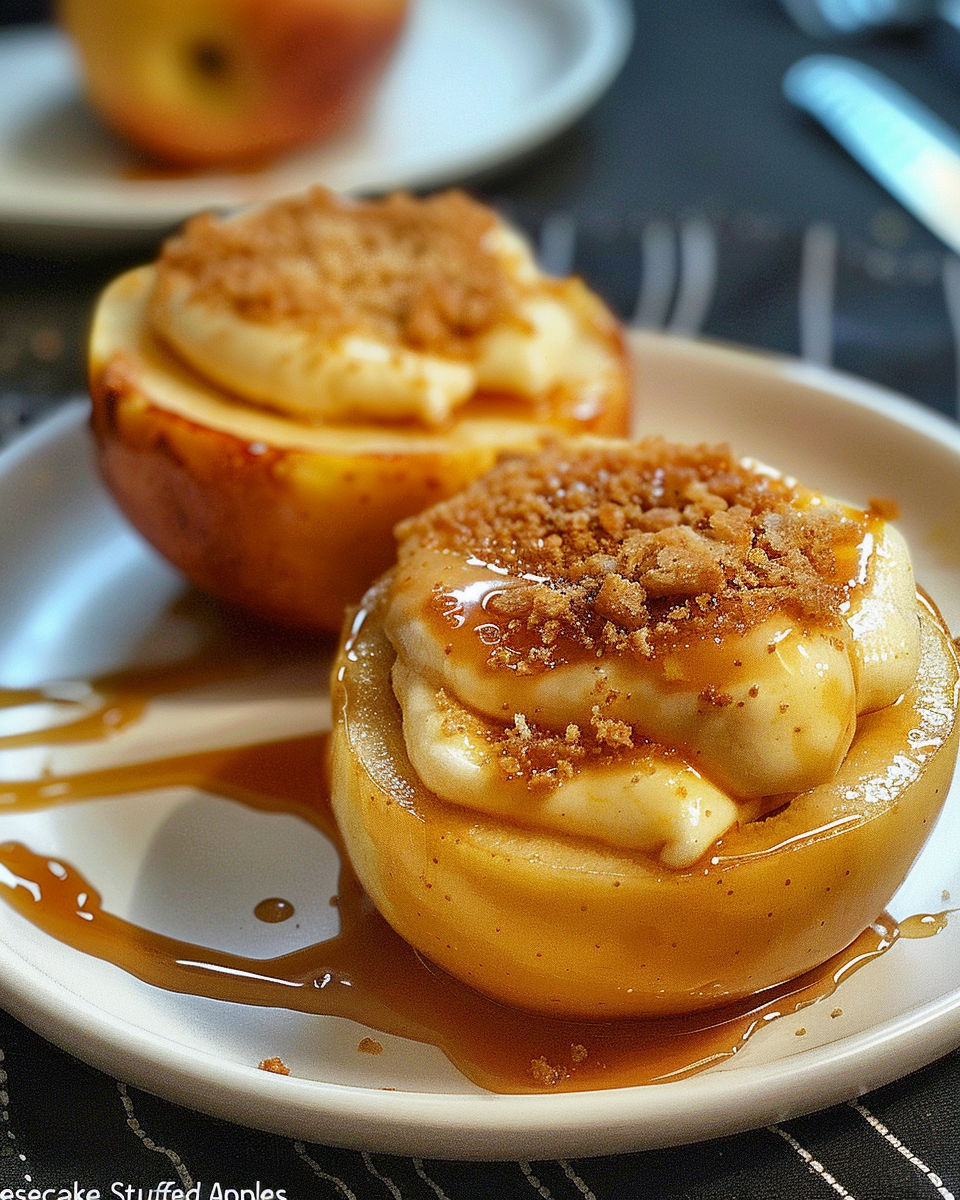
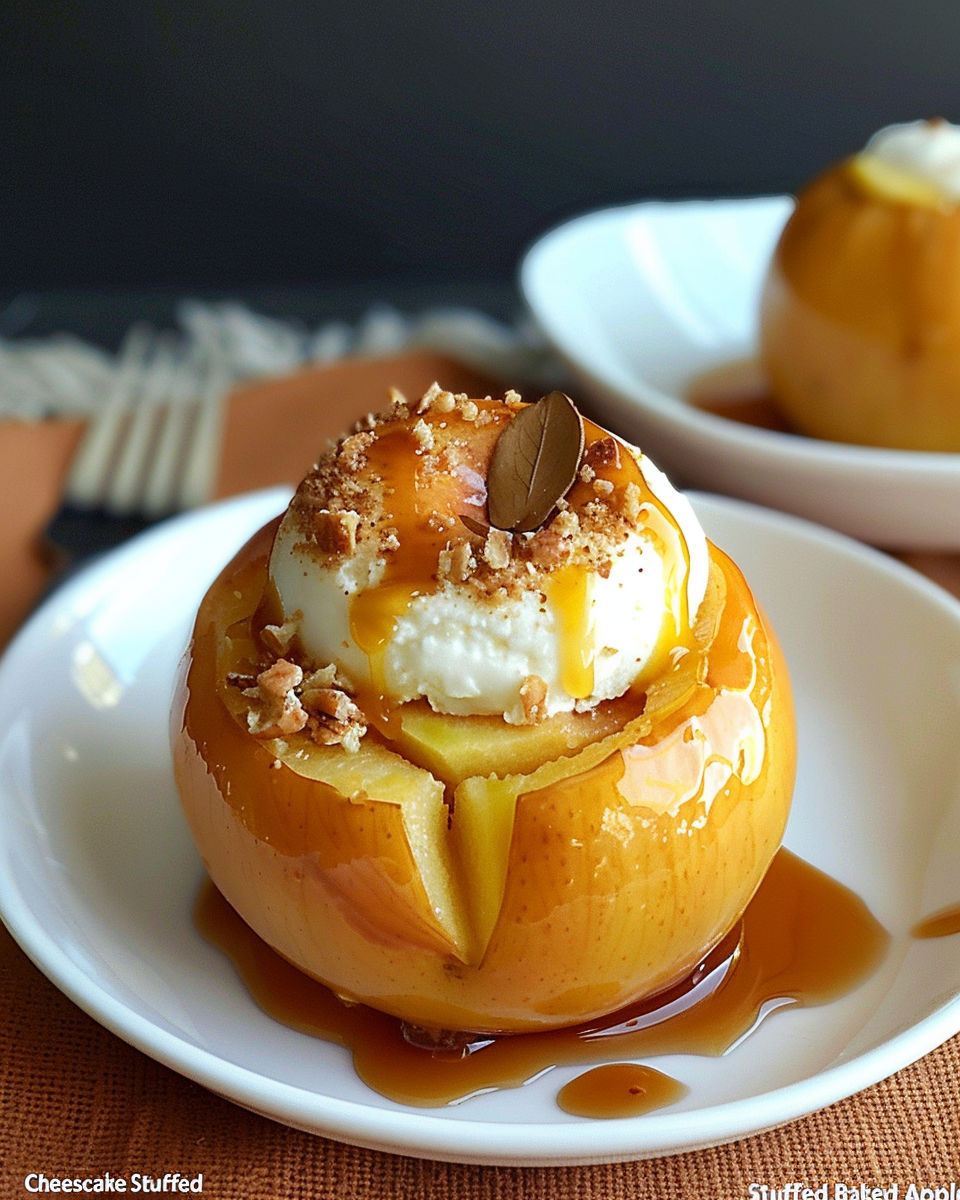
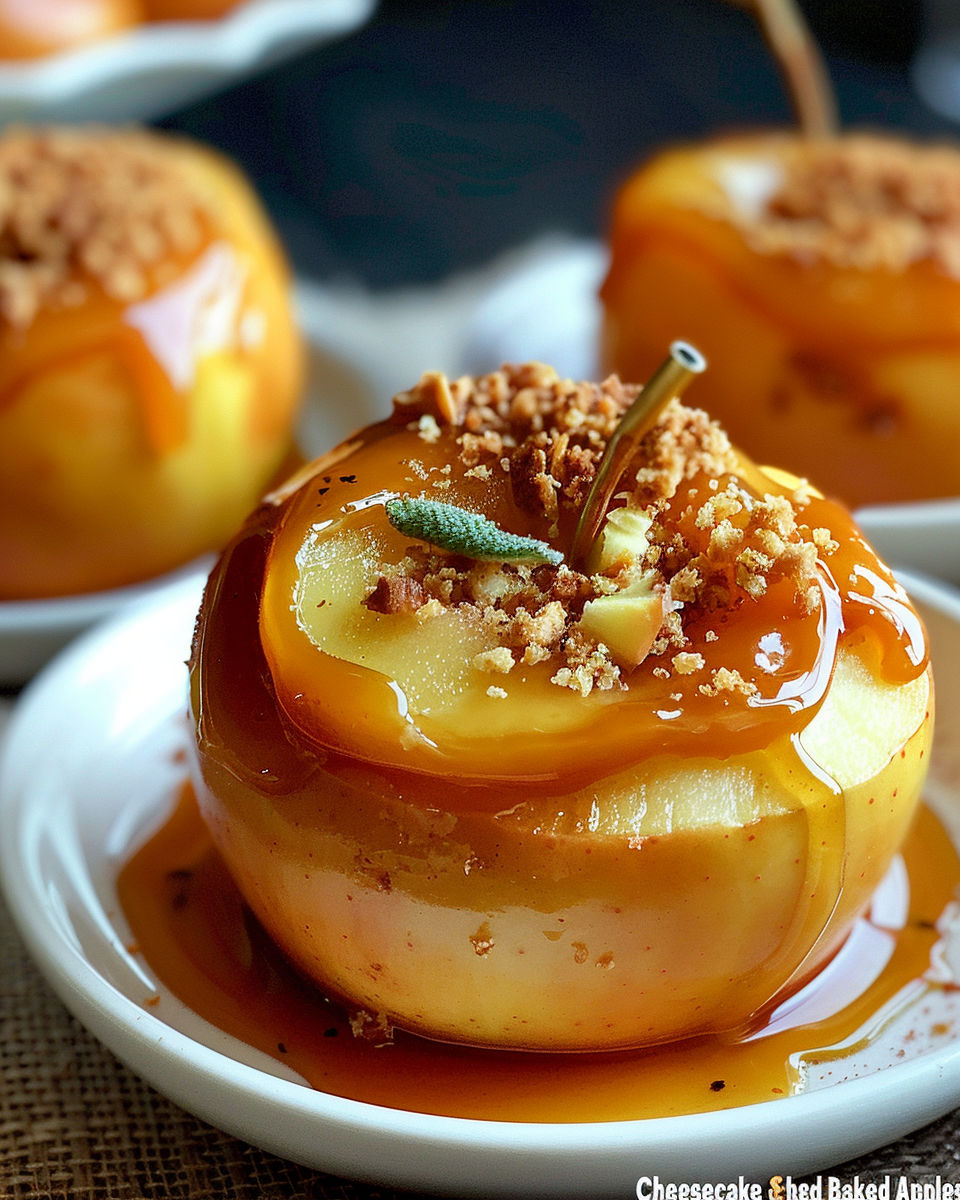
This cheesecake stuffed baked apples recipe has completely changed my fall dessert game with its easy preparation and irresistible flavor. Featuring creamy cheesecake filling inside tender, perfectly baked apples, this cozy treat is ready in just under an hour from start to finish. Whether you need an impressive dessert for guests or a simple weeknight sweet, you only need 15 minutes of hands on prep time plus 30 to 45 minutes of baking to enjoy this crowd pleaser packed with nostalgic fall flavor.
I first dreamed up this cheesecake stuffed baked apples recipe on a chilly autumn evening when I wanted a dessert warmer and creamier than pie that my kids would love. After the first batch filled our kitchen with the scent of cinnamon apples and creamy cheesecake, it quickly became our family's favorite go to dessert for fall gatherings. Now, every time we smell this baking, it signals the start of apple season and cozy moments around the table together.
Gather Your Ingredients
- Large baking apples such as Honeycrisp or Fuji: These apples hold their shape beautifully and become ultra tender while baking, giving the best texture for stuffing. Select firm apples with unblemished skin for best results; you can also substitute Granny Smith for a tarter flavor.
- Full fat cream cheese: Cream cheese softened at room temperature creates a rich, classic cheesecake filling. For a lighter version, low fat cream cheese can be used, but the texture will be slightly less luxurious.
- Powdered sugar: This dissolves easily into the cheesecake filling, creating a silky mouthfeel. Do not substitute granulated sugar, as it can cause a gritty texture.
- Pure vanilla extract: Adds essential warm flavor and enhances the bakery fresh taste. Opt for real vanilla for best results, or almond extract for a subtle twist.
- Ground cinnamon: Provides cozy spice notes that elevate the aroma and sweetness of the apples. Freshly ground cinnamon delivers the most robust flavor.
- Graham cracker crumbs: Mimic classic cheesecake crust with a buttery crunch on top. Gluten free graham crackers or crushed vanilla wafers work for dietary needs or flavor variation.
- Melted unsalted butter: Binds the crumbs for the topping, helping it bake up golden and crisp. Plant based butter or a pinch of sea salt for sweet and salty flavor are optional substitutions.
How to Make Cheesecake Stuffed Baked Apples
- Preheat the Oven to Build a Crispy Crust:
- Set your oven rack to the center position and preheat to 375°F. Lightly grease a baking dish large enough to hold all the apples without them touching. This ensures even baking and a crisp crumb topping, while preventing sticking as the apples soften.
- Core and Hollow the Apples for Perfect Filling:
- Use a sharp knife to slice off the top half inch of each apple. With a sturdy spoon or melon baller, scoop out the core and some extra flesh, leaving about a half inch border on the sides and bottom. This step prevents the filling from leaking and guarantees each apple base remains sturdy during baking.
- Whip the Cheesecake Filling Until Creamy:
- In a medium bowl, beat softened cream cheese, powdered sugar, vanilla extract, and cinnamon together with an electric mixer or spatula until completely smooth and fluffy. Creaminess is key for a professional bakery texture, so take your time and mix until no lumps remain.
- Stuff the Apples Generously:
- Fill each hollowed apple with a generous scoop of cheesecake mixture, pressing it gently to eliminate air pockets and smoothing the top. Even layers help the filling bake up evenly and look appetizing when served.
- Add Graham Cracker Crumb Topping for Crunch:
- Mix graham cracker crumbs with the melted butter in a small bowl until the mixture resembles damp sand. Sprinkle this evenly over the cheesecake filling in each apple, patting gently so it sticks. The topping bakes up crisp and golden, supplying a classic cheesecake crunch.
- Bake Until Apples Are Tender and Filling is Set:
- Arrange stuffed apples in the baking dish. Cover loosely with foil for the first 20 minutes to help the apples steam gently and keep from drying. Then, uncover and bake another 10 to 25 minutes, until the apples are fork tender, filling is puffed, and topping is golden. Check for doneness starting at 30 minutes, as bake times vary by apple size and type.
- Cool and Serve for Best Texture:
- Let baked apples cool in the dish for at least 10 minutes. This allows the cheesecake center to finish setting and ensures easier slicing or serving. Garnish with whipped cream and a sprinkle of cinnamon sugar for a stunning final touch.
One time, I tried to save a few minutes by scooping too much out of the apples, but ended up with leaky bottoms and filling everywhere. Now, I always leave a sturdy base and use the extra apple scoops in oatmeal or muffins for less waste. My favorite discovery is adding lemon zest to the cheesecake filling, which brings a pop of bright flavor and elevates the entire dessert.
Smart Swaps and Variations
This cheesecake stuffed baked apples recipe is easy to customize for dietary preferences or simply to keep things interesting. Substitute graham crackers with gluten free cookies, oat based crumbs, or almond meal for a gluten free crust that still delivers crunch. For dairy free guests, try coconut based or vegan cream cheese, and mix half with Greek yogurt to lighten the filling while achieving a creamy result. You can even swap in ripe Bosc pears for apples, or use ginger cookie or vanilla wafer crumbs for a holiday twist, and add toasted nuts for extra texture and nutty flavor balance.
How to Store and Reheat Cheesecake Stuffed Baked Apples
To store leftovers, allow baked apples to cool completely before transferring to an airtight container. Refrigerate for up to three days for best flavor and texture. If you want to keep them longer, wrap each apple tightly and freeze for up to two months. When ready to enjoy, reheat individual portions in the microwave for 30 seconds or in a 300°F oven for about 10 minutes to refresh the crumb topping and cheesecake center. Making these a day ahead also allows the flavors to develop even more and saves time before gatherings.
What to Serve with Cheesecake Stuffed Baked Apples
When serving cheesecake stuffed baked apples for a special occasion, arrange them on a serving platter and drizzle with caramel sauce for added elegance. Pair with a scoop of vanilla or cinnamon ice cream for extra decadence, or serve with a mug of hot spiced cider for the ultimate fall comfort. For a lighter or brunch style dessert, top with Greek yogurt, a drizzle of honey, or toasted granola to add a wholesome crunch that balances the creamy filling.
Nutritional Benefits
Each cheesecake stuffed baked apple blends wholesome fruit and a creamy filling, providing a dessert that is both satisfying and lighter in sugar than traditional cheesecake. Apples deliver fiber, vitamin C, and powerful antioxidants that support heart and digestive health. The cream cheese filling brings protein to help you feel fuller longer and calcium for bone health, while the whole dessert is lower in total sugar and can be easily modified for gluten free or dairy free diets. At around 430 calories per serving, it fits into a well balanced meal plan for fall and winter treats.
Recipe Success Tips
For best results, leave apple walls about a half inch thick so the cheesecake filling stays contained during baking. Avoid overfilling, as too much filling can spill out or cause the apples to tip in the oven. Bake on the center rack and keep an eye out for excess liquid at the bottom of the dish—carefully spoon it out halfway through so the apples roast instead of steam, preserving the crumb topping's crunch and the apple's texture.
This cheesecake stuffed baked apples recipe brings bakery style comfort and irresistible autumn flavor to your kitchen in under an hour. I hope it becomes your new favorite fall dessert for both weeknights and special occasions—try your own twist and share which version you love most.
Common Questions About This Recipe
- → What type of apples works best?
Firm apples like Honeycrisp or Fuji hold their shape well when baked and offer a balanced sweet-tart flavor.
- → Can I prepare these in advance?
Yes, you can assemble the apples and refrigerate before baking. Bake just before serving for best results.
- → Is the filling customizable?
Absolutely! Try adding chopped nuts, mini chocolate chips, or a swirl of salted caramel for variety.
- → What toppings pair well?
Whipped cream, a drizzle of caramel sauce, or vanilla ice cream all complement the warm, creamy apples.
- → How do I prevent apples from breaking during preparation?
Use a spoon or melon baller gently, leaving the bottom intact to hold the filling securely while baking.