
 Pin
Pin
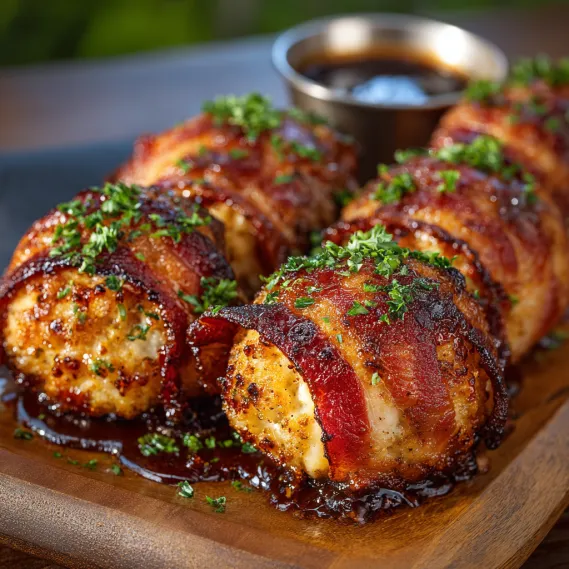
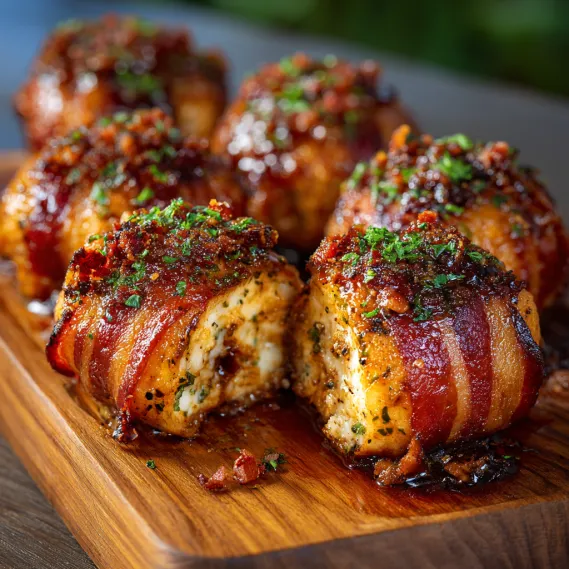
This hearty Cheddar-Stuffed BBQ Bacon Bombs recipe has become my weekend warrior when I need to impress guests without spending hours in the kitchen. The combination of juicy beef, melty cheese centers, and crispy bacon wrapping creates an irresistible bite that disappears from platters almost instantly.
I first created these bacon bombs for a last-minute Super Bowl gathering when I needed something substantial but easy. They were such a hit that friends now request them specifically whenever we get together for casual entertaining.
Ingredients
- Ground beef: The foundation of our bombs, choose 80/20 lean-to-fat ratio for best flavor and juiciness
- Cheddar cheese: Opt for sharp or extra sharp for more pronounced flavor that stands up to the beef and bacon
- Bacon: Select medium thickness slices that will crisp nicely without burning
- Breadcrumbs: Helps bind the meat mixture while keeping it tender
- BBQ sauce: Adds smoky sweetness, choose your favorite style from tangy to sweet
- Garlic powder: Provides essential savory notes throughout the meat mixture
- Onion powder: Adds depth without the texture of fresh onions
- Salt and pepper: Basic but crucial seasonings that enhance all other flavors
Step-by-Step Instructions
- Prepare Your Heat Source:
- Preheat your oven to 400°F or prepare your grill for medium heat cooking. Proper preheating ensures even cooking and helps the bacon crisp beautifully.
- Create The Meat Mixture:
- Combine ground beef, breadcrumbs, BBQ sauce, and all seasonings in a mixing bowl. Use your hands to thoroughly incorporate everything, ensuring the seasonings are evenly distributed throughout the meat.
- Form The Bombs:
- Take approximately 2 ounces of the beef mixture and flatten it in your palm to create a disc shape about 1/4 inch thick. Place a cube of cheddar cheese directly in the center of the meat disc.
- Seal The Cheese:
- Carefully fold the edges of the beef mixture up and around the cheese cube, making sure to completely encase the cheese. Seal all seams by pinching them together and roll between your palms to form a perfect ball.
- Add The Bacon Wrap:
- Take a slice of bacon and wrap it around each beef ball, stretching it slightly as you wrap to ensure full coverage. The bacon ends should overlap slightly, and you can secure with a toothpick if needed.
- Arrange For Cooking:
- Place the wrapped bacon bombs on a parchment-lined baking sheet with at least an inch of space between each one to allow for proper air circulation and even cooking.
- Cook To Perfection:
- Bake for 20-25 minutes until the bacon becomes crispy and caramelized. The internal temperature should reach 160°F to ensure the beef is fully cooked while the cheese inside becomes gloriously molten.
- Rest Before Serving:
- Allow the bombs to rest for 3-5 minutes after removing from the oven. This helps the juices redistribute and the cheese to set slightly so it doesn't immediately run out when bitten into.
My absolute favorite moment with these bacon bombs was watching my cheese-skeptical nephew take his first bite. His eyes widened as the molten cheddar center revealed itself, and he proceeded to eat four in one sitting. Sometimes the most powerful food memories come from seeing others discover new favorites.
Make-Ahead Magic
These bacon bombs shine as a make-ahead option. You can prepare them up to 24 hours in advance and keep them covered in the refrigerator until ready to cook. This makes them perfect for entertaining when you want to enjoy your guests instead of being stuck in the kitchen. The flavors actually develop nicely with a bit of time, creating an even more delicious final result.
Flavor Variations
While the classic cheddar filling is amazing, this recipe welcomes creative adaptations. Try pepper jack for a spicy kick, smoked gouda for complexity, or blue cheese for bold flavor lovers. You can also experiment with the seasoning blend in the meat mixture by adding smoked paprika, cayenne pepper, or even a splash of Worcestershire sauce for deeper umami notes.
Serving Suggestions
These bombs work beautifully as a standalone appetizer with toothpicks for easy grabbing, but they also make a satisfying main dish. Serve them alongside a crisp green salad to balance the richness, or nestle them on top of creamy mashed potatoes for an indulgent dinner option. For parties, I often create a dipping sauce station with extra BBQ sauce, ranch dressing, and spicy mayo.
Common Questions About This Recipe
- → What type of cheddar works best?
Choose a sharp or medium cheddar for a strong melt and bolder flavor profile. Block cheese cubed by hand melts better than pre-shredded varieties.
- → Can you prepare these bacon bombs in advance?
Shape and assemble the beef, cheese, and bacon balls ahead of time, then refrigerate until ready to bake or grill. This helps flavors meld and saves time before serving.
- → What’s the secret to crispy bacon wrapping?
Arrange the bacon-wrapped bombs on a rack or parchment and leave space between each to ensure even airflow. For extra crispiness, finish under the broiler briefly or grill directly over heat.
- → Are there cheese alternatives for filling?
Try pepper jack, gouda, or mozzarella for a twist on flavor and texture. Experimenting with different cheeses can add new depth to every bite.
- → How do you serve bacon bombs?
Serve warm as an appetizer with extra BBQ sauce for dipping, or make them the centerpiece of a main meal alongside simple sides like coleslaw or roasted veggies.