
 Pin
Pin
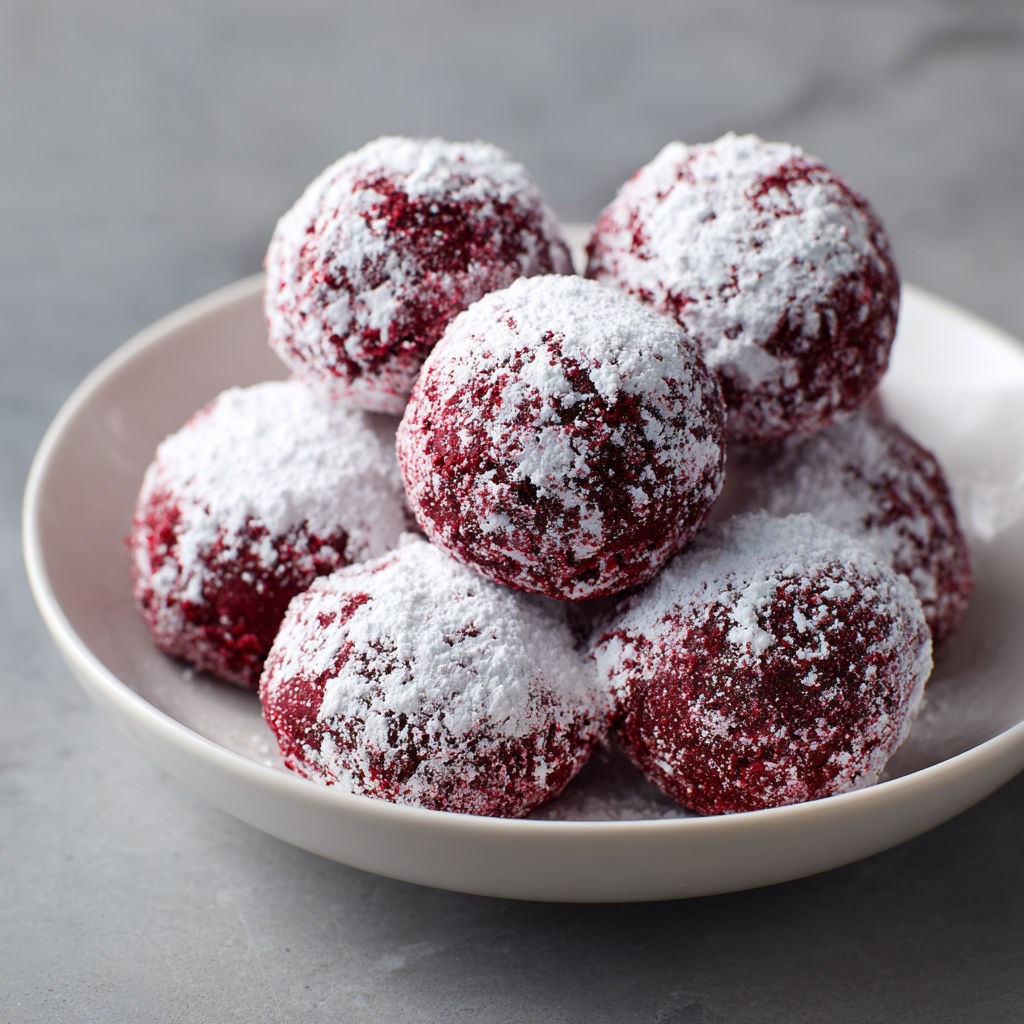
These decadent red velvet snowballs transform the classic red velvet cake flavor into bite sized treats that melt in your mouth with each bite. With a convenient cake mix base, creamy centers, and sweet powdered sugar coating, these festive cookies are ready in just 30 minutes of prep and 15 minutes of baking. Perfect for holiday gatherings or whenever you crave a special red velvet dessert that is truly impressive yet simple to prepare.
I first made these red velvet snowballs for a Christmas cookie exchange and needed something more eye catching than the usual treats. With their vivid red centers and snowy powdered sugar exterior, they stood out among a sea of classic cookies and quickly became the most requested dessert at every gathering. The tender texture and rich, creamy notes make these a lasting favorite in our holiday recipe lineup, and I've enjoyed tweaking them over the years for both flavor and presentation.
Gather Your Ingredients
- Red velvet cake mix (15.25 oz): Provides signature red color and classic cocoa flavor, ensure fresh mix for the brightest hue and can use gluten free mix if needed
- Unsalted butter (1/2 cup, softened): Adds richness and tender texture, bring fully to room temperature for smooth blending, can substitute plant based butter
- Cream cheese (4 oz, softened): Delivers tanginess and distinctive moist crumb, best results with brick style full fat, can use dairy free if required
- Large egg: Binds dough for a soft, chewy bite, always use at room temperature for best texture, or substitute with vegan egg replacer
- Vanilla extract (1 teaspoon): Boosts warm flavor notes and elevates aroma, use pure vanilla for best results but imitation works in a pinch
- Powdered sugar (2 cups plus extra for coating): Creates the essential snowball exterior and adds light sweetness, sift for extra smooth coating
- Pecans or walnuts (1/2 cup chopped, optional): Lends delightful crunch and flavor, toast for extra depth or swap for mini chocolate chips
- Red velvet cake crumbs or sprinkles (1/4 cup, optional): Adds colorful decorative finish, use leftover cake or festive sprinkles for visual appeal
How to Make Red Velvet Snowballs
- Prepare the Oven and Baking Sheets:
- Preheat your oven to 350°F and line baking sheets with parchment paper to prevent sticking and ensure quick cleanup. Allow about 10 minutes for the oven to preheat fully and set out your ingredients to soften.
- Cream the Butter and Cream Cheese:
- In a large mixing bowl, beat softened butter and cream cheese until completely smooth and fluffy, about 2 minutes at medium speed. Achieving a lump free mixture ensures even texture and prevents dense spots in the cookies.
- Create the Dough:
- Add red velvet cake mix, egg, and vanilla extract to the butter mixture and mix thoroughly until a thick, uniform red dough forms. The dough should be pliable yet not sticky, similar to classic sugar cookie dough, for easy shaping and rolling.
- Add Optional Mix Ins:
- Gently fold in chopped pecans, walnuts, or alternative mix ins until evenly distributed. This adds a satisfying textural contrast and can be tailored to preference with nuts, chocolate chips, or left plain for a classic snowball.
- Shape the Snowballs:
- Scoop dough into 1 inch balls, aiming for about 24 snowballs total, and roll gently between your hands for uniform size. Place each on the prepared baking sheet leaving 2 inches between for even heat distribution and minimal spreading.
- Bake to Perfection:
- Bake for 12 to 15 minutes until edges are set but centers still look slightly soft, indicating a moist, tender crumb. Look for a matte finish and keep a close eye in the final 2 minutes to prevent overbaking and preserve the cookies' signature softness.
- Cool Properly:
- Let snowballs cool on baking sheets for at least 5 minutes before transferring to a wire rack, which prevents breakage and helps set their shape. Allow to cool fully, about 30 minutes, before rolling in powdered sugar to achieve the snowy coating.
- Create the Snowball Effect:
- Generously roll each cooled cookie in powdered sugar until completely coated. For a bright white exterior, wait 5 minutes then repeat rolling in fresh powdered sugar. Optional: Decorate with red velvet cake crumbs or sprinkles for festive detail and color contrast.
- Store Properly:
- Place finished snowballs in an airtight container, using parchment paper between layers to maintain the coating and freshness. With the right container, the cookies will stay soft and snowy for up to 3 days at room temperature.
My grandmother always said the secret to these red velvet snowballs is patience while cooling the cookies before rolling them in sugar. When I rushed and rolled them warm, the coating just melted instead of turning snowy and beautiful. Now I always cool them completely and the powdered sugar stays pristine, creating that perfect festive finish every time for my family celebrations.
Smart Swaps and Variations
The adaptability of these red velvet snowballs makes them a go to choice for various dietary needs and special occasions. Substitute gluten free red velvet cake mix for a celiac friendly version, adding a quarter teaspoon xanthan gum if needed to help bind the dough. For flavor changes, try chocolate or vanilla cake mixes which pair wonderfully with cream cheese and yield different flavor profiles. To mimic a cream cheese frosting center, tuck a small cube of cream cheese inside each dough ball for a delightful filling that echoes classic cake and frosting in one bite.
How to Store and Reheat Red Velvet Snowballs
For best freshness and presentation, store red velvet snowballs in an airtight container at room temperature, layering with parchment paper to preserve the powdered sugar coating and protect from moisture. They maintain top quality for up to 3 days this way. To extend their shelf life, refrigerate for up to 7 days, and bring to room temperature before serving to restore a melt in your mouth texture. For long term storage, freeze the cookies in single layers, then transfer to a freezer safe container with parchment between layers; they keep well for up to 3 months. Thaw at room temperature and re roll in powdered sugar just before serving for that just baked finish.
What to Serve with Red Velvet Snowballs
These lovely red velvet snowballs are a festive highlight on any dessert table and pair well with a variety of sweet drinks and treats. Serve them with a glass of cold milk for a classic combination, or offer with hot chocolate topped with whipped cream for a cozy winter treat. For a sophisticated touch at adult gatherings, pour a splash of coffee liqueur or a sweet dessert wine to complement the cookie’s rich, chocolatey flavor. When entertaining, arrange the snowballs on a platter with contrasting cookies such as chocolate crinkles, green pistachio cookies, or buttery shortbread for a visually appealing and flavor rich dessert spread.
Nutritional Benefits
Although red velvet snowballs are a delightful indulgence, they offer some nutritional positives compared to larger desserts. With about 150 calories per cookie, these treats make portion control easy for mindful celebrating. Including nuts adds heart healthy fats and some protein, while cream cheese brings calcium and a bit of extra protein. For special diets, the recipe adapts easily to gluten free or egg free versions, ensuring there is an option for everyone without sacrificing taste or festive appeal.
Recipe Success Tips
To guarantee perfect snowballs every time, make sure all your ingredients are at room temperature before mixing the dough for maximum smoothness and binding. If your cookies spread too much while baking, chill the shaped balls for 15 minutes before baking to help them retain their rounded appearance. For a snowy white sugar coating that does not dissolve or become patchy, always coat the cookies after they have cooled completely—double rolling in powdered sugar ensures a pristine finish and eye catching presentation.

These red velvet snowballs bring festive color and irresistible red velvet flavor to every holiday gathering. Try them as your next show stopping cookie recipe and enjoy the compliments from friends and family.
Common Questions About This Recipe
- → Can I make red velvet snowballs ahead of time?
Yes, you can prepare red velvet snowballs in advance and store them in an airtight container at room temperature for up to 3 days. If the powdered sugar coating absorbs, simply recoat before serving.
- → Do I need to use nuts in the dough?
Nuts are optional in this cookie. Add chopped pecans or walnuts for extra texture and flavor, or skip them for a smoother bite.
- → How do I keep the snowballs soft?
Keep an eye on bake time—remove cookies when edges are set and centers are slightly soft. Overbaking will dry them out.
- → Can I freeze red velvet snowballs?
Yes, freeze baked cookies in a single layer, then transfer to a freezer bag. Thaw at room temperature and recoat with powdered sugar before serving.
- → What decorations work best for extra flair?
Try rolling the snowballs in more powdered sugar, then sprinkling red velvet crumbs, colored sprinkles, or edible glitter for a festive appearance.