
 Pin
Pin
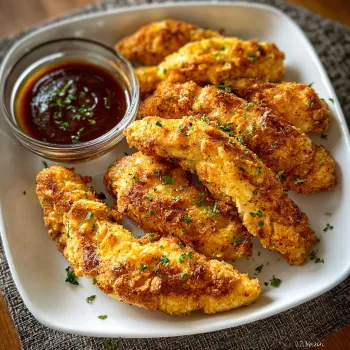
This flavorful Instant Pot chicken tenderloins recipe transforms ordinary chicken strips into a juicy, perfectly seasoned meal that's ready in minutes. I developed this recipe when searching for quick dinner solutions that would please both adults and picky eaters at my table.
I first created this recipe during a particularly hectic week when I needed reliable meals that wouldn't require constant attention. Now it's in our regular rotation because everyone from my toddler to my husband eagerly devours these tenders without complaint.
Ingredients
- Chicken tenderloins: 1 pound Fresh tenders cook more evenly but frozen work in a pinch with a time adjustment
- Olive oil: 1 tablespoon Helps seasonings adhere and prevents sticking in the pot
- Paprika: 1/2 teaspoon Adds mild flavor and beautiful color to the chicken
- Onion powder: 1/2 teaspoon Provides savory depth without the texture of actual onions
- Garlic powder: 1/2 teaspoon Infuses the chicken with aromatic flavor without burning like fresh garlic
- Sea salt: 1/2 teaspoon Enhances all the flavors look for fine sea salt for even distribution
- Black pepper: 1/4 teaspoon Adds gentle heat and complexity
- Chicken broth: 1 cup Creates steam for pressure cooking and adds flavor choose low sodium if watching salt intake
Step-by-Step Instructions
- Prepare the Pot:
- Add half tablespoon olive oil to your Instant Pot and press the sauté function. Allow the pot to heat up which usually takes about 2 minutes until the display reads HOT. This preheating step ensures your chicken will sear properly rather than steam.
- Season the Chicken:
- While the pot heats brush the remaining half tablespoon of oil over all sides of your chicken tenderloins. Mix all the seasonings in a shallow dish until well combined. Gently press each chicken tenderloin into the seasoning mixture ensuring all surfaces are coated evenly. The oil helps the seasonings stick to the meat for maximum flavor.
- Sear the Chicken:
- Once the pot is hot place the seasoned tenderloins in a single layer in the pot. Work in batches if needed to avoid overcrowding. Sear for exactly 1 to 2 minutes per side until you see a light golden color developing. This step locks in moisture and creates flavor compounds that will distribute throughout the chicken during pressure cooking.
- Prepare for Pressure Cooking:
- Remove the seared tenders using tongs and set aside temporarily. Pour the chicken broth into the pot and use a wooden spoon to scrape up any browned bits from the bottom. These flavor bits dissolve into the cooking liquid adding depth to your finished dish. Place the metal trivet in the pot with handles facing up then arrange the seared chicken tenders on top of the trivet.
- Pressure Cook:
- Cancel the sauté function and set the Instant Pot to high pressure for 5 minutes. Close and seal the lid ensuring the pressure valve is in the sealing position. The pot will take approximately 5 minutes to come to pressure before the cooking countdown begins.
- Release and Serve:
- After cooking completes allow the pressure to naturally release for exactly 3 minutes. This resting period allows the chicken fibers to relax and reabsorb juices. After 3 minutes perform a quick release by carefully turning the pressure valve to venting. Once pressure is fully released open the lid and remove your perfectly cooked chicken tenders.
The trivet is my secret weapon in this recipe. I discovered that elevating the chicken above the liquid rather than submerging it creates a texture thats somewhere between steamed and roasted resulting in incredibly juicy meat that isnt waterlogged. My daughter actually noticed the difference the first time I used this method and declared them the best chicken tenders ever.
Storage and Meal Prep
These chicken tenders maintain their juiciness wonderfully when refrigerated in an airtight container for up to 4 days. I often make a double batch on Sunday for easy protein throughout the week. For longer storage freeze the cooled tenders on a baking sheet until solid then transfer to freezer bags where they'll keep for 2 months. Reheat refrigerated tenders in the microwave for 1 minute or in a 350°F oven for 8 minutes until warmed through. Frozen tenders can go straight into a 375°F oven for about 15 minutes.
Easy Variations
While I love the classic seasoning blend there are endless ways to customize these tenders. Try Italian seasoning with a sprinkle of parmesan for an Italian twist. For Tex Mex flavor substitute the paprika with chili powder and add cumin and oregano. Asian inspired tenders benefit from five spice powder ginger and garlic. The beauty of this cooking method is that it works with virtually any seasoning combination making it infinitely adaptable to your family's preferences.
Serving Suggestions
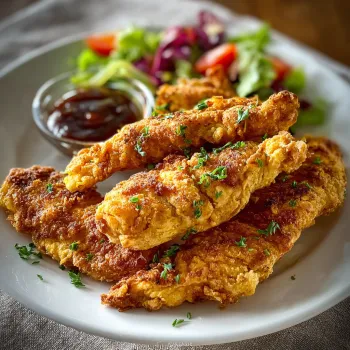
These versatile chicken tenders work beautifully in numerous meal settings. Serve them traditionally with honey mustard BBQ sauce or ranch dressing for dipping. Slice them to top salads for a protein boost without the need for additional cooking. They make excellent sandwich fillings especially on brioche buns with some avocado and bacon. For a complete dinner pair with roasted vegetables and quinoa or a simple side salad. My personal favorite is slicing them for quick chicken tacos with avocado lime crema and pickled onions.
Common Questions About This Recipe
- → Can I use frozen chicken tenderloins?
Yes, you can use fresh or frozen tenderloins. Just add 2-3 minutes to the pressure cooking time for frozen pieces.
- → What is the best way to season the chicken?
Combine paprika, onion powder, garlic powder, salt, and pepper, then press the mixture onto the chicken for flavorful coating.
- → How do I keep the chicken juicy?
Coating with oil and a short sauté before pressure cooking helps seal in juices. Avoid overcooking to preserve tenderness.
- → What dipping sauces pair best?
Ranch, barbecue, and honey mustard are popular choices, but you can use any favorite sauce for dipping.
- → Can I use a different pressure cooker?
Yes, any electric pressure cooker will work. Adjust settings according to the manufacturer's instructions.
- → What sides go well with the chicken?
These tenderloins are great with salads, steamed vegetables, rice, or as part of wraps and sandwiches.