
 Pin
Pin
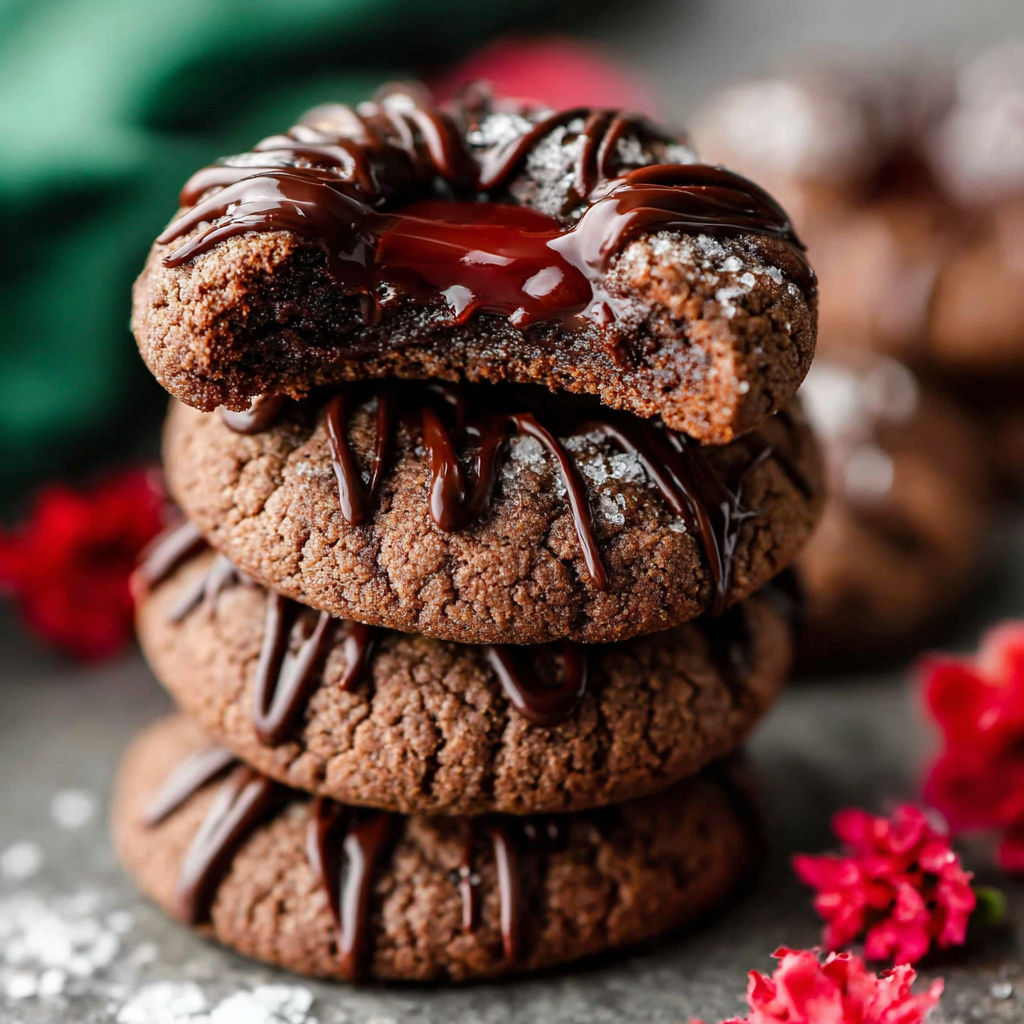
Fudgy thumbprint cookies have become my go-to trick for holiday treat platters and when sudden dessert needs pop up. They mix decadent chocolate dough with smooth ganache centers creating something that looks fancy but works perfectly in any home kitchen. I've watched these little treats steal the spotlight at every gathering I bring them to.
I first made these cookies while trying to copy what my grandma used to bake at Christmas. After baking my first batch, the folks next door begged me for the instructions, and now they show up at practically every family event.
Delicious Ingredients
- All-purpose flour: provides the cookie base with needed stability so they hold their shape well, remember to gently stir it before you measure
- Cocoa powder Dutch process: delivers deeper chocolate taste than regular cocoa, just make sure it's not sitting in your pantry for ages
- Salt: cuts through sweetness and makes chocolate taste better, regular table salt works fine too
- Baking powder: helps create soft-textured cookies, give it a quick test if it's been sitting around
- Unsalted butter: makes cookies tender and flavorful, splurging on good butter really pays off
- Light brown sugar: adds moisture and hints of toffee flavor, break up any lumps before mixing
- Granulated white sugar: creates tenderness and sweetness in perfect balance, regular supermarket sugar does the job
- Egg yolks: add creaminess and bind everything together, try separating eggs straight from the fridge
- Vanilla bean paste or extract: brings warm background notes, real vanilla beats artificial every time
- Semi-sweet chocolate chips: create that irresistible filling texture, chips with around 55% cocoa content work best
- Heavy whipping cream: transforms chocolate into silky ganache centers, don't try to use half-and-half instead
How to Make It
- Mix Dry Ingredients:
- Stir flour, cocoa powder, salt and baking powder together until completely blended with no cocoa streaks showing. Getting this mix just right helps your cookies bake perfectly throughout.
- Cream Butter and Sugars:
- Mix soft butter with both brown and white sugars until it looks light and fluffy, roughly 2-3 minutes using your mixer. Don't forget to scrape down the bowl sides. This step puts air into your dough for better texture.
- Add Egg Yolks and Vanilla:
- Drop in egg yolks one by one, then pour in your vanilla. Keep mixing until everything blends smoothly. Your mix should look glossy and uniform when done right.
- Combine Wet and Dry:
- Add your dry mix to the butter mixture in two batches, mixing slowly just until everything comes together. Scrape the sides as needed. Stop mixing as soon as the flour disappears to keep cookies tender.
- Shape Cookies:
- Form tablespoon amounts of dough into neat balls. Put them on your baking sheets with some room between each. Push your thumb or a wooden spoon handle into each ball to make a deep dent for filling later.
- Bake and Cool:
- Pop into a 350°F oven for 10-12 minutes until the edges look set but centers still seem slightly soft. Remember they'll firm up while cooling. Let them sit on the tray about 5 minutes before moving to a cooling rack.
- Make Chocolate Ganache:
- Warm your cream until it's hot but not boiling, then pour it over chocolate chips in a bowl. Wait two minutes, then stir until it turns smooth and thick.
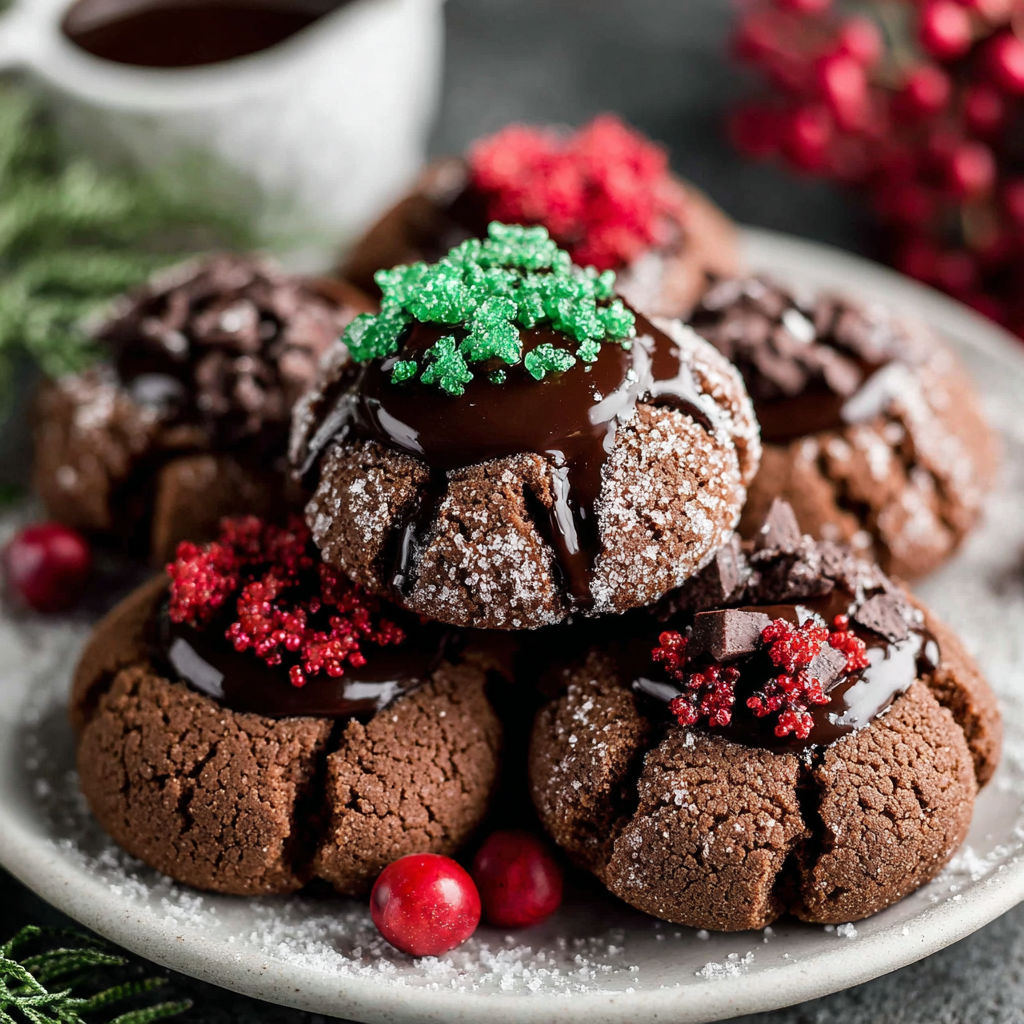
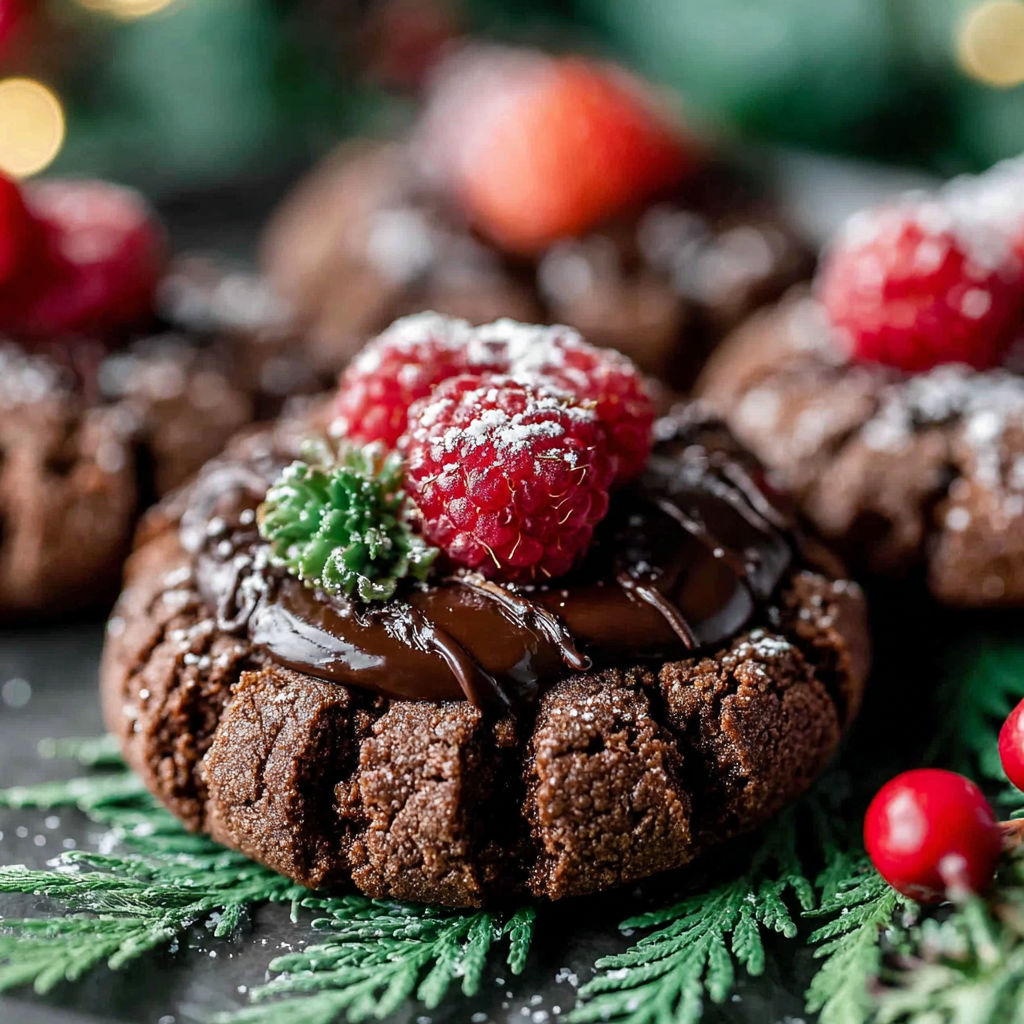
- Fill and Decorate:
- Drop spoonfuls of ganache into each cookie indent, about a teaspoon per cookie. If you want, add sprinkles while the chocolate is still wet for a fun crunch. Let them sit until the filling sets up.
The cocoa powder really makes these cookies special. I'll never forget when my youngest helped me add it to the bowl and ended up with chocolate dust all over their face. We couldn't stop laughing, and those snapshots still show up in our family photo collection.
Flavor Boosters
During winter months, try mixing a dash of cinnamon or cardamom into the dough. When spring arrives, add some fruit jam or lemon zest to your ganache for a brighter taste.
Serving Suggestions
These treats taste amazing with hot coffee or cold milk. Put them on a nice plate for parties or pack them in boxes for holiday gifts. Sometimes I'll add a tiny bit of peanut butter or caramel to the centers with the chocolate for something extra special.
Creative Twists
Run out of Dutch process cocoa? Regular cocoa works too, but your cookies will taste slightly more tangy. You can swap in milk chocolate chips for the filling if you want it sweeter. Need a dairy-free version? Try vegan butter and coconut cream instead.
Nothing beats watching a tray of these pretty cookies vanish almost instantly when you bring them out. Have fun baking and sharing them!
Common Questions About This Recipe
- → How do I achieve a soft and chewy texture?
Make sure your butter is properly softened, don't pack your flour when measuring, and pull the cookies out slightly early. They'll continue cooking a bit on the hot tray.
- → Can I substitute Dutch process cocoa powder?
Regular unsweetened cocoa works fine in a pinch, but Dutch process delivers a deeper chocolate taste. You might want to add a bit more sugar if using regular cocoa.
- → What is the best way to fill the thumbprints?
Pour warm ganache from a small spoon or squeeze it from a piping bag into each indent. Let them sit at room temperature for that nice glossy look.
- → Are the cookies freezer-friendly?
They freeze well without the ganache filling. Just thaw them completely and add fresh ganache before you plan to serve them for the best results.
- → Can egg yolks be replaced?
You can try a store-bought egg substitute or mix water with a bit of oil and baking powder instead. Just know the cookies might feel a bit different when you bite into them.