
 Pin
Pin
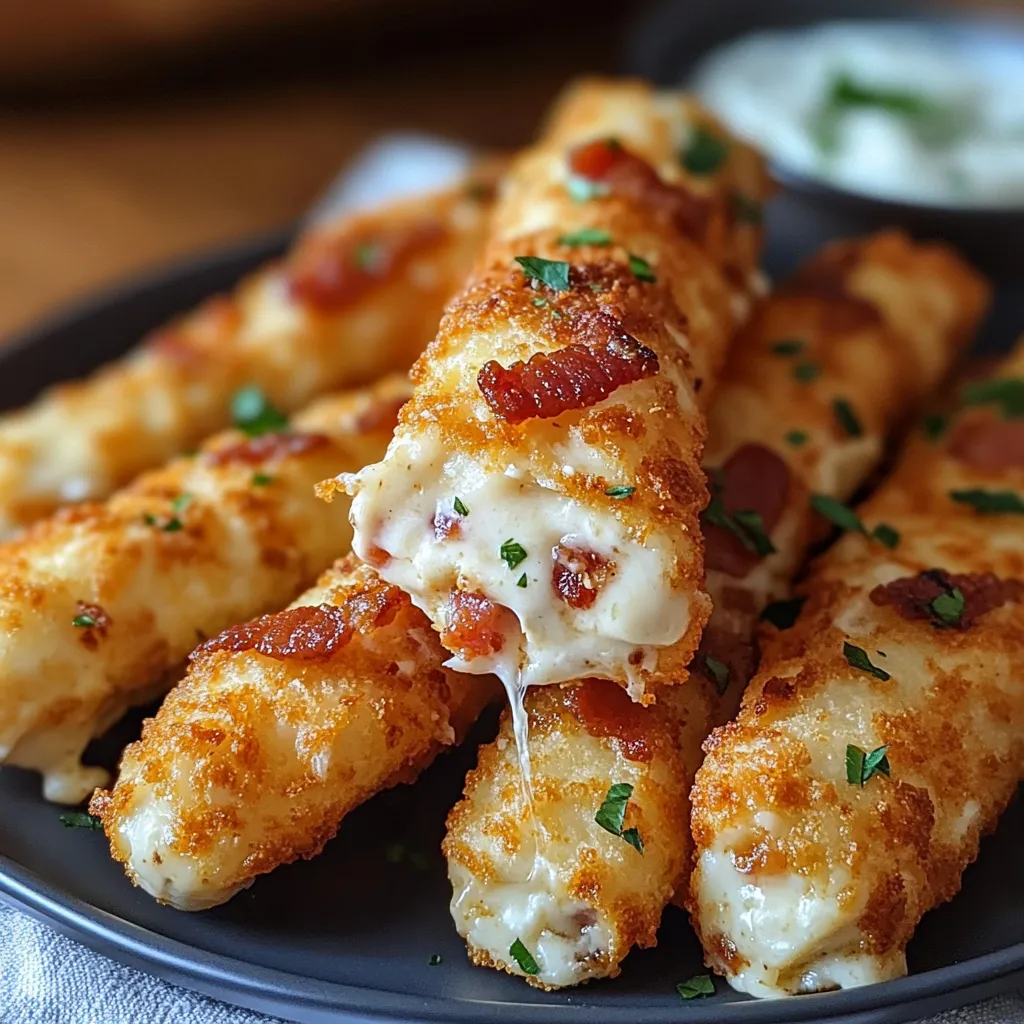
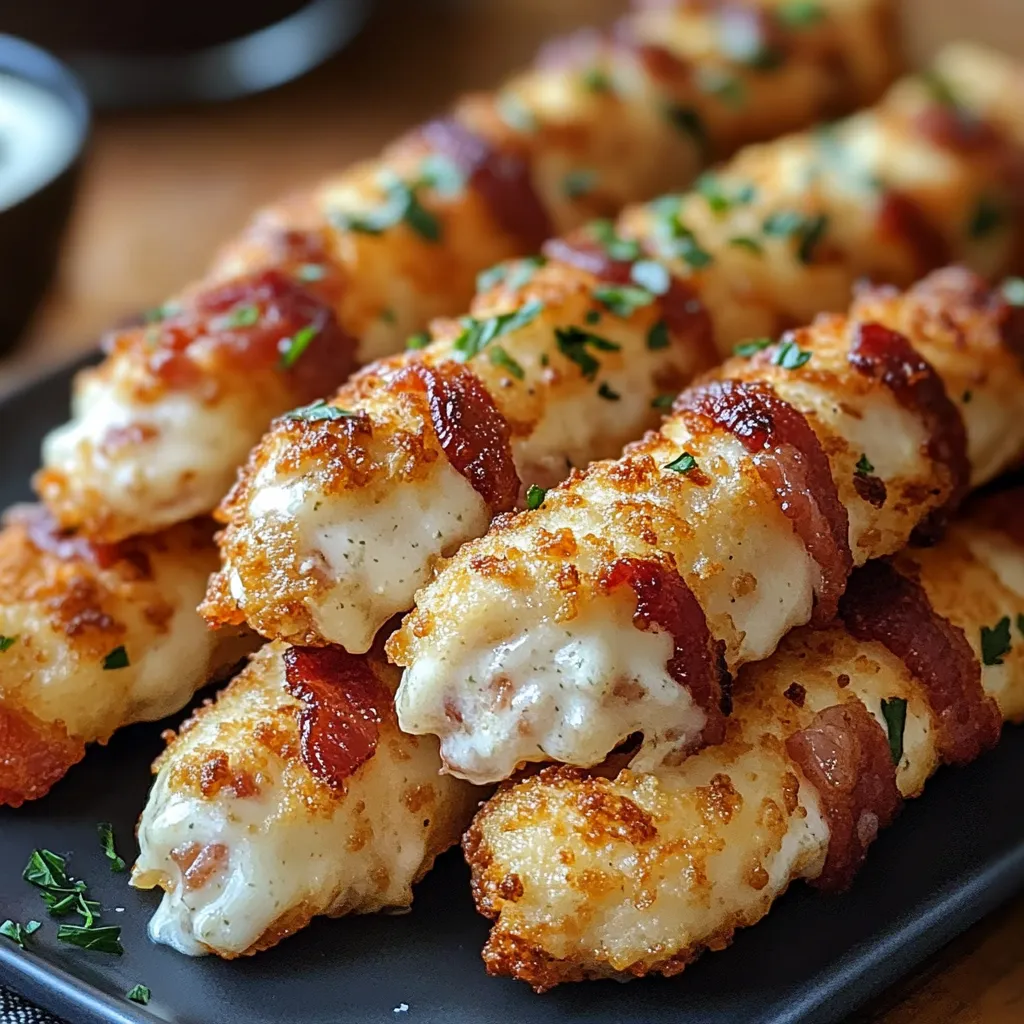
Turn a handful of basics into these super tasty chicken bacon ranch cheese sticks that always get demolished at parties. Savory chicken with crunchy bacon and cool ranch all come together for a killer flavor, tucked around oozy mozzarella.
I whipped up these cheese sticks when my kid turned 7 and they've been showing up at every party since. Even my anti-ranch neighbor always begs for a plate when she spots them.
Irresistible Ingredients
- Cooking spray — Use it so everything gets evenly golden without swimming in oil.
- Salt and pepper to taste. Throw in more or less depending on what you like.
- 1 teaspoon onion powder. Gives everything a tasty boost.
- 1 teaspoon garlic powder. Adds loads of flavor without being too strong.
- 1 cup breadcrumbs. Panko makes 'em extra crunchy.
- 1 package mozzarella sticks. This is what creates that killer cheese pull.
- 1 cup shredded cheddar cheese. Fresh-shred for the best melt.
- 1 cup ranch dressing. Pick your favorite or whip some up.
- 1 cup bacon crumbled. Fry it until it’s really crispy.
- 1 cup cooked chicken shredded. Rotisserie chicken makes this super fast.
Simple How-To Guide
- Give ‘Em a Break
- Let your cheese sticks chill for about 3 to 5 minutes after baking so the insides firm up and you don’t burn your mouth.
- Watch the Bake
- Pop the tray in for 12-15 minutes at 400°F until they’re golden everywhere and crispy. Keep an eye out at the end so you don’t lose all your cheese.
- Get Prepped
- Flip your oven on to 400°F, line your baking tray with parchment, and let everything get up to temp while you work on the sticks.
- Set Them Up to Bake
- Line up the cheese sticks on your tray with space between, then spray the tops with the cooking spray so they brown just right.
- Roll in Breadcrumbs
- Take your chicken-wrapped cheese stick and dunk it in the seasoned breadcrumbs, pressing so it sticks all over.
- Season the Breadcrumbs
- Mix together breadcrumbs, garlic powder, onion powder, salt, and pepper in a shallow bowl so you get flavor in every bite.
- Wrap Cheese in Chicken Mix
- Coat each mozzarella stick all over with the chicken mixture. Press it on so it doesn't fall off—cover every side.
- Mix the Filling
- Stir together the chicken, bacon, ranch, and cheddar cheese in a bowl until it all sticks together. It should be nice and thick.
The mozzarella inside really steals the show here. The first time I tried string cheese for these I couldn’t believe how gooey yet sturdy they stayed. My kid loves helping out every time—putting them together has actually become our go-to kitchen hangout.
Tasty Dips to Try
They’re awesome without any dip but if you want to level up, marinara sauce brings great tang to stand up to all the cheesy ranch action. Like things spicy? A bit of sriracha mayo wakes them up. Cool cucumber tzatziki is my favorite for balancing out all that rich cheese goodness.
Keep ‘Em Fresh
These are at their best warm and crispy, right out of the oven. Got extras? Stash them in an airtight container in the fridge for up to 3 days. For a quick warmup, lay them on a baking sheet and heat at 350°F for about 10 minutes. Skip the microwave or you risk ending up with sad, soggy cheese. If you want to keep them longer, freeze them uncooked on a tray, then bag them up. Bake straight from frozen—just tack on another 3 to 5 minutes in the oven.
Plan Ahead Like a Pro
Want to get prepared? Assemble the cheese sticks up to the breadcrumb step and pop them in the fridge for up to a day. Cover them loosely with plastic on a tray. Or freeze unbaked ones up to 3 months if you want extras around for last-minute snacking. I always double my batch and save half in the freezer for busy days.
Common Questions About This Recipe
- → Can I use pre-cooked chicken?
Of course! Grab some rotisserie chicken from the store or use leftovers. Just shred it finely so it mixes and coats nicely.
- → What cheeses can I swap in?
Try out Monterey Jack or pepper jack for a change. Just make sure it’s shredded well so it blends easily.
- → What about a gluten-free version?
Totally doable! Opt for gluten-free breadcrumbs instead to keep it gluten-free.
- → Can I use an air fryer instead?
Yep! Pop them in the air fryer at 375°F for around 8-10 minutes. Flip them halfway for even crispiness.
- → What’s the best way to store extras?
Stick leftovers in a sealed container in the fridge for up to 3 days. Warm them back up in the oven or air fryer for the best crunch.
- → Can I prep and bake later?
You bet. Prep the coated sticks and keep them chilled for up to a day. Bake them fresh when you’re ready to eat for that crispy finish.